

Video content is growing in popularity, and can be a key method for marketing your business. However, you may not have someone on your team who’s comfortable in front of a camera, or the tools to create traditional high-quality videos. Fortunately, you can always create animated videos as an alternative to live-action or screen recordings.
In this post, we’ll walk you through the process of creating a free animated video online. You can follow these steps even if you have no experience with graphic design or video editing.
Let’s dive right in!
- 1 The Benefits of Animated Video Content
-
2
How to Easily Create Animated Videos for Your Content (In 8 Steps)
- 2.1 Step 1: Select Your Video Template
- 2.2 Step 2: Customize Your Chosen Video Template
- 2.3 Step 3: Incorporate Original Content to Personalize Your Video
- 2.4 Step 4: Add or Remove Scenes as Needed
- 2.5 Step 5: Adjust Your Scenes’ Timing
- 2.6 Step 6: Apply Transitions and Other Effects
- 2.7 Step 7: Choose Your Video’s Background Music
- 2.8 Step 8: Preview and Export Your Video
- 3 Conclusion
The Benefits of Animated Video Content
We’ve discussed video marketing and content creation in-depth before. so we don’t want to repeat ourselves too much here. In short, videos tend to have a high Return on Investment (ROI), and provide the opportunity to successfully engage audiences via multiple channels, including social media and email.
There are several benefits to using animated video content in particular. To start with, this format is adaptable to multiple use cases, including:
- Brand and team introduction videos
- Product tutorials and reviews
- Team member and client onboarding videos
- Specific marketing campaigns such as product announcements
If you’ve been holding off on video marketing because you don’t have the expertise or tools required to film live content, learning how to create animated videos is an excellent alternative solution. It’s cost-effective, since you don’t have to worry about purchasing filming equipment or hiring actors. Plus, you can visually represent scenarios through animation that you’re not be able to recreate live, such as natural disasters.
How to Easily Create Animated Videos for Your Content (In 8 Steps)
No matter what type of products or services you provide, you can demonstrate your value to clients through animated videos. There are many online platforms available that can help you create this type of content.
For the purposes of this post, we’re going to be using Powtoon. This platform specializes in animated video content, and includes several templates as well as pre-built scenes and characters you can use. Once you create a free account, you can jump right into the following steps for creating your own animated video.
Step 1: Select Your Video Template
Powtoon enables you to create animated videos from scratch, and fill them with various backgrounds, characters, and props from its library of pre-built elements. However, it also provides several video templates that can get you started more quickly. These are useful for many reasons, including:
- Ensuring that your videos are the ideal length for YouTube or social media ads
- Making sure your videos are properly formatted for the platform where you intend to publish them
- Helping you remember key information to include in order to optimize your campaign
You can access the Powtoon template library by logging into your account and clicking on Templates in the sidebar to the left:
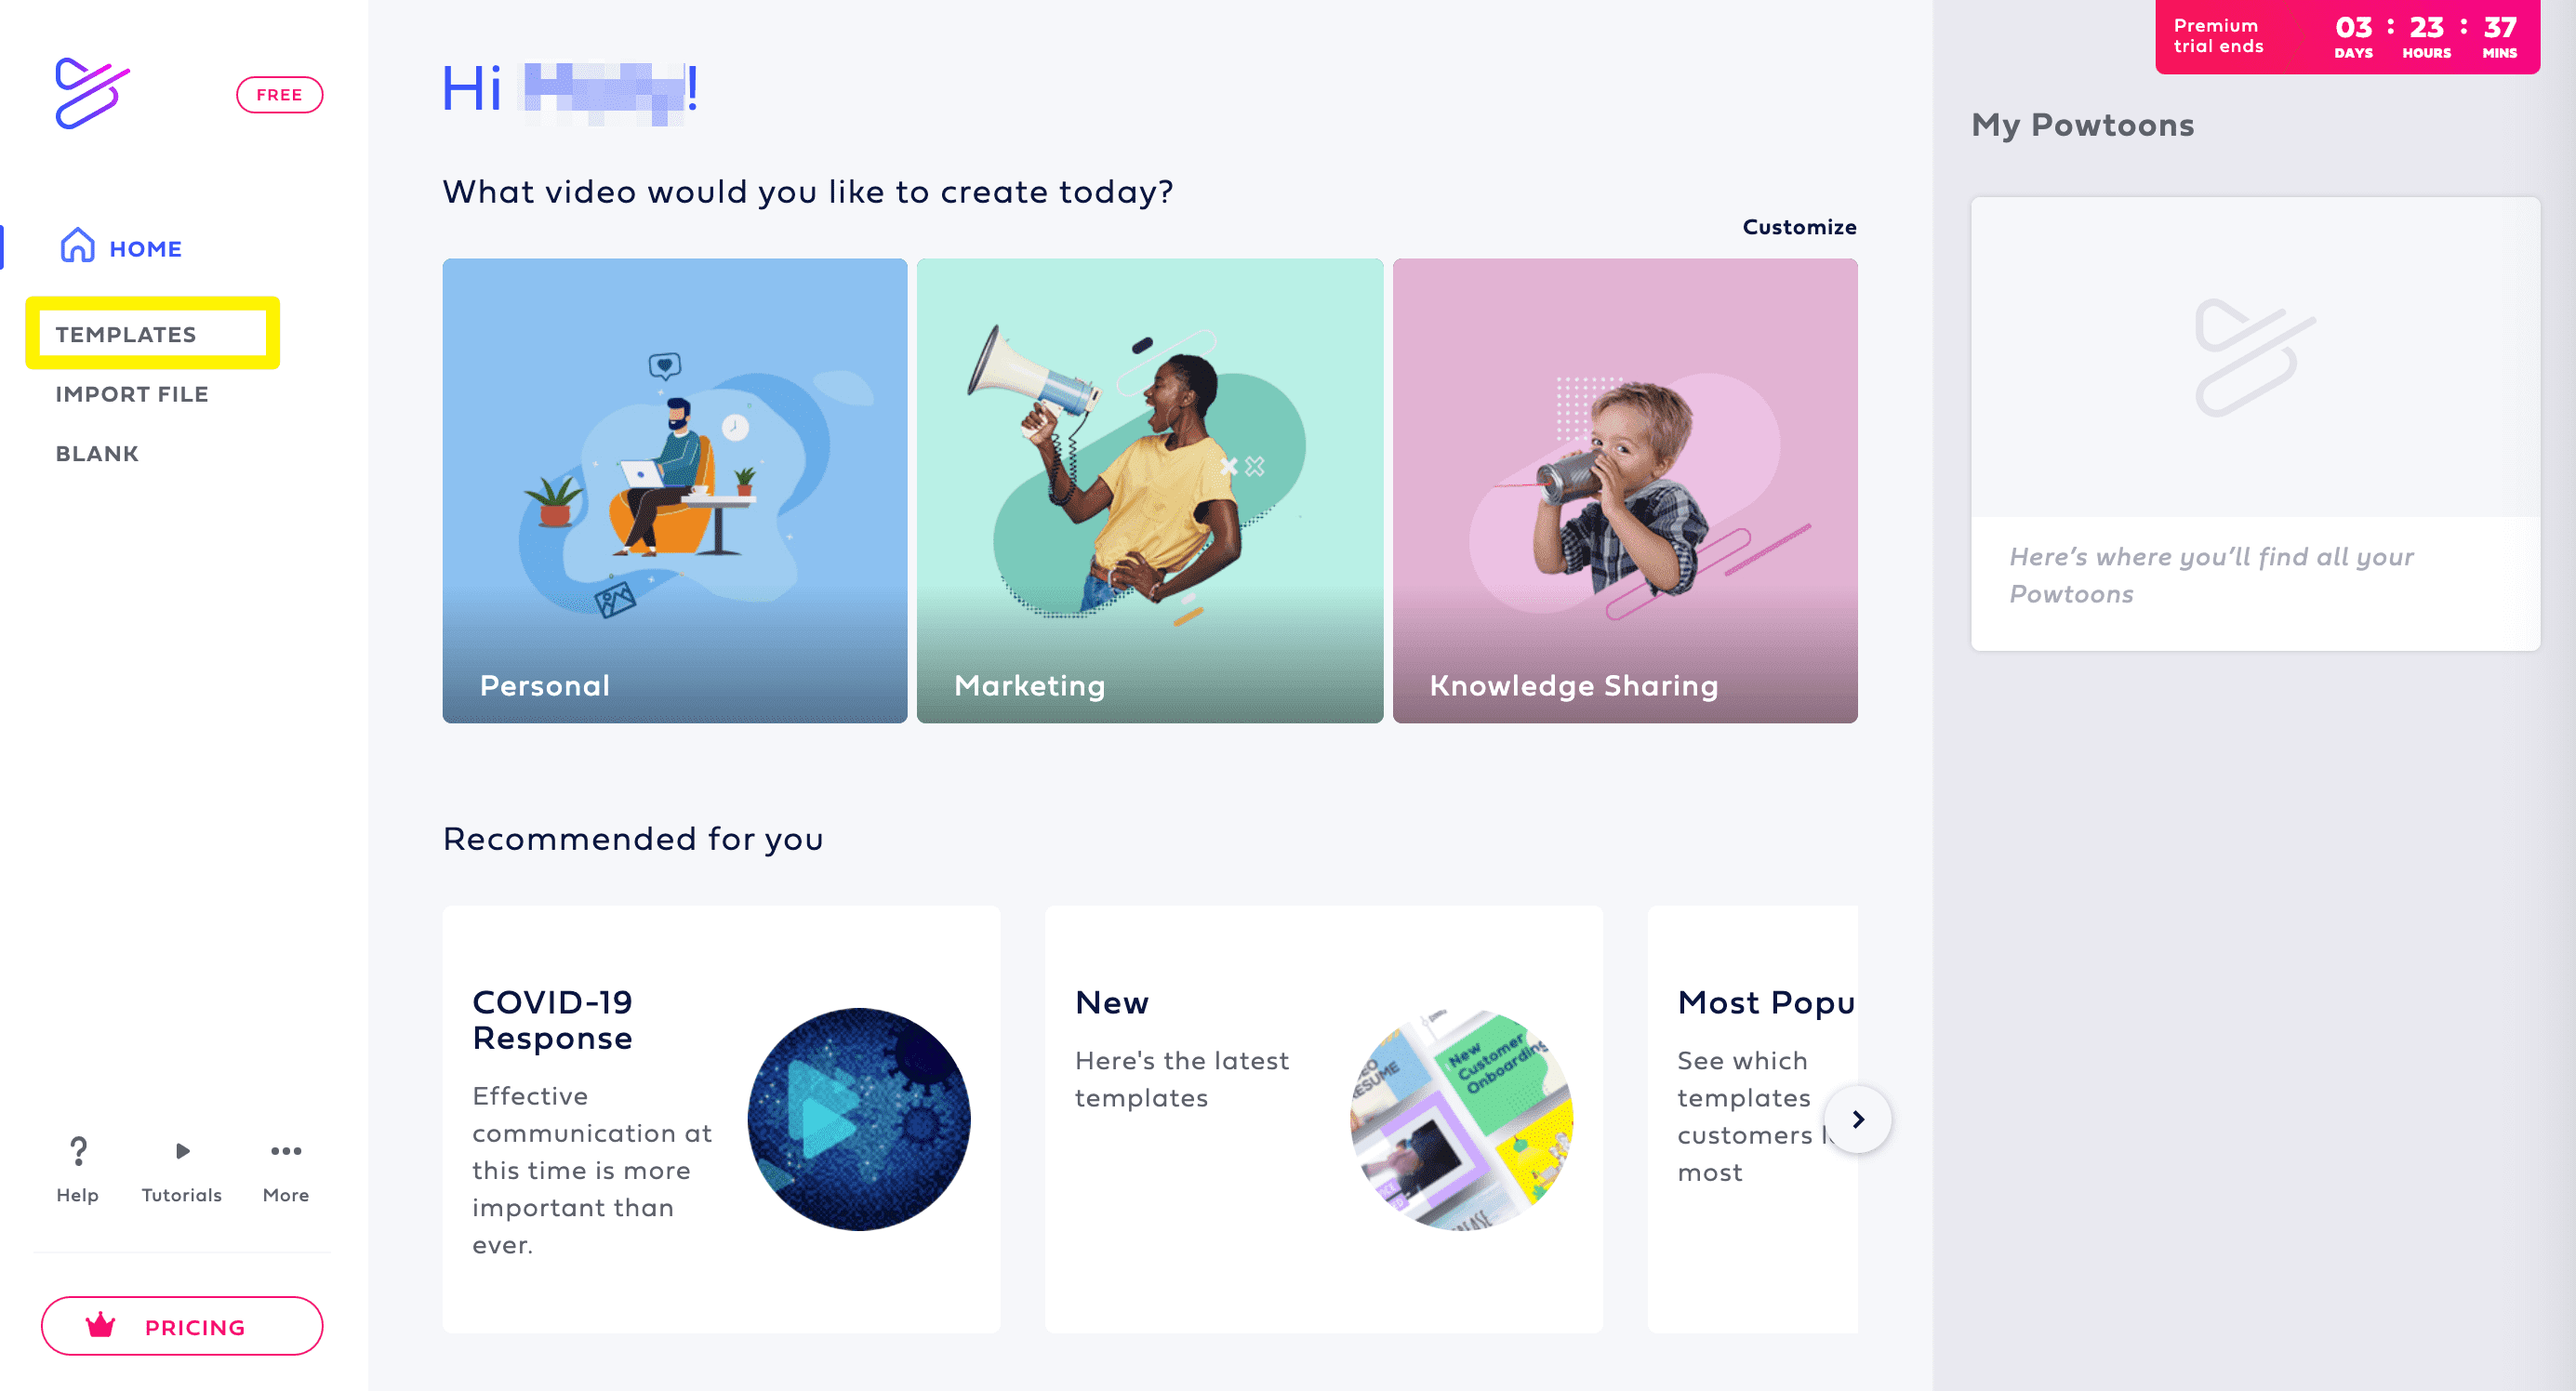
Then you can browse the available templates. Powtoon covers several categories, including marketing, education, employee engagement, and more:
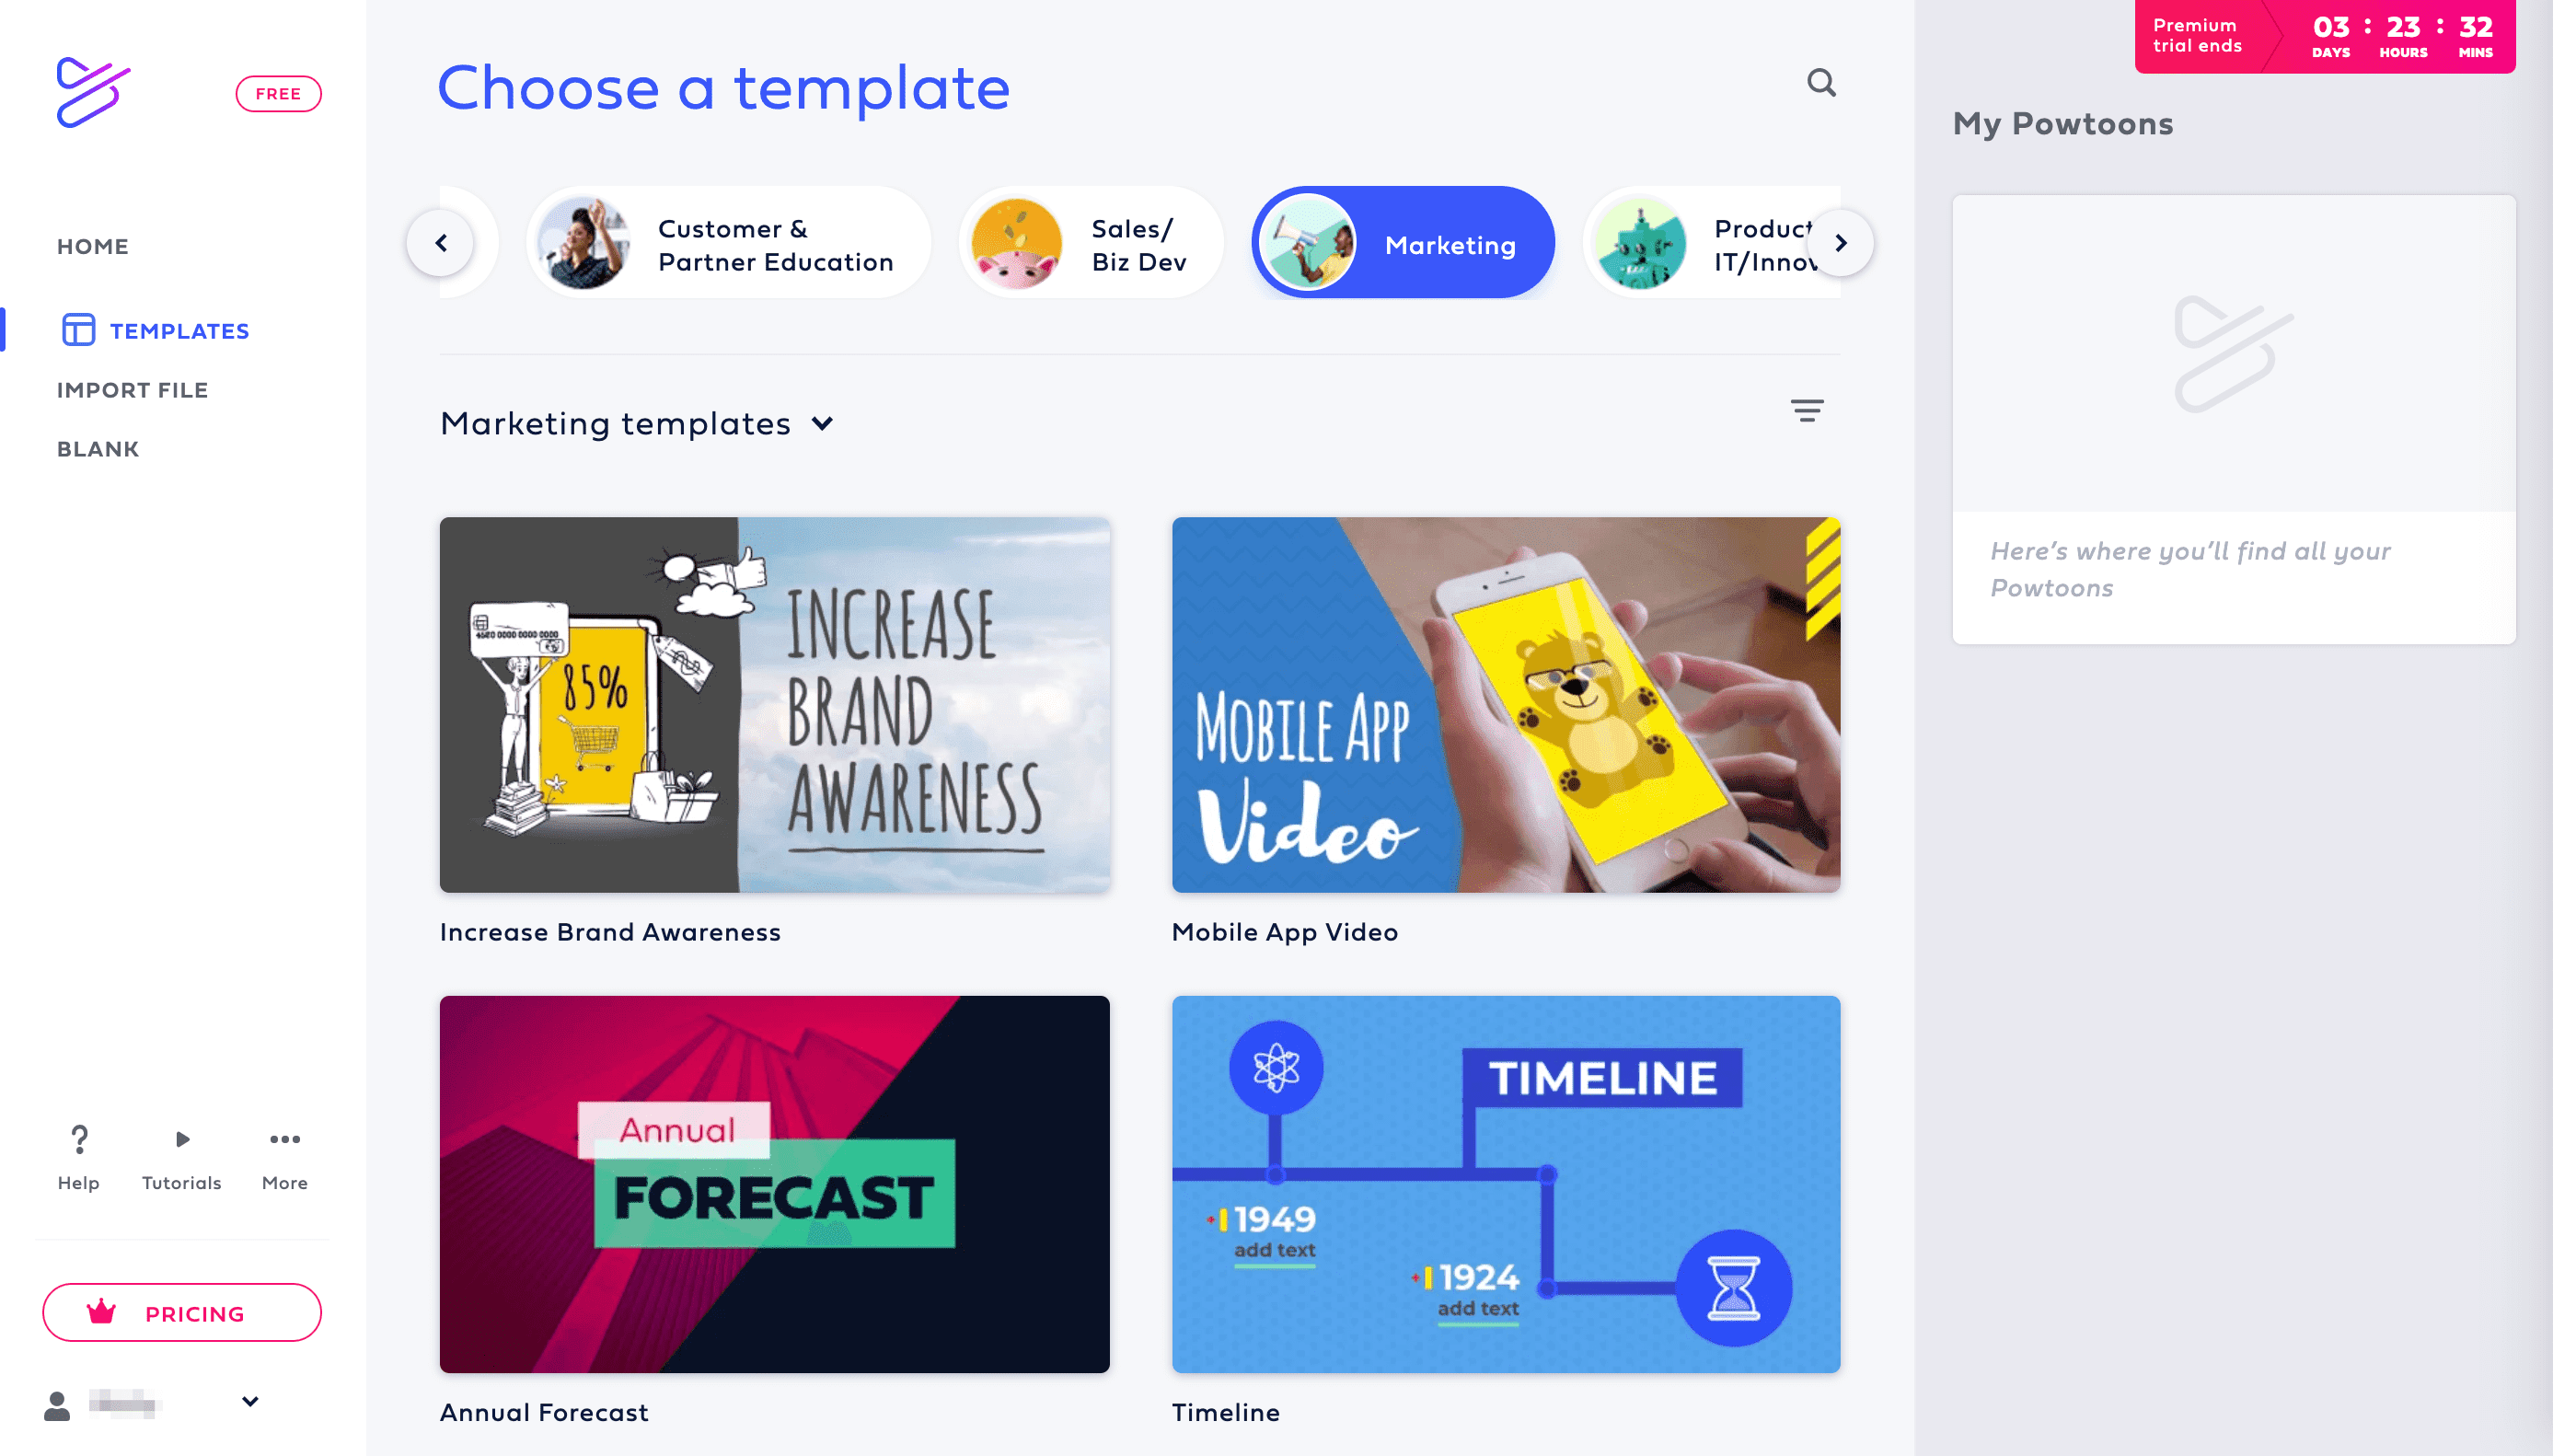
Which templates are available to you will depend on what Powtoon plan you signed up for. You can click on any template to watch it. Once you find one that suits your needs, click on the Edit this template button in the preview window:
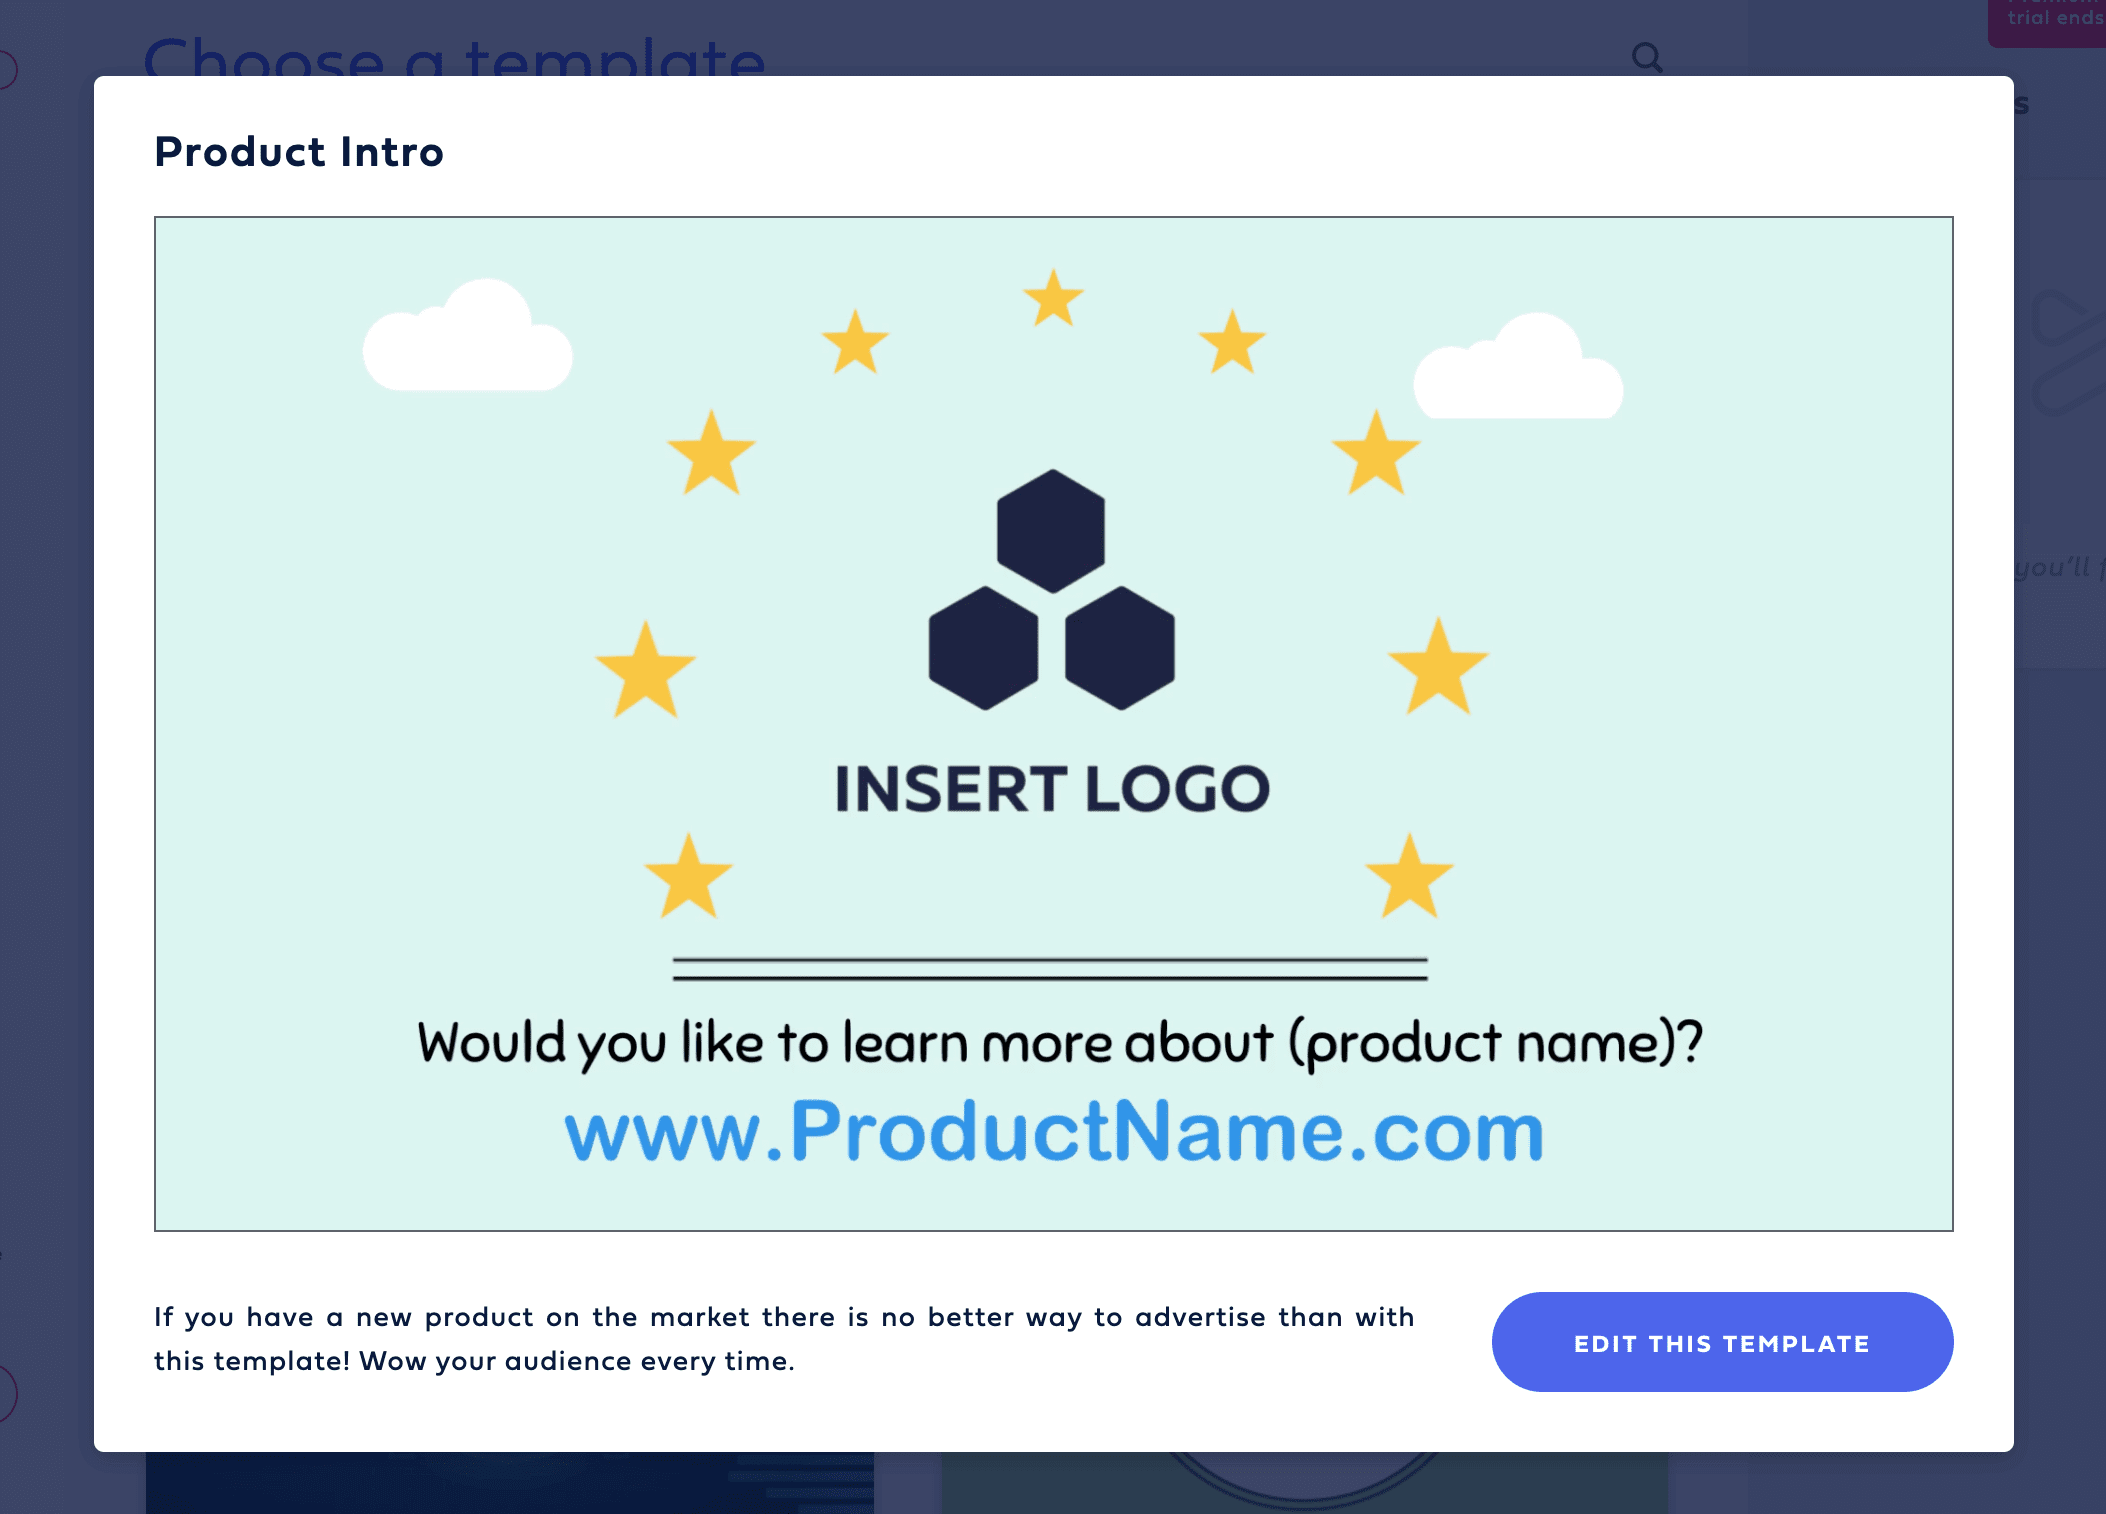
This will open your template in the Powtoon editor.
Step 2: Customize Your Chosen Video Template
It’s important that when you create an animated video, it reflects your business’ branding and style. The easiest place to start when customizing the template you’ve chosen is to update its pre-built elements, including:
- The background
- Any characters or objects
- Text
- Images and graphics
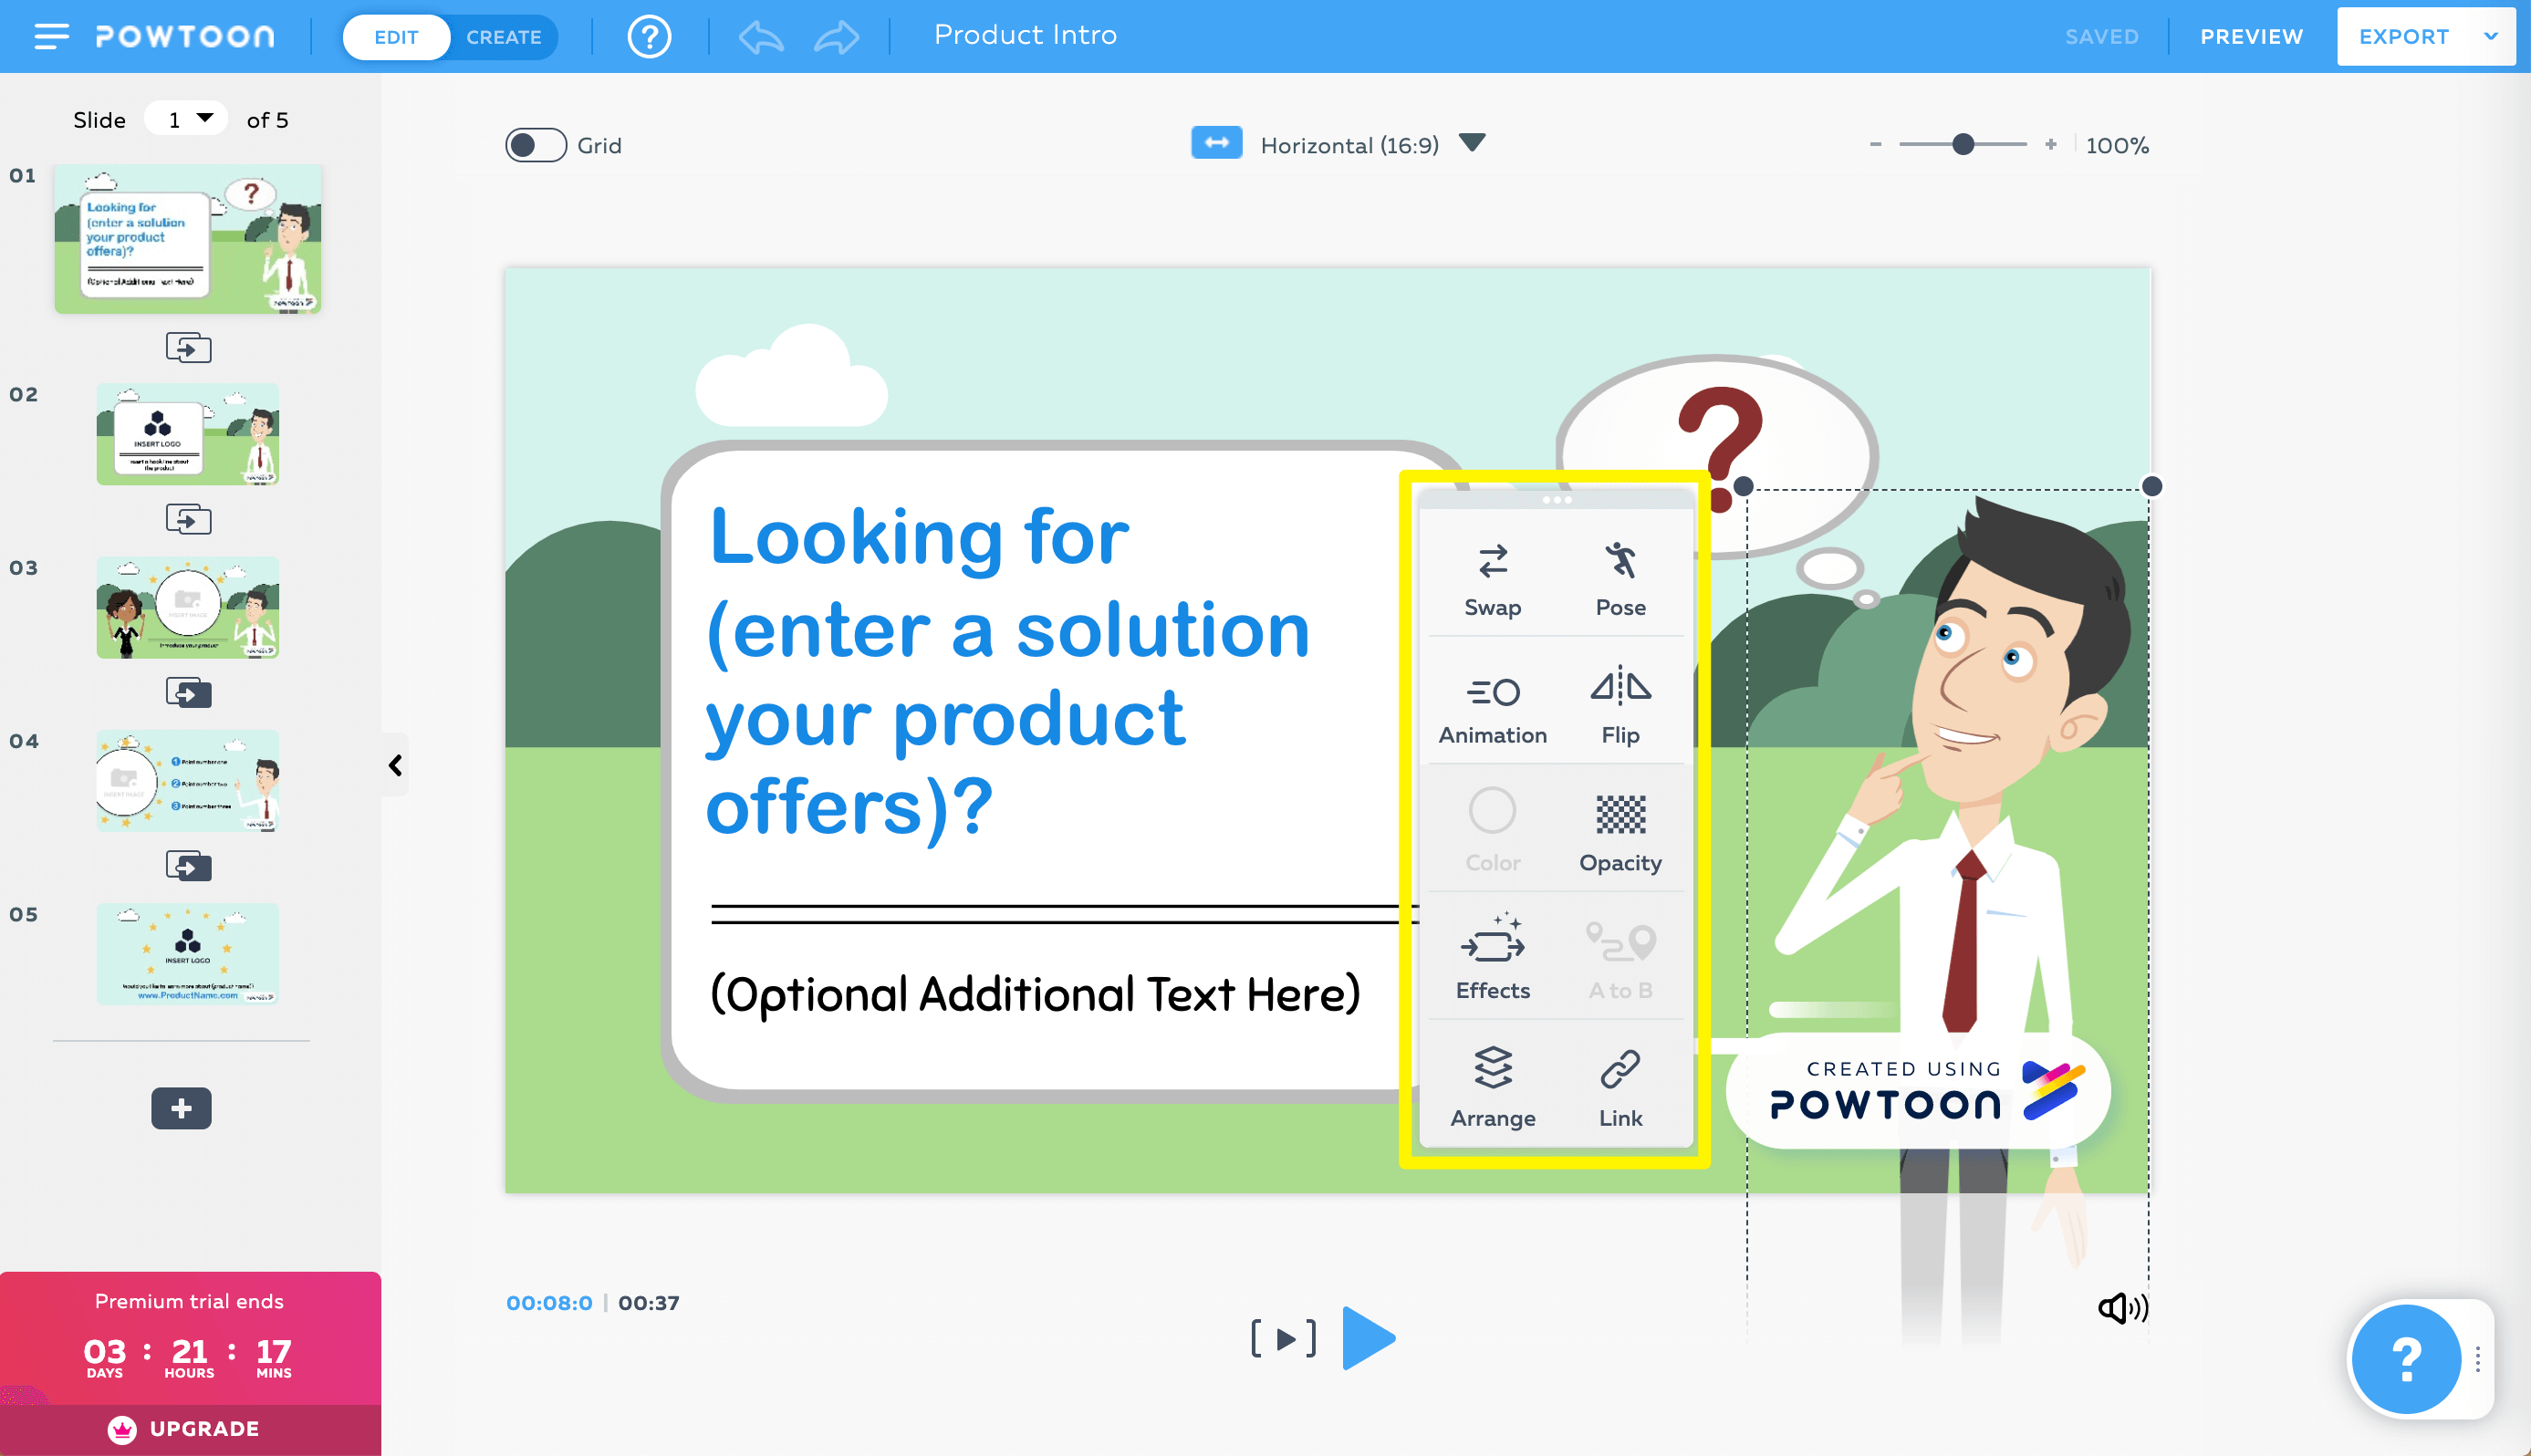
You can click on any element in the Powtoon editor to open its toolbar:
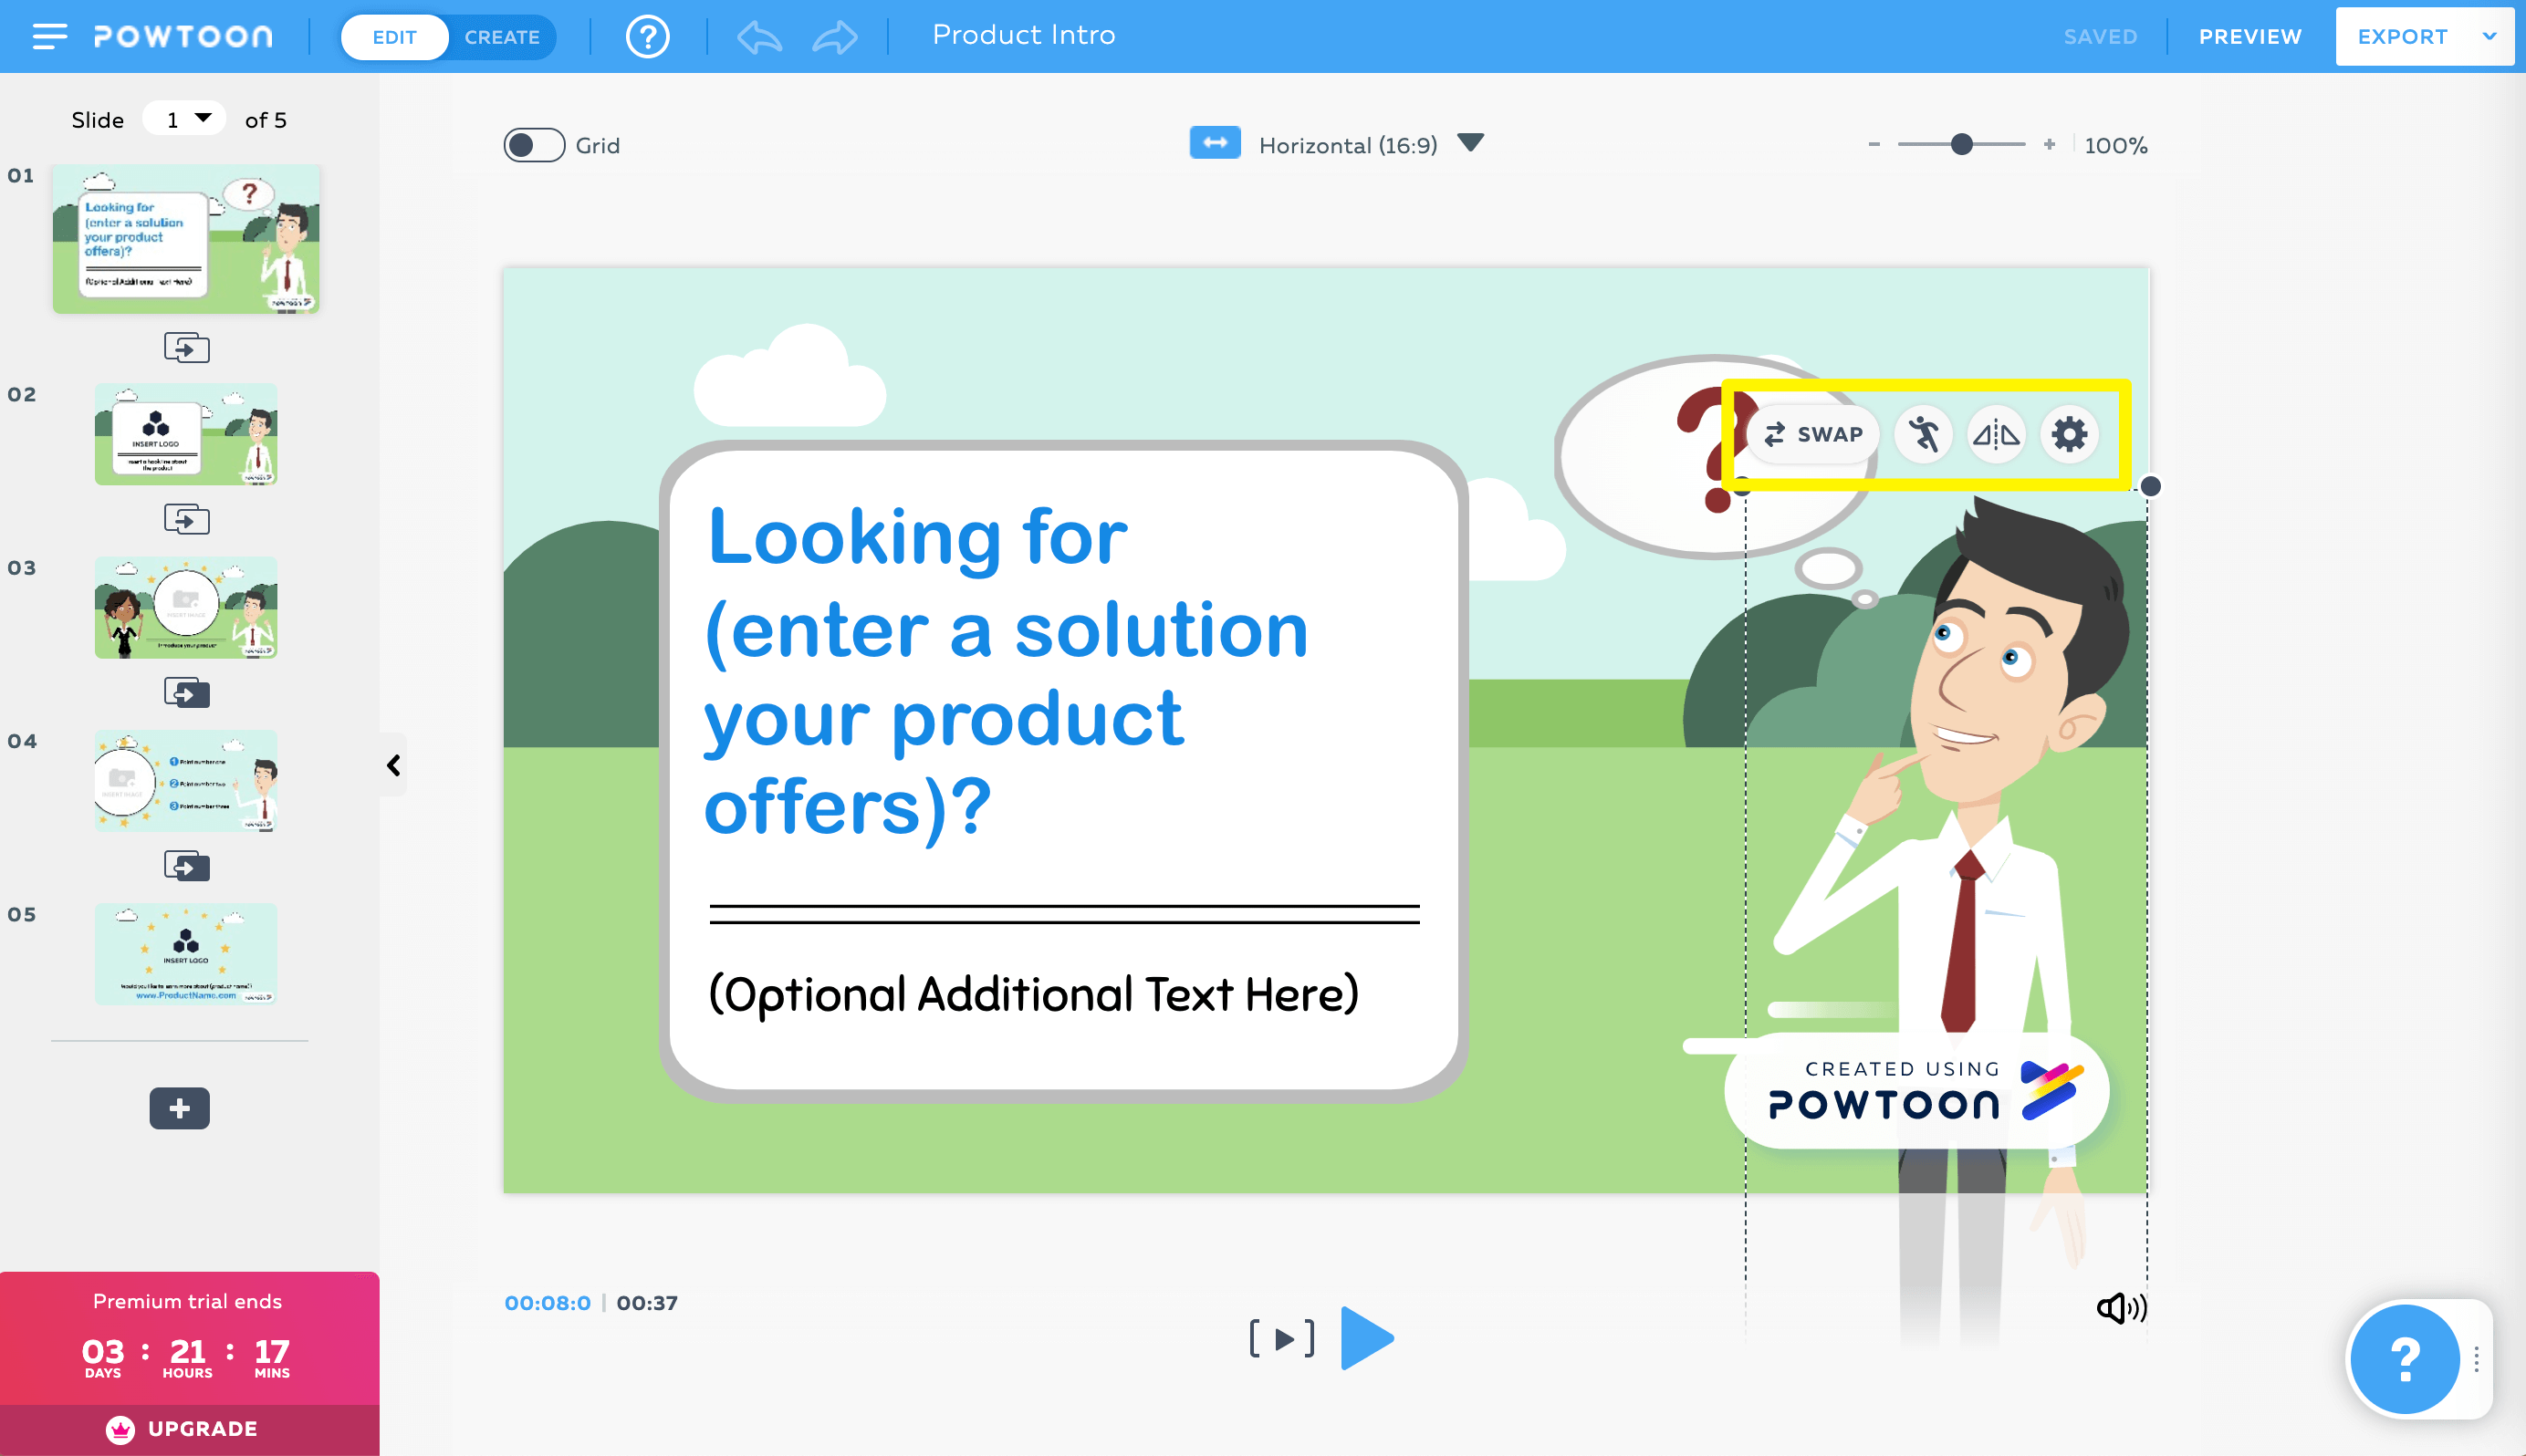
The available options will depend on the type of element you’re editing. For example, the character toolbar includes options to pose or flip your character, as well as a gear icon with more settings such as animations and effects:
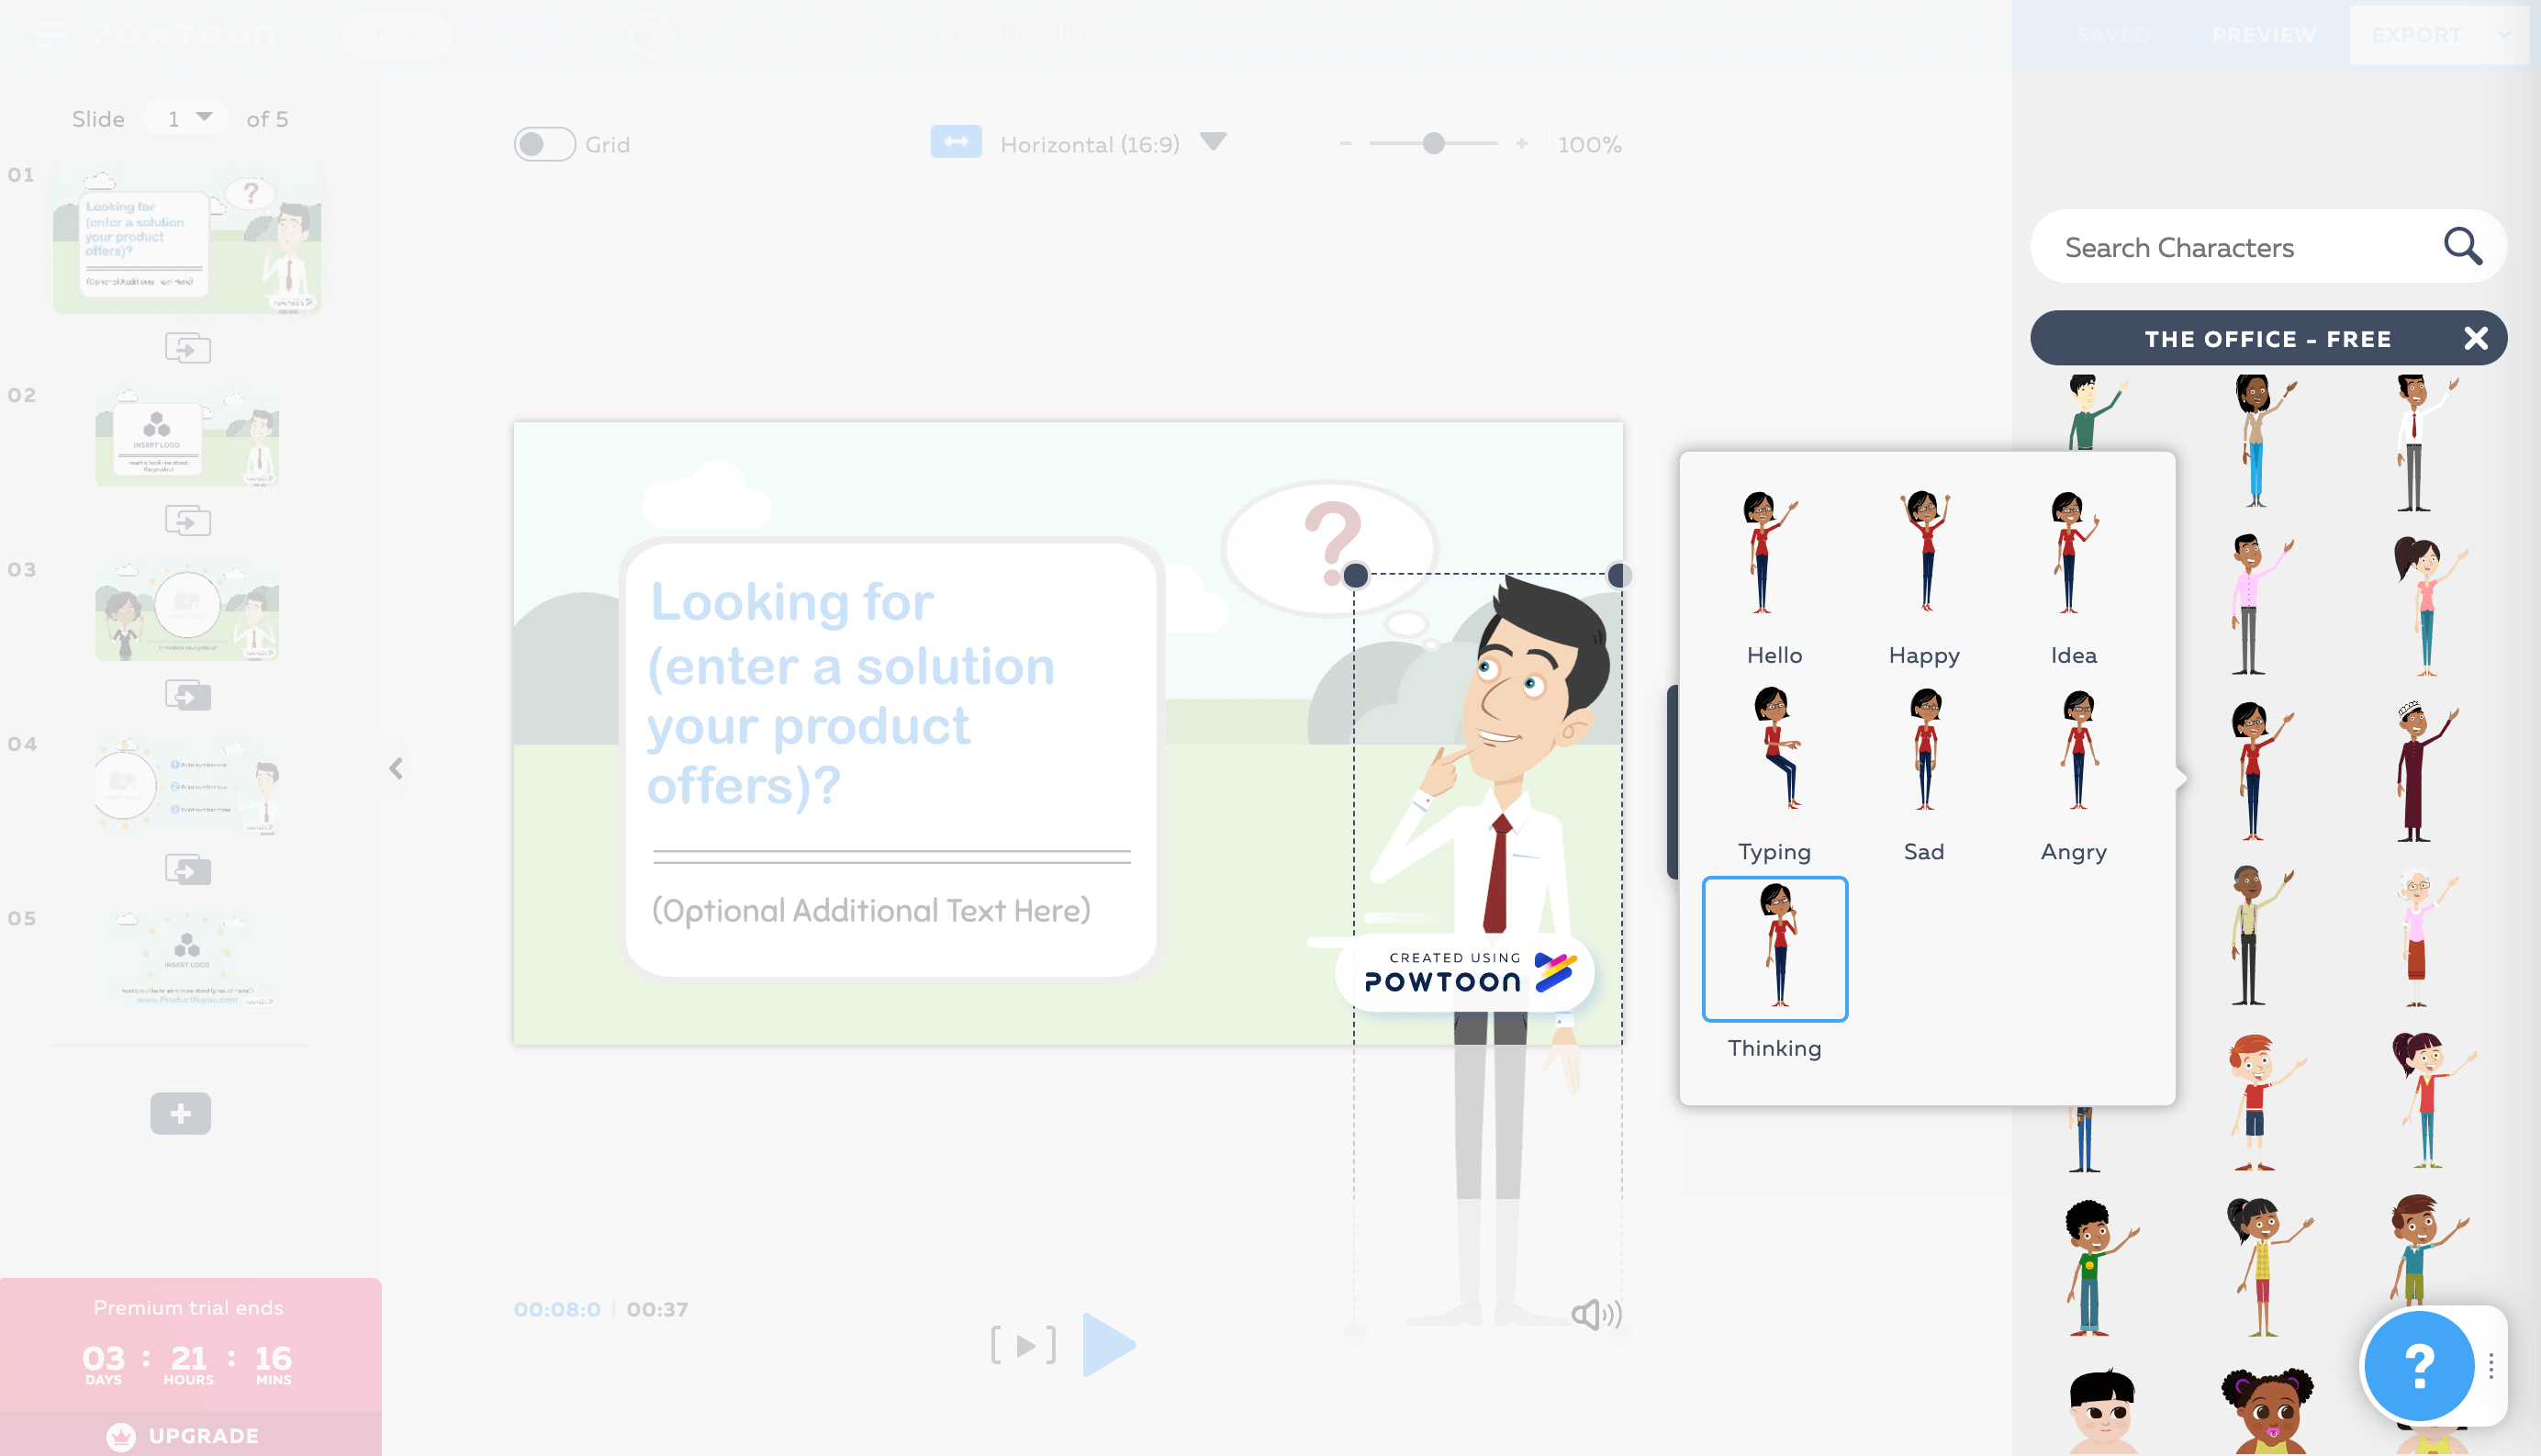
You can also click on the Swap button to switch an element out for another one from the Powtoon library:
The same general principle applies to all the pre-built elements in your Powtoon video template. Using the slides to the left of the main editor, you can navigate through your scenes and update your background, characters, and other features to suit your needs. Remember to keep your visuals consistent throughout the video, however, so that it makes sense to viewers.
Step 3: Incorporate Original Content to Personalize Your Video
You can create animated videos by simply customizing Powtoon’s templates and publishing them. However, there are many other features of this platform that you can use to make your content more interesting.
For example, you can incorporate your own media alongside Powtoon’s pre-built elements. This is especially helpful if you want to use product images, team member profile pictures, or other features that can help personalize your video and make it unique.
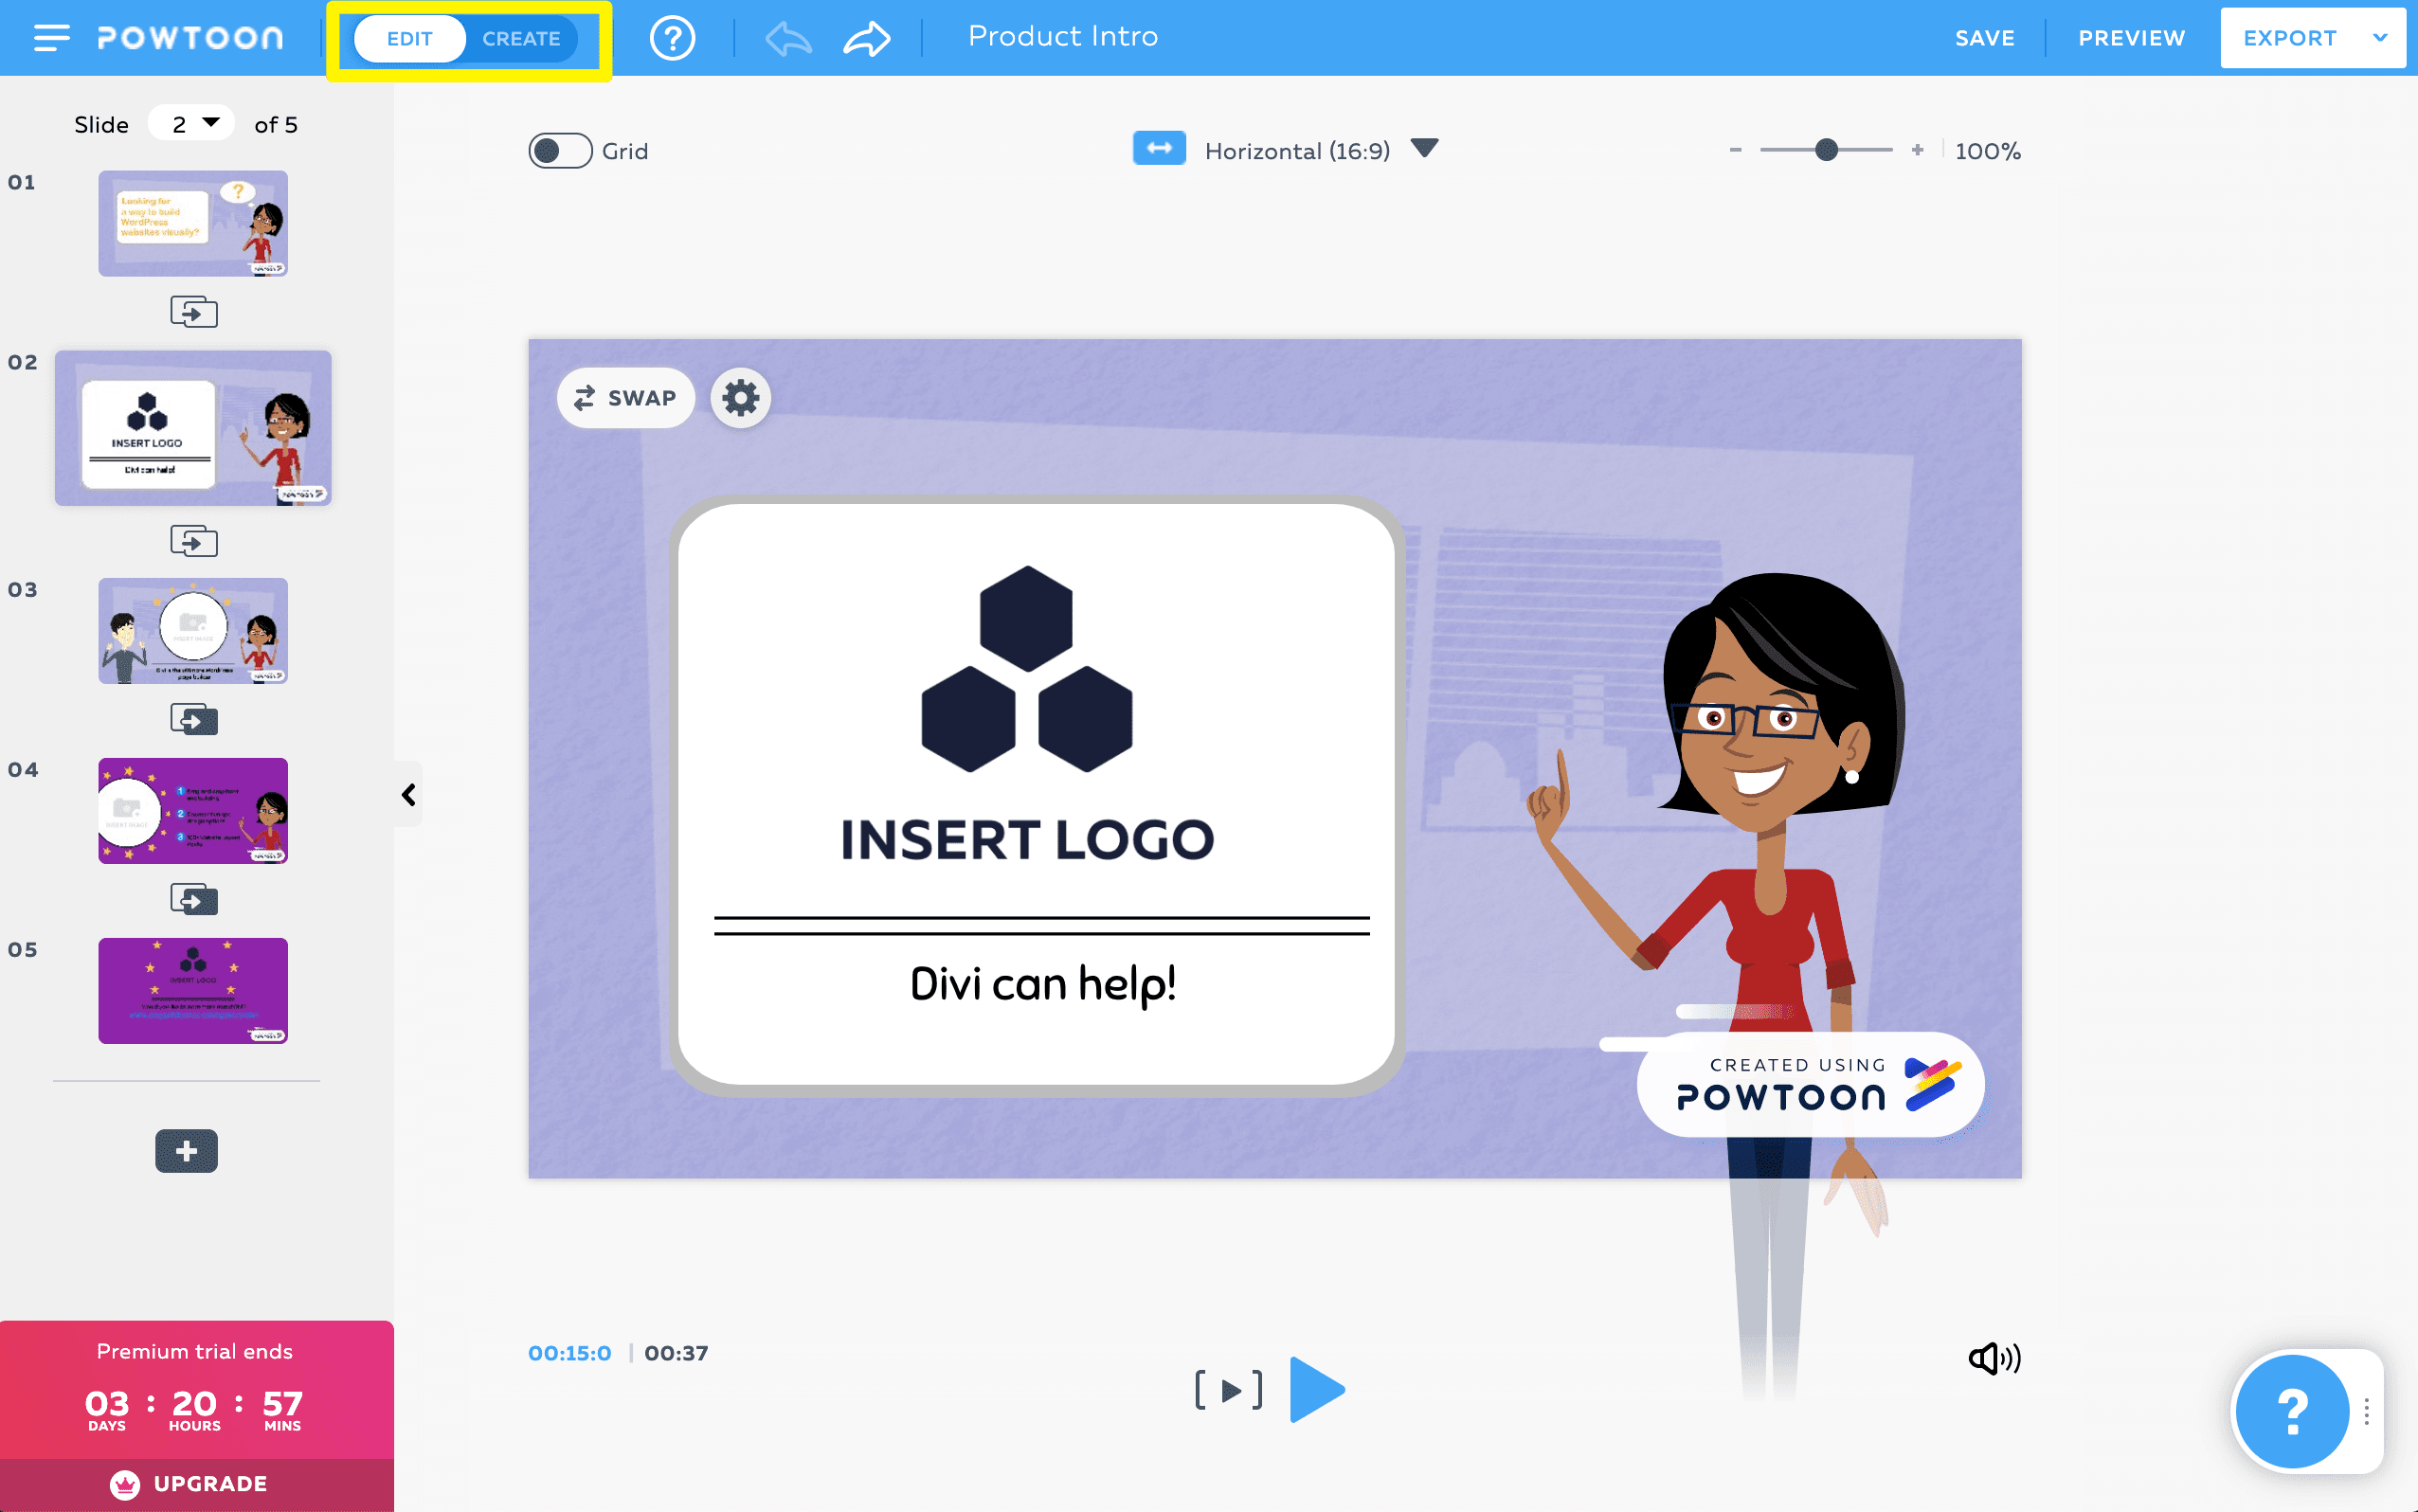
To add your own media to your Powtoon template, you’ll need to toggle the switch at the top of the editor from Edit to Create:
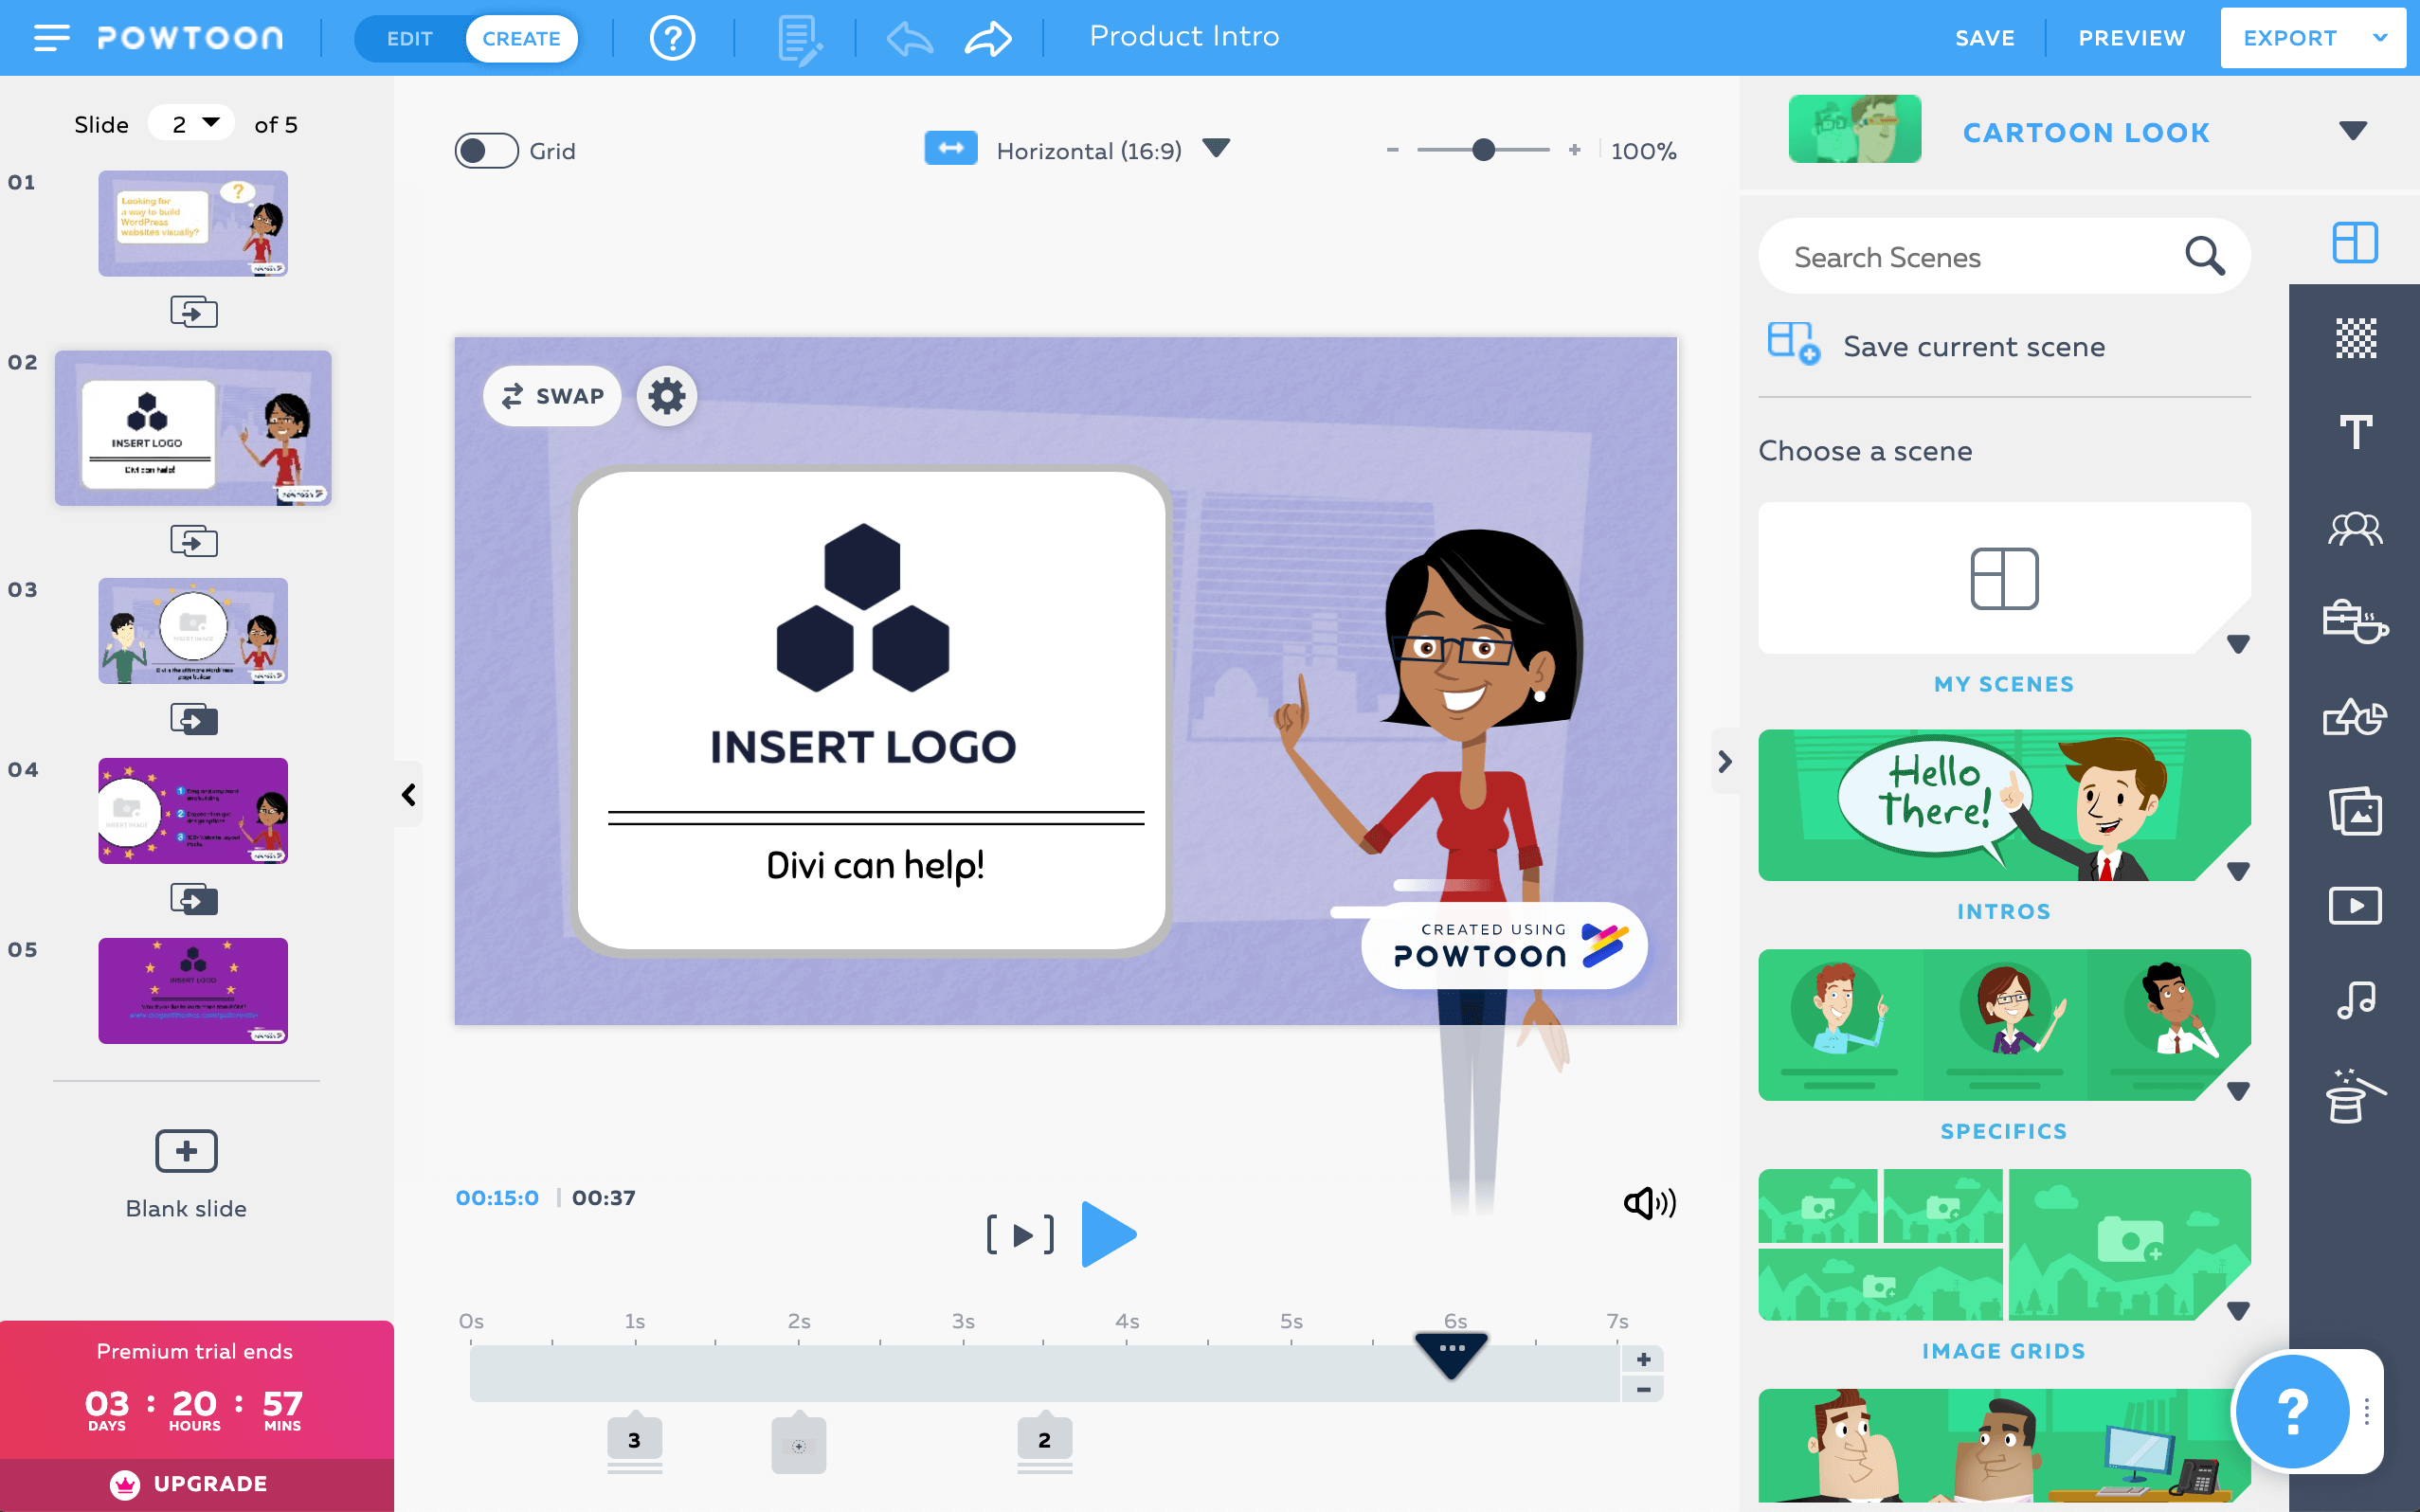
This will reveal an additional toolbar on the right side of the screen:
To add an image, click on the Image option in the toolbar. Then select My Images > Add Image:
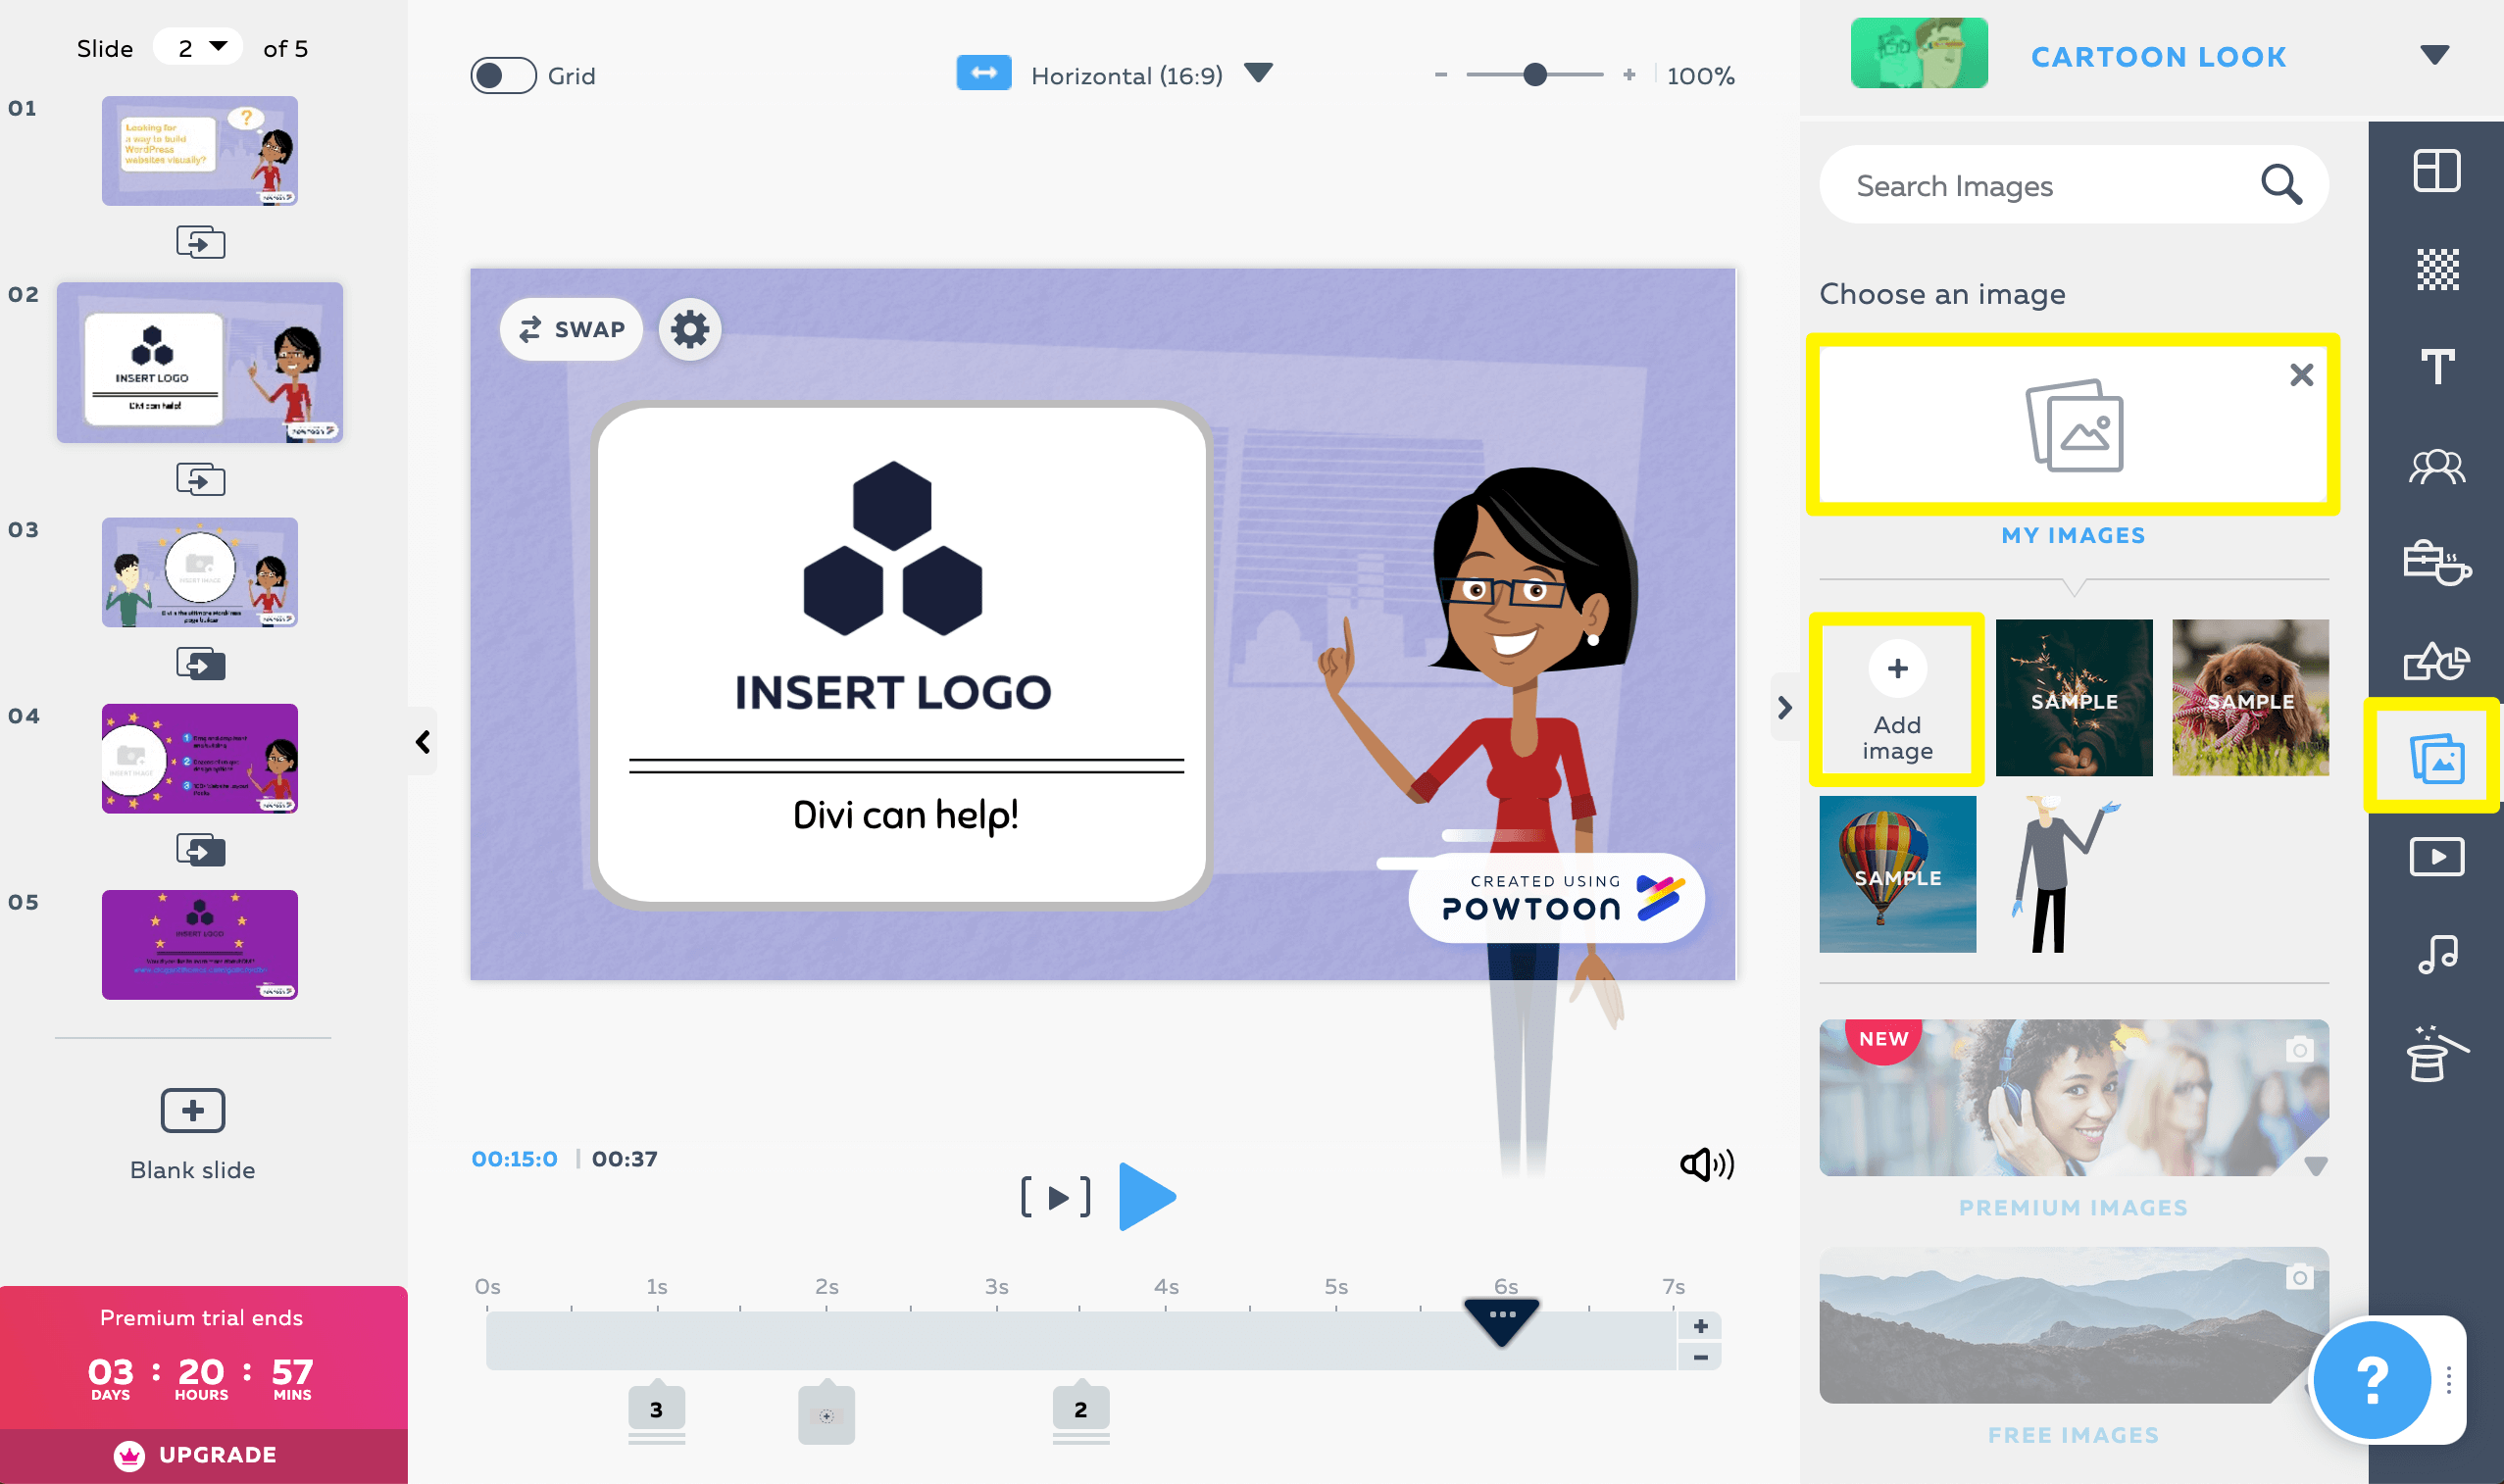
This will enable you to upload an image from your computer, which you can then incorporate into your video:
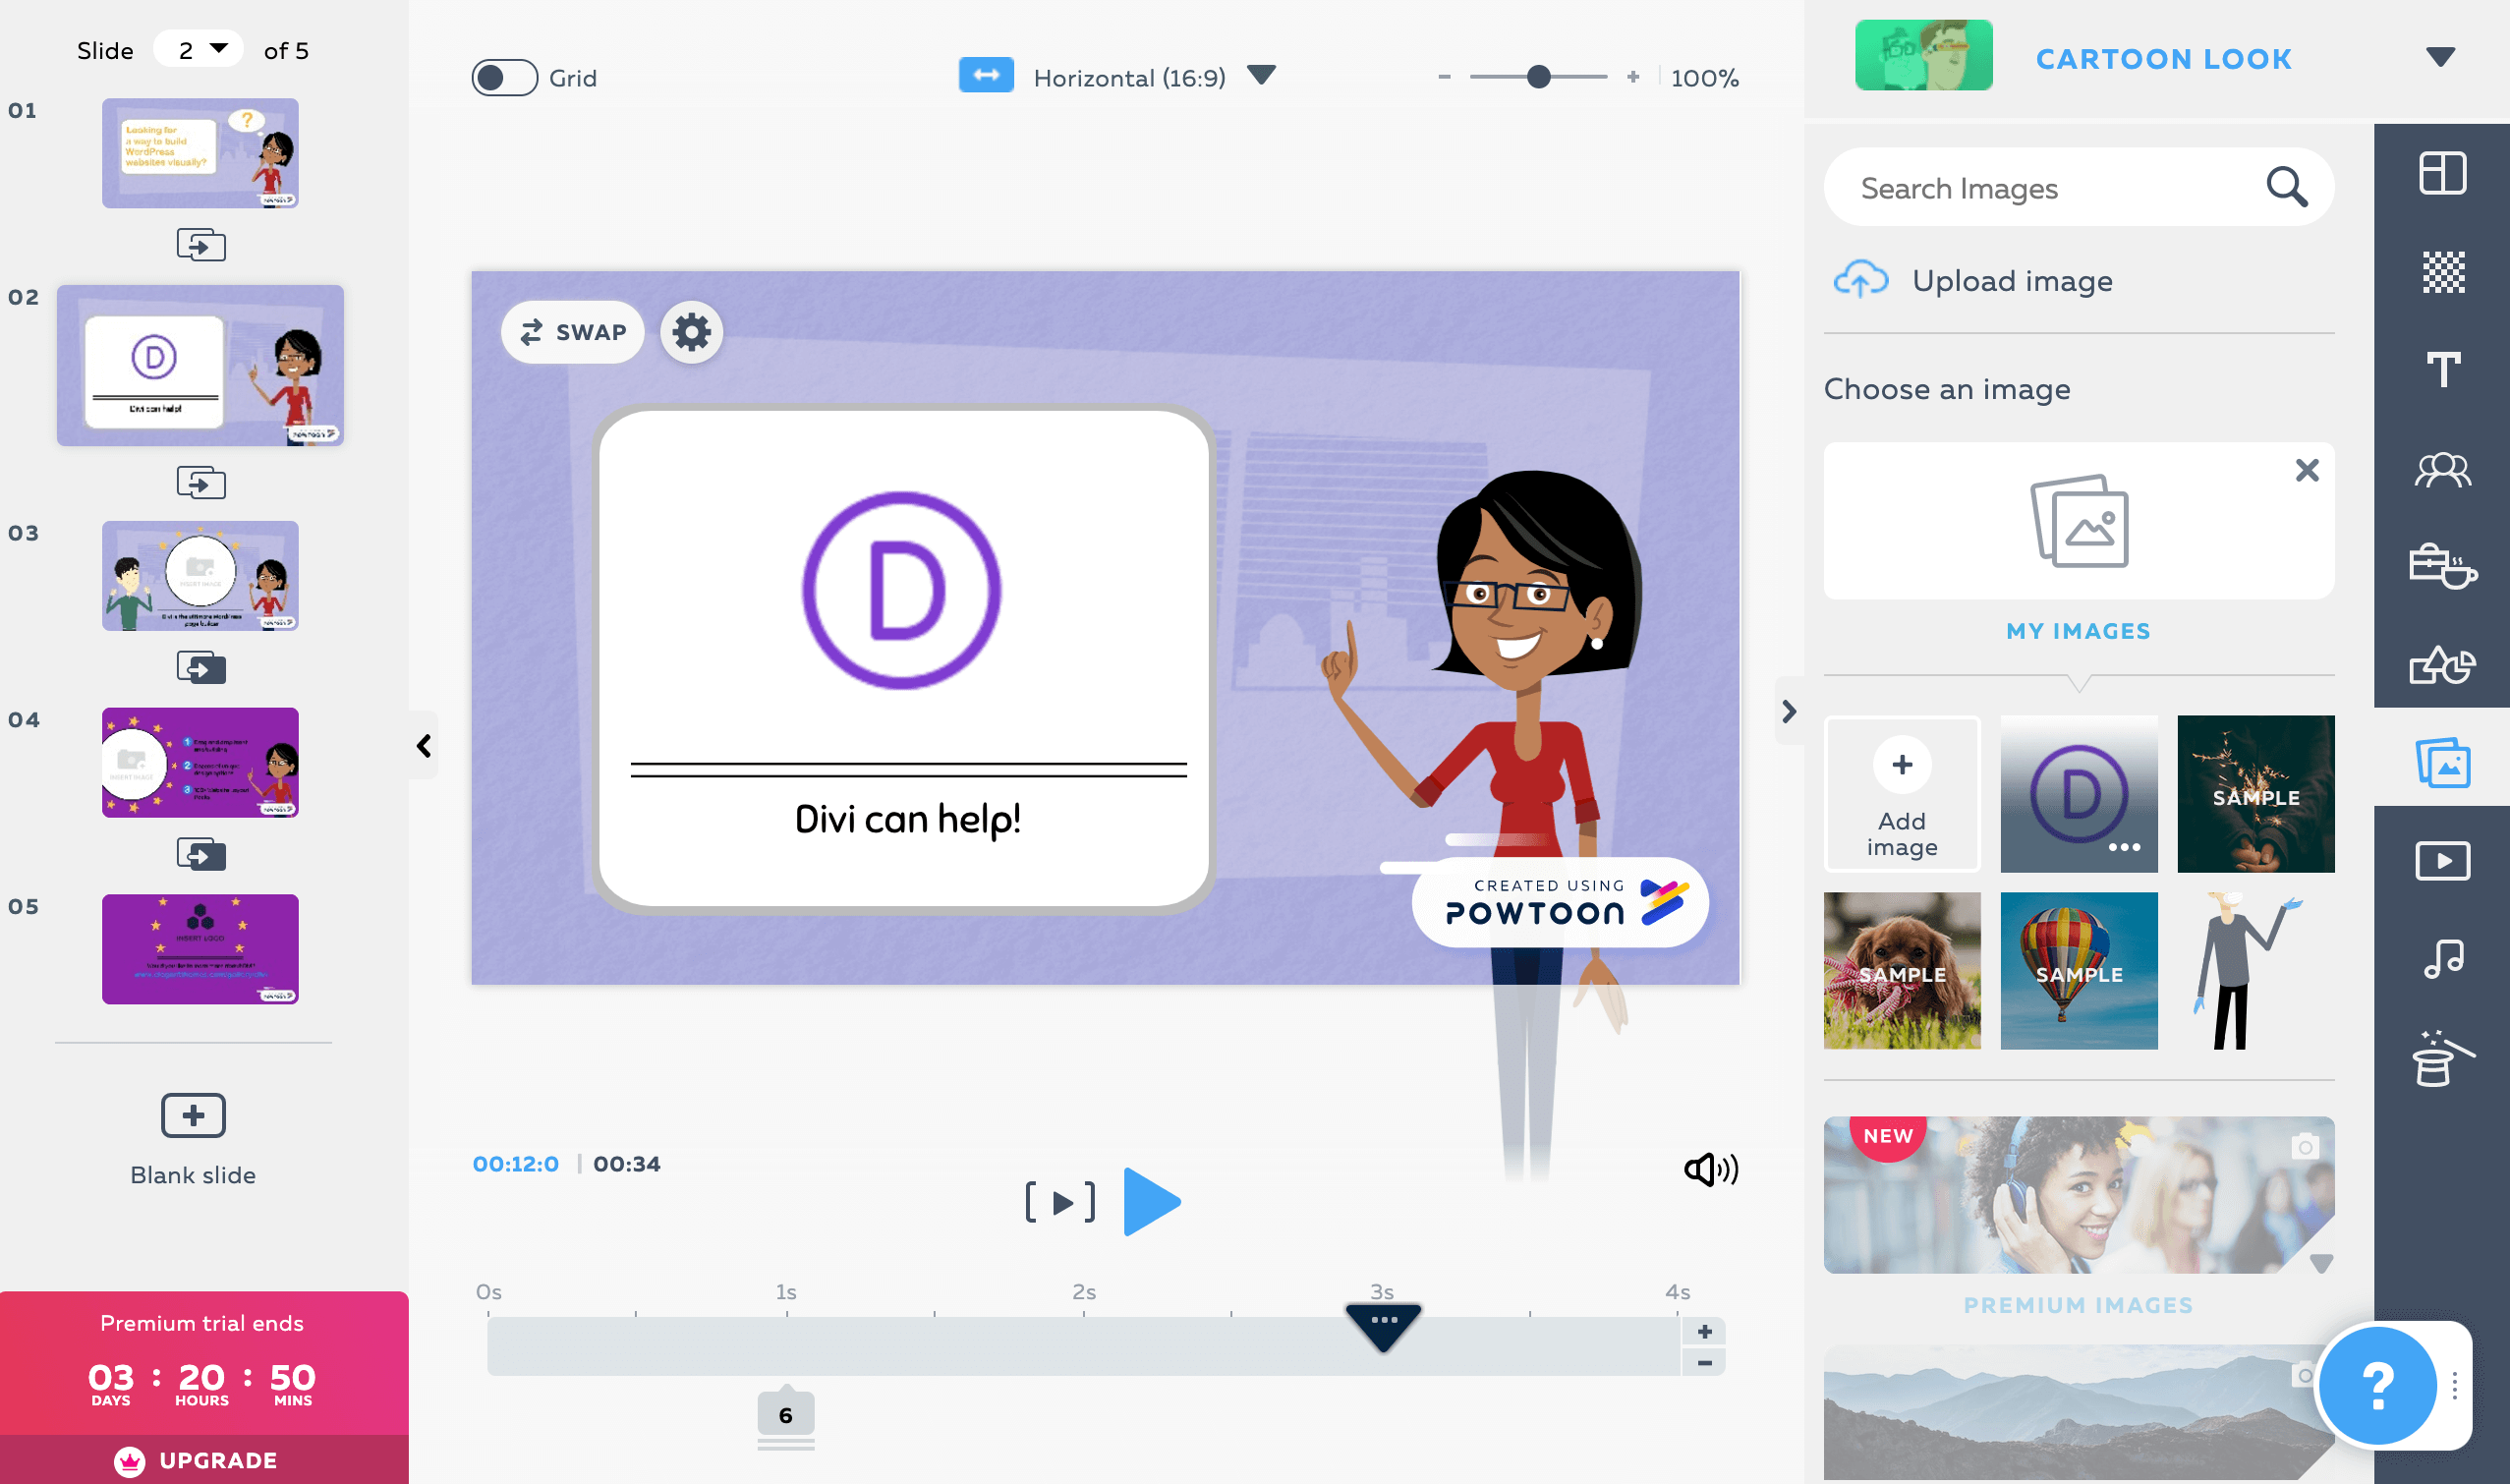
Note that you can follow a similar process to add your own video clips or audio. In Create mode, you can also incorporate additional elements from the Powtoon libraries, by clicking on the relevant icons in the toolbar to the right.
Step 4: Add or Remove Scenes as Needed
Ideally, the template you’ve chosen to create your animated video will include all the scenes you need to get your point across to your audience. However, if that’s not the case, you can add or remove scenes as needed.
You can add scenes in Edit or Create mode by clicking on the + icon in the list of slides to the left. You’ll have the option of choosing a pre-built scene from the Powtoon library, or creating your own from scratch:
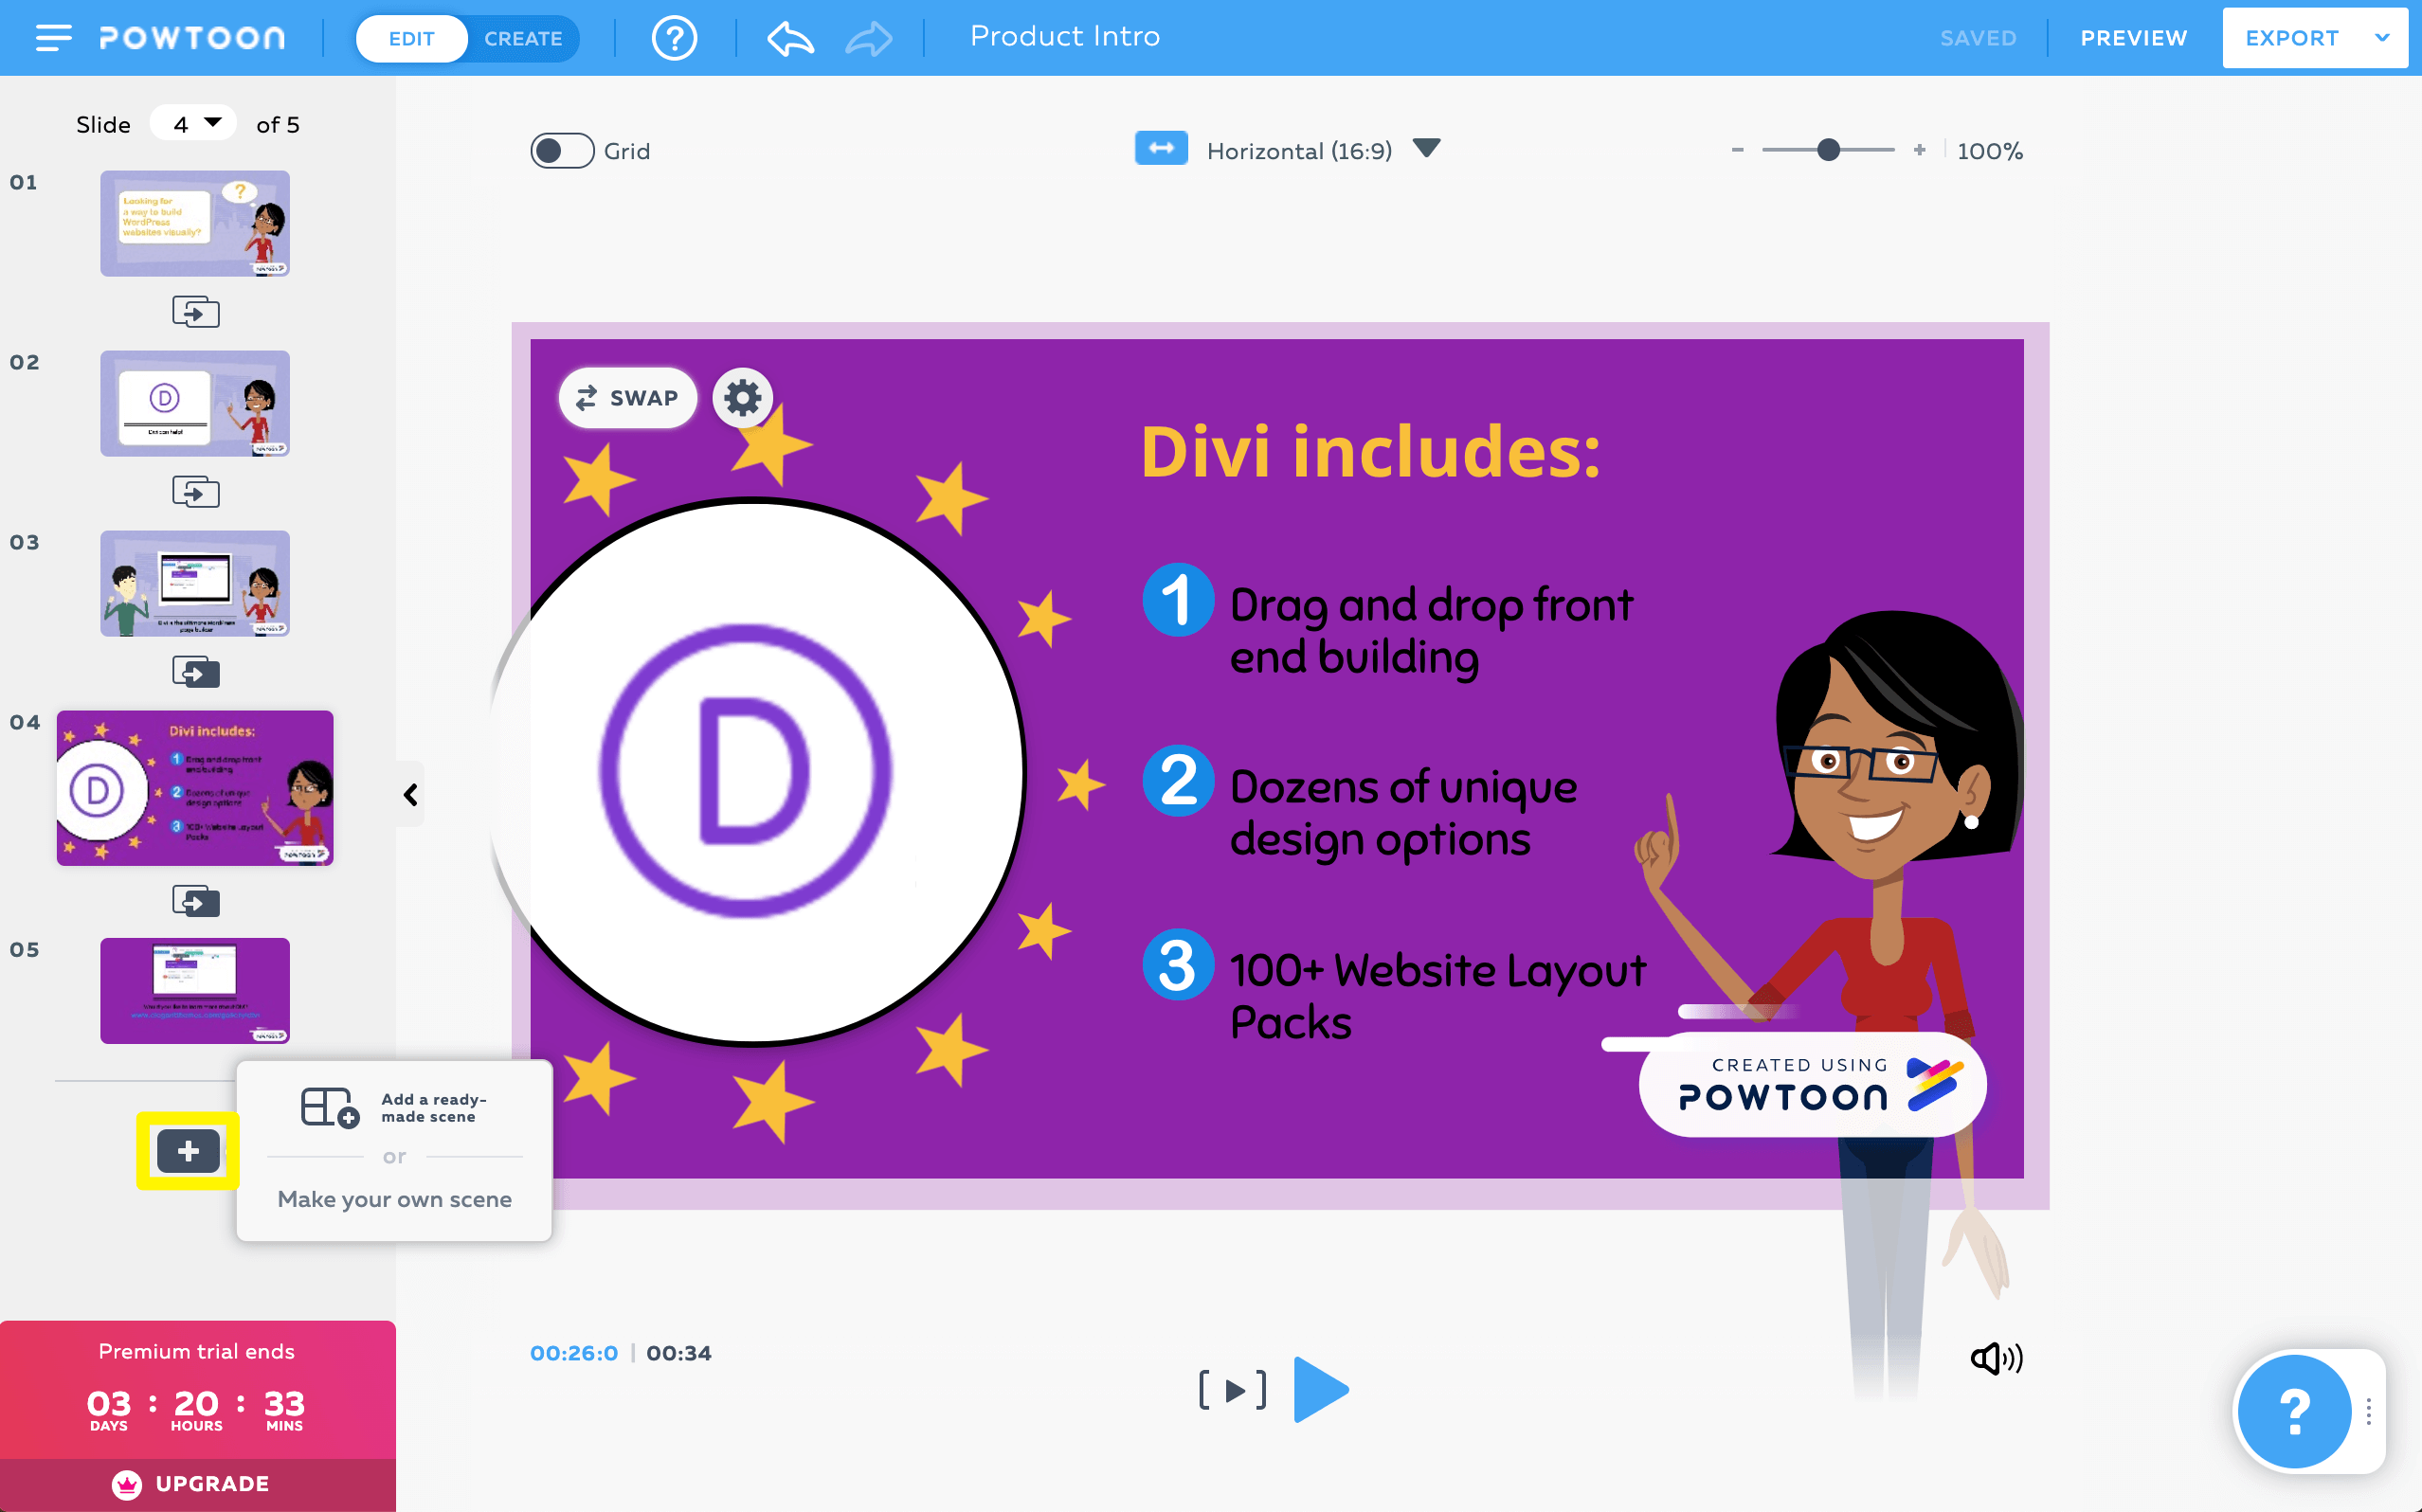
If you choose a ready-made scene, you can customize it to match the rest of your video using the same methods described in the steps above.
To delete a scene, click on it in the slide list on the left side of the editor:
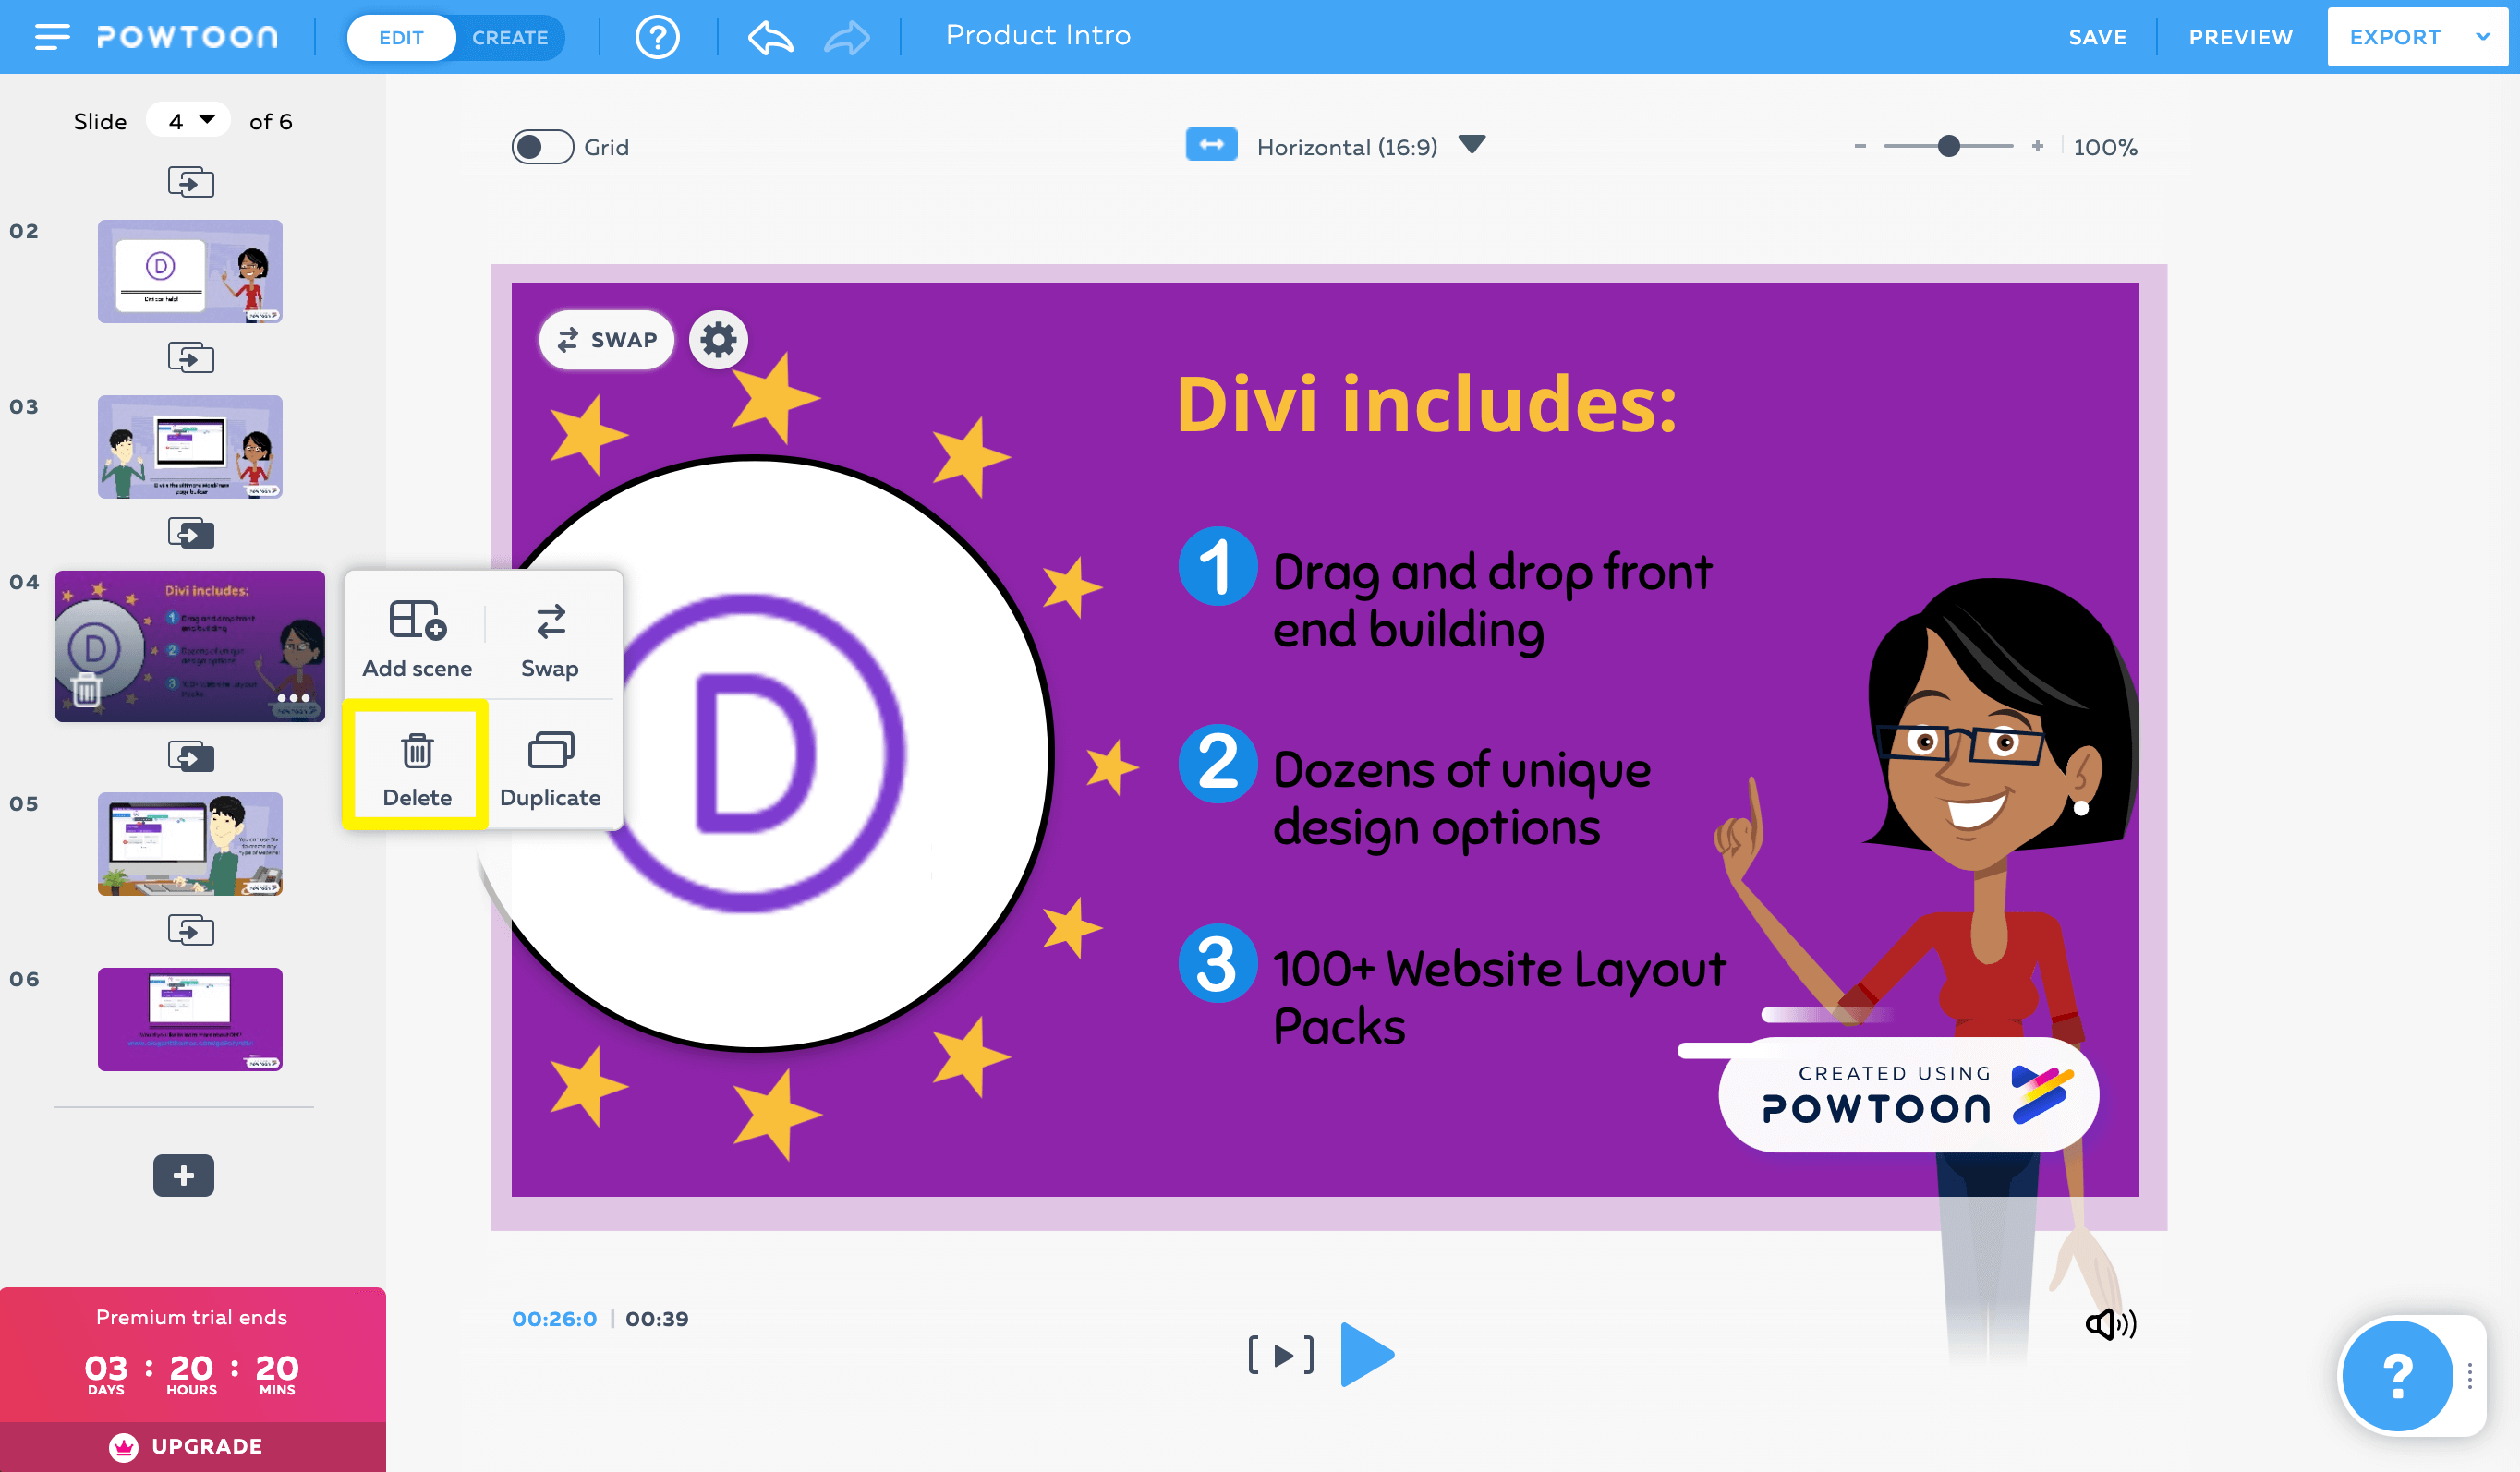
Then select the trash can icon.
Step 5: Adjust Your Scenes’ Timing
Powtoon doesn’t rely on a complex timeline like you might be used to if you have video editing experience. Instead, there are relatively simple timing settings available for each scene. You must be in Create mode to access them.
To add or remove seconds from a scene, use the + and – buttons at the end of the timeline:
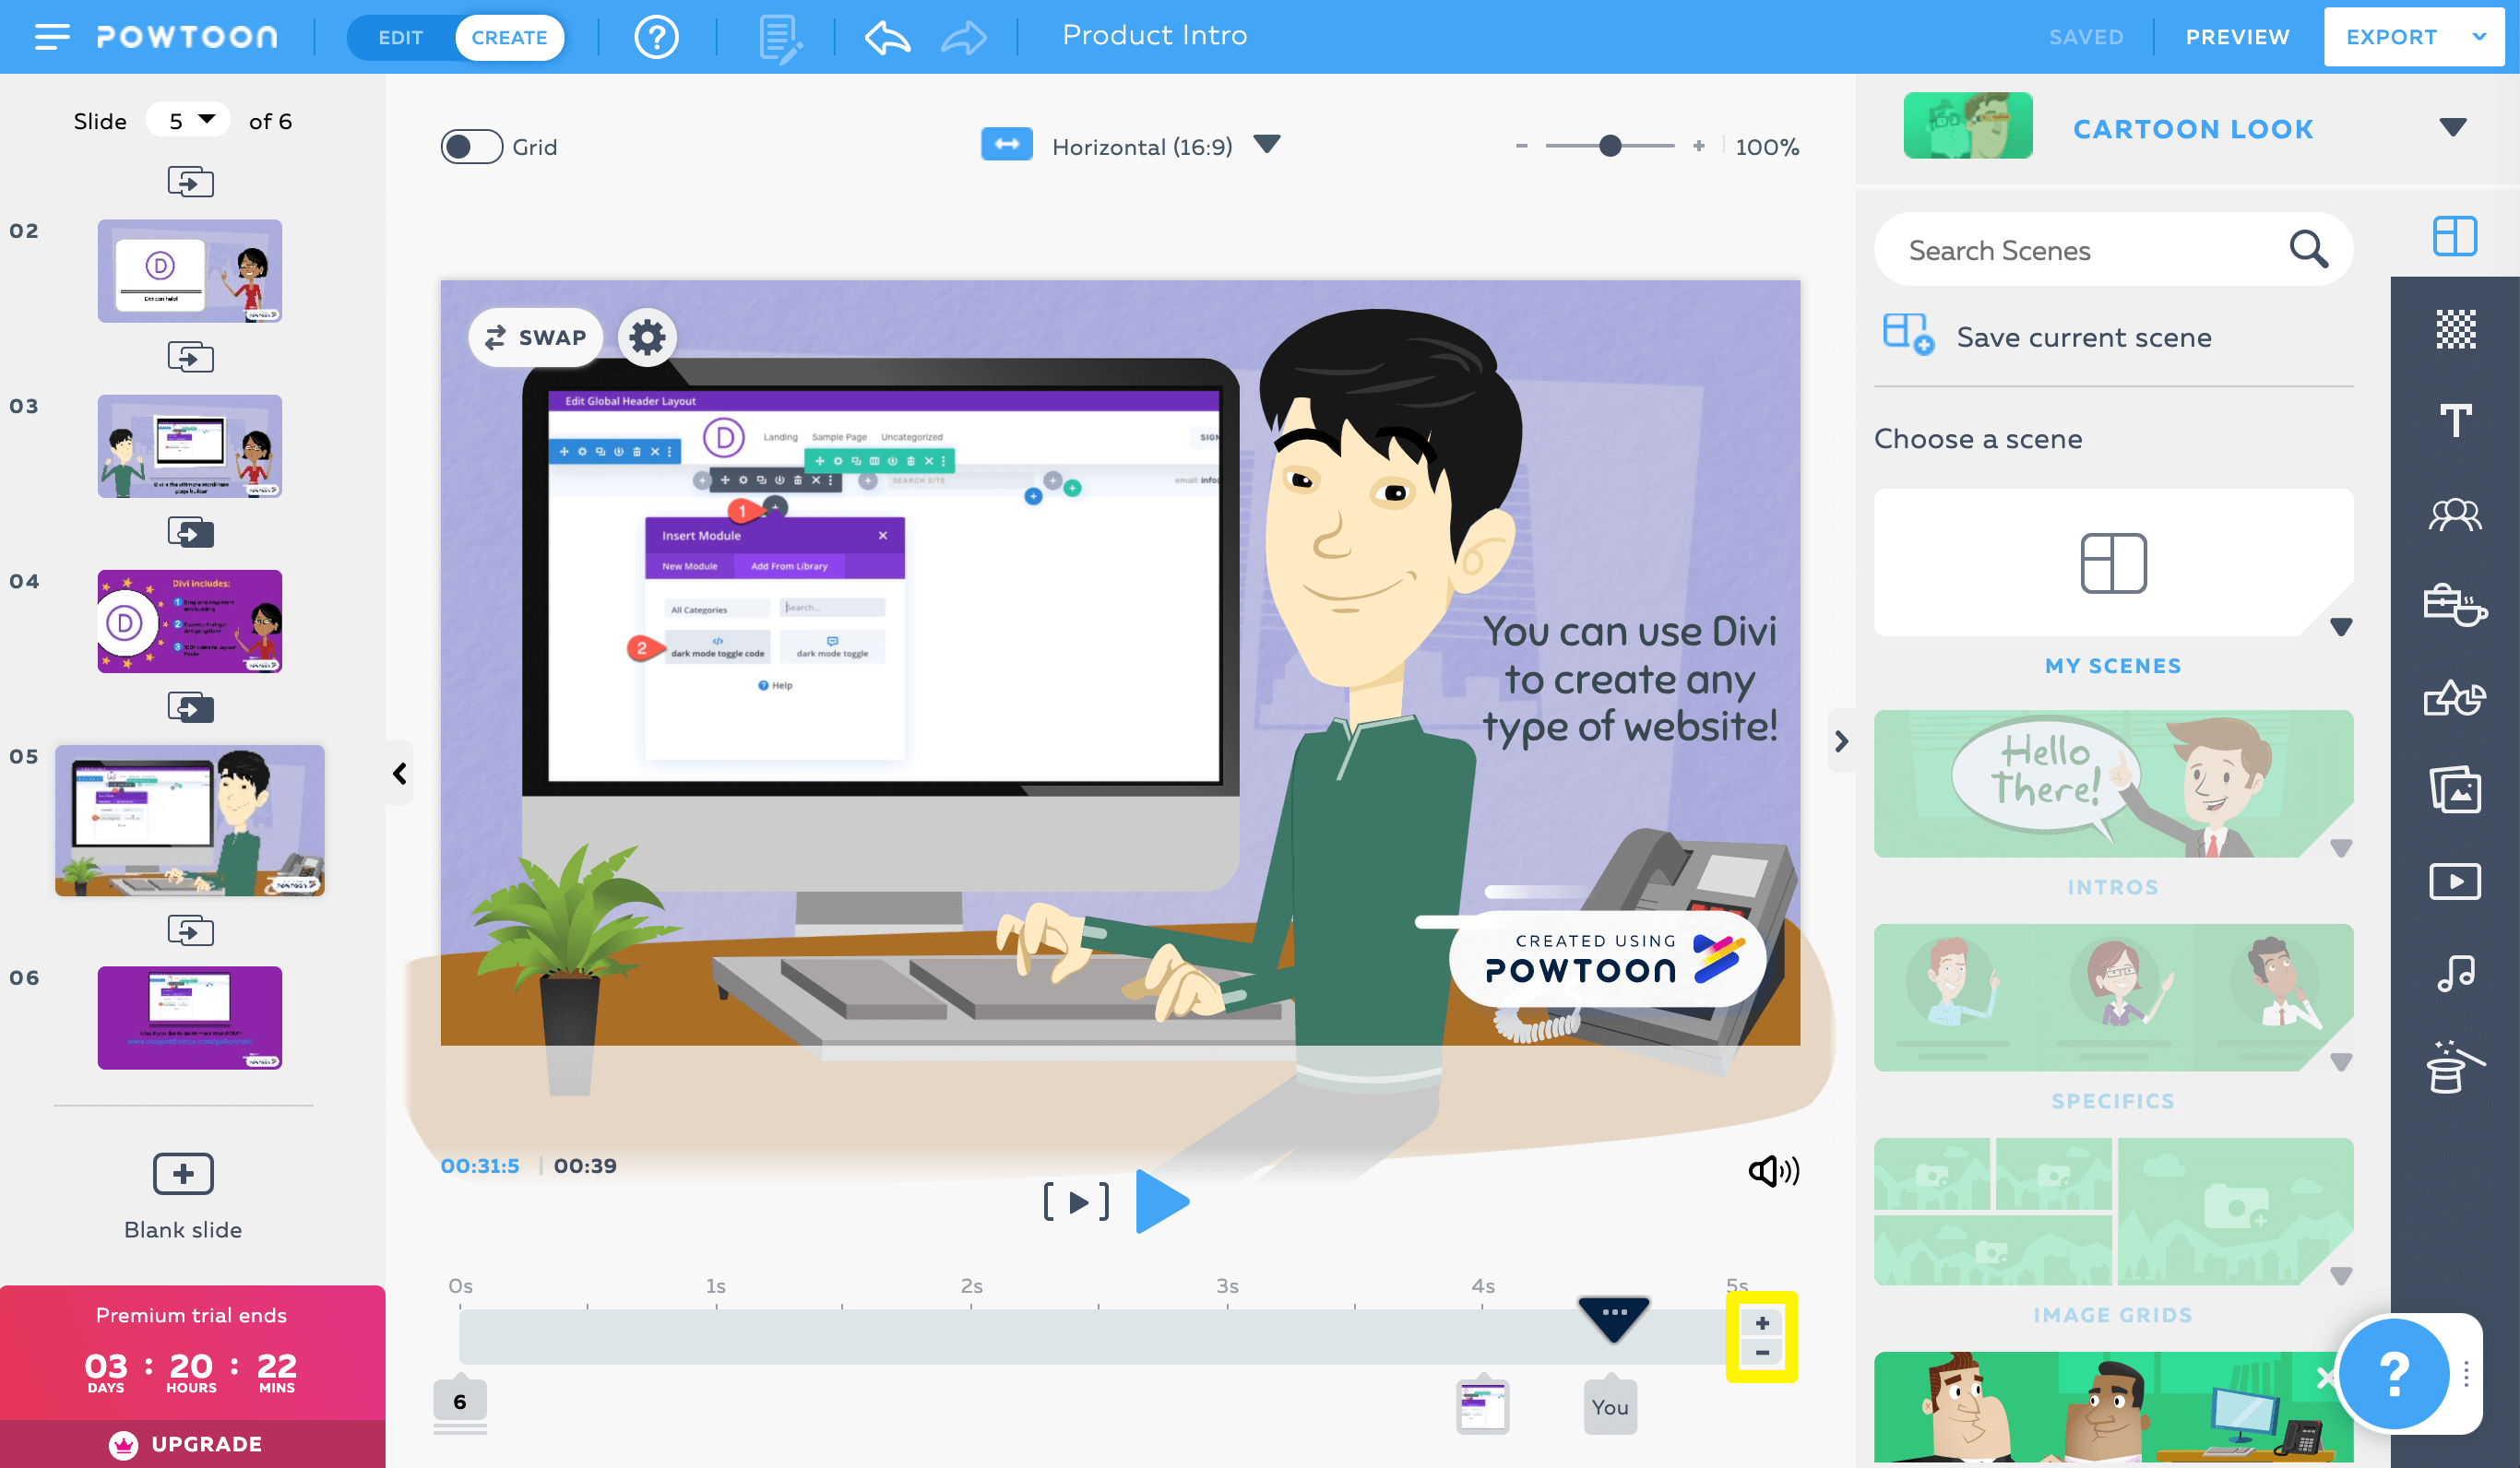
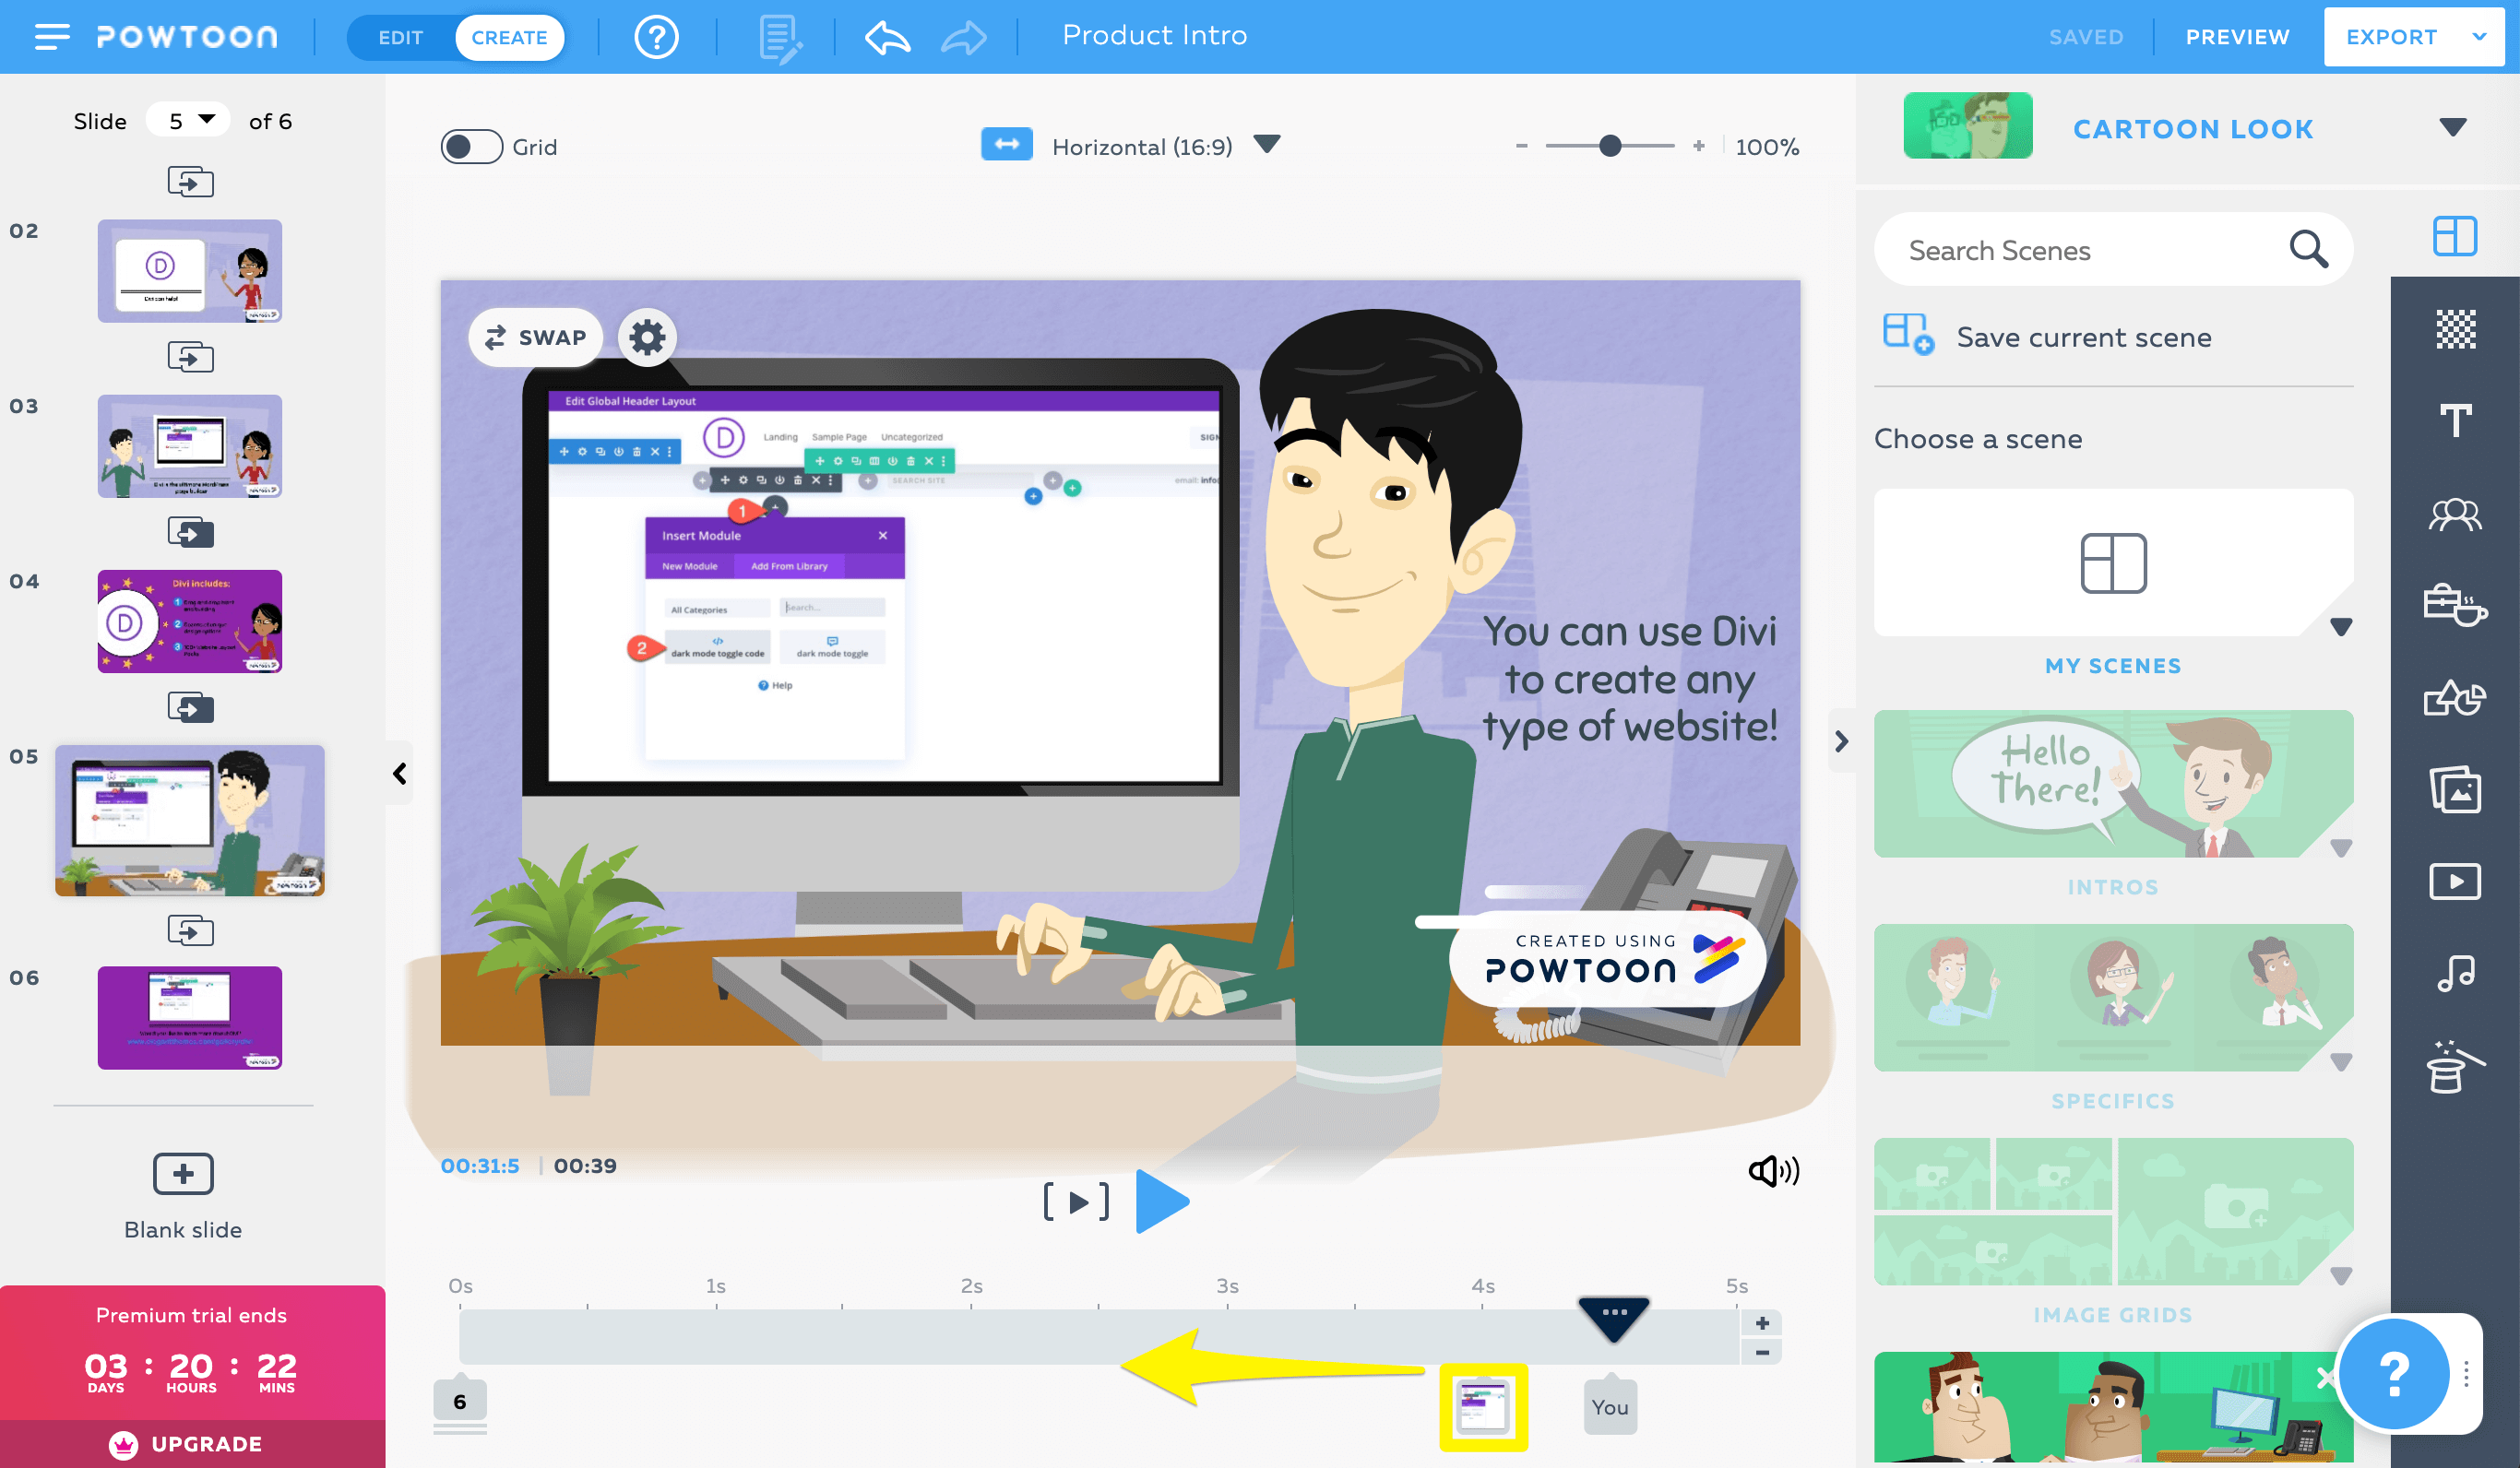
To adjust when a certain element appears on the screen, slide its icon along the timeline:
Keep in mind that it’s better to risk a scene lasting too long than to rush through your video. You don’t want viewers to miss important text because they weren’t able to read it quickly enough.
Step 6: Apply Transitions and Other Effects
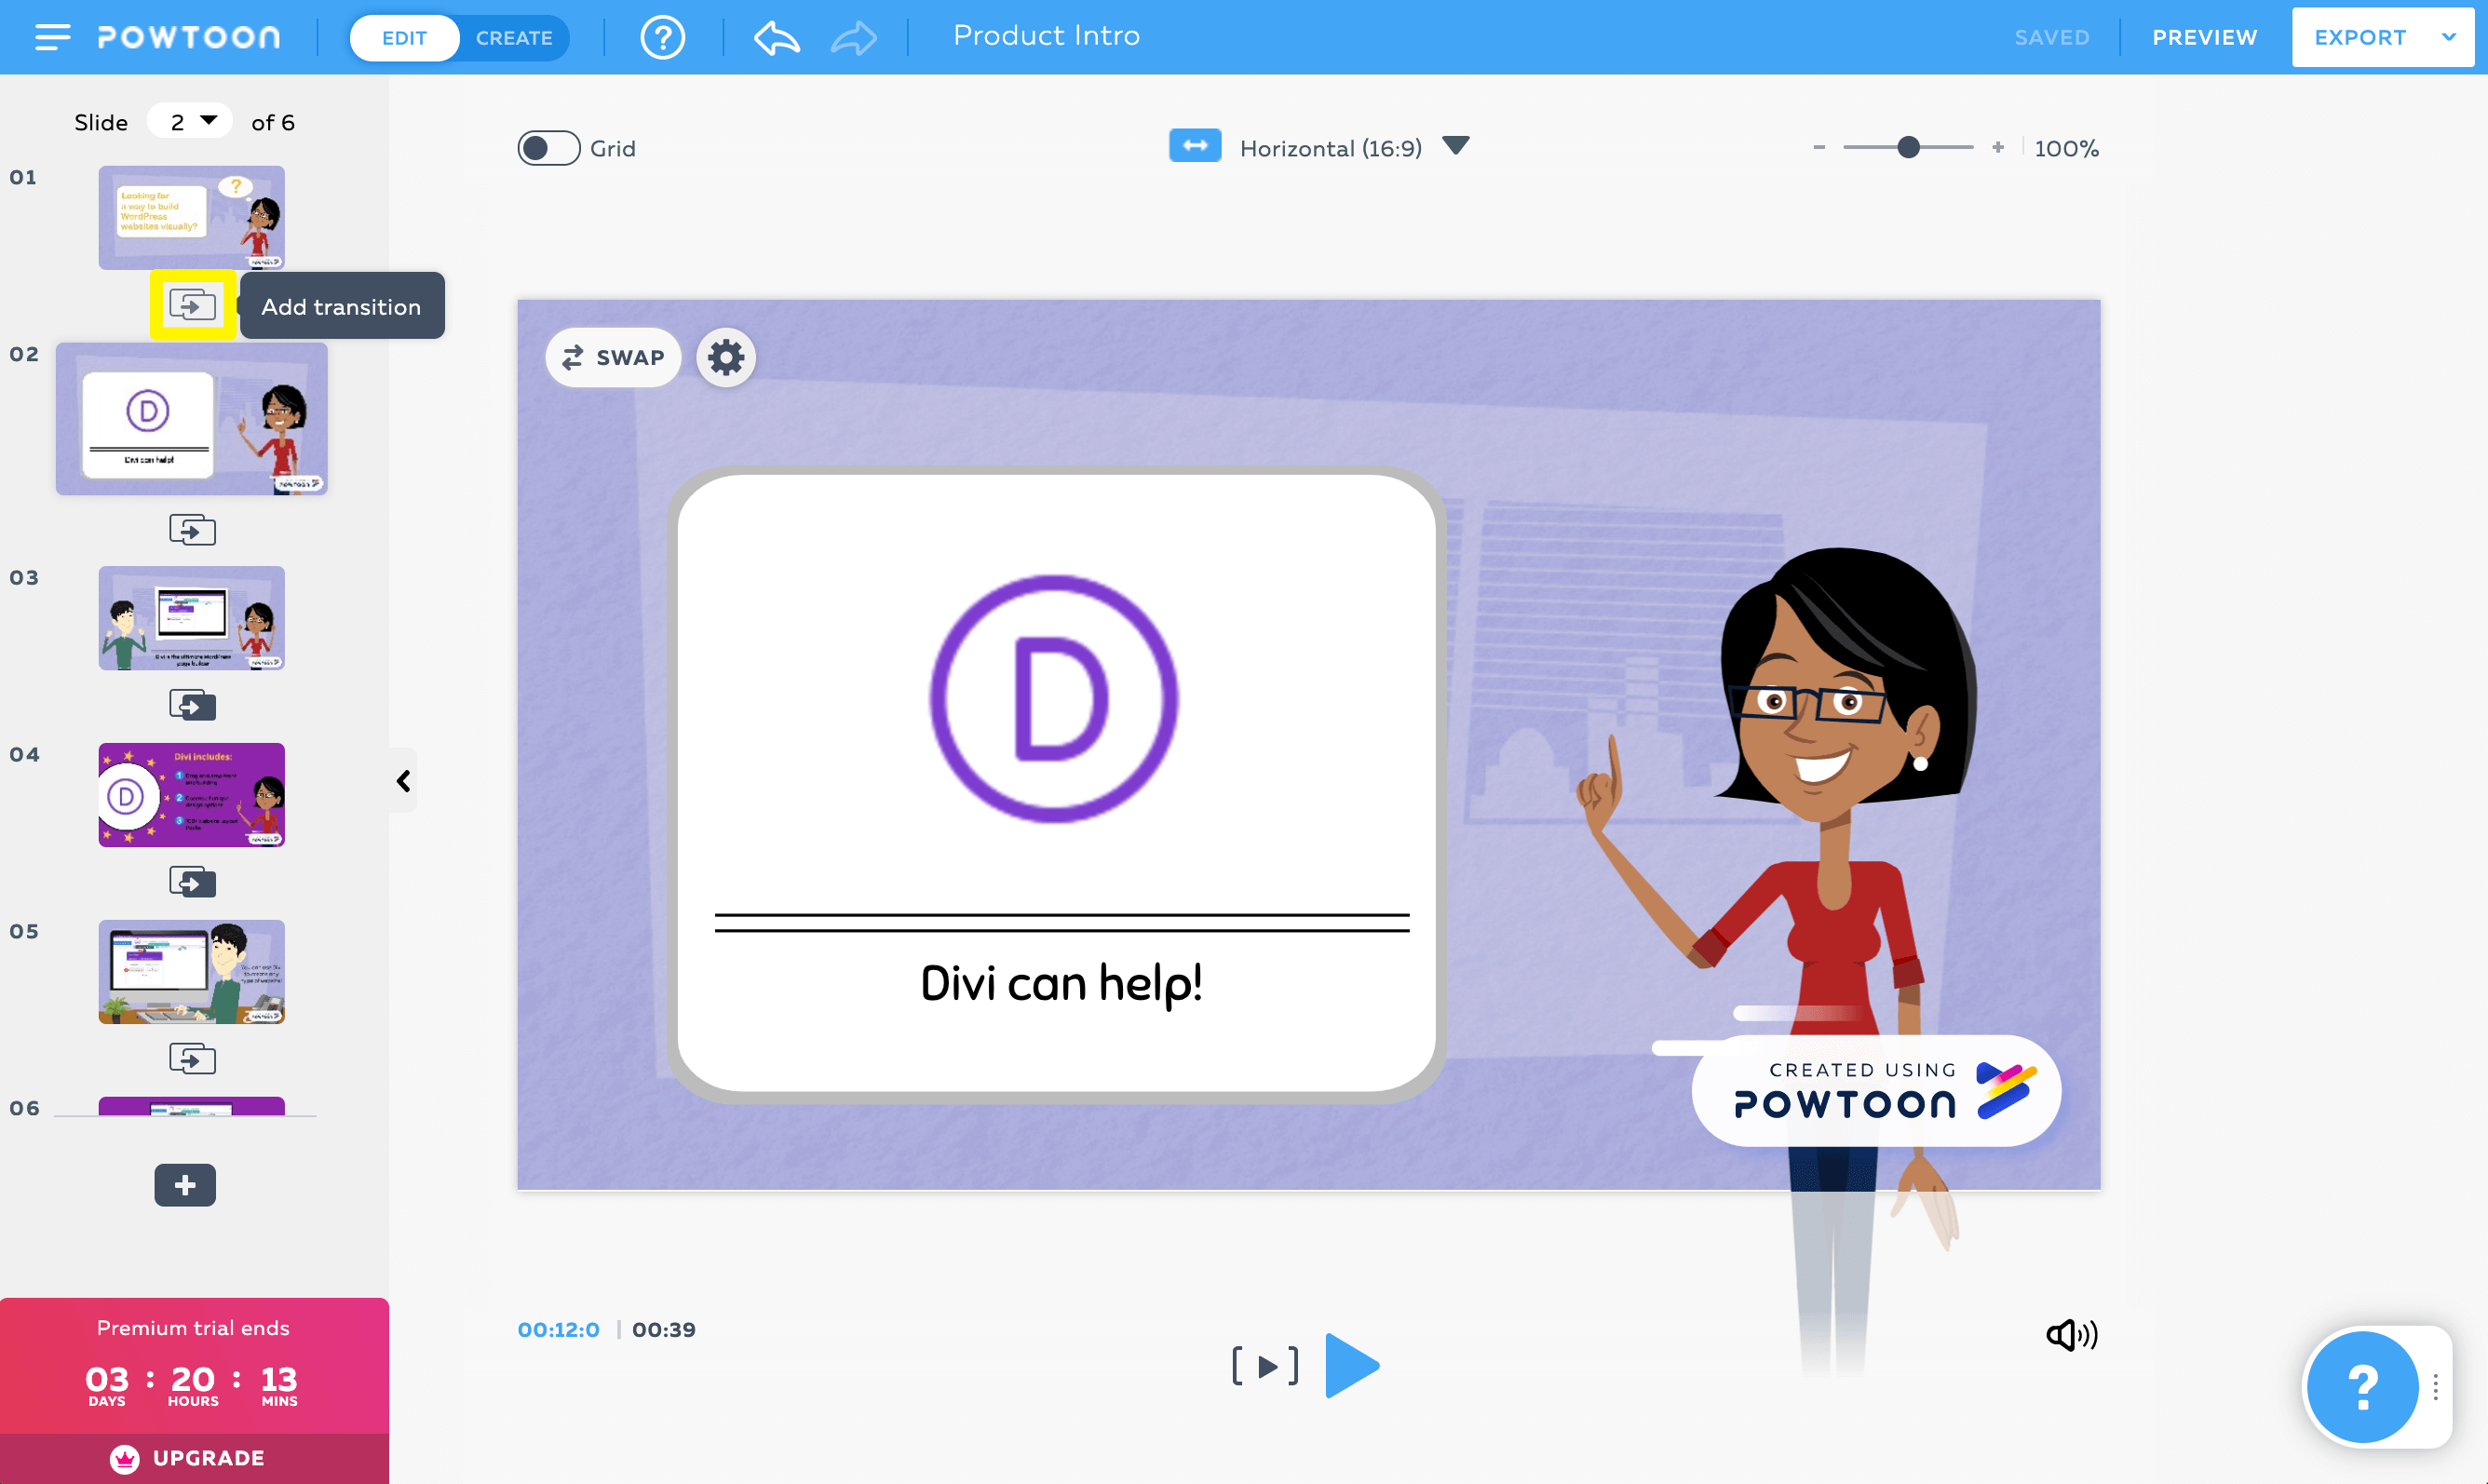
Powtoon provides many optional transitions and effects that you can apply to your scenes, as well as to various elements. To apply a transition between scenes, simply click on the icon that appears between the slides in the editor:
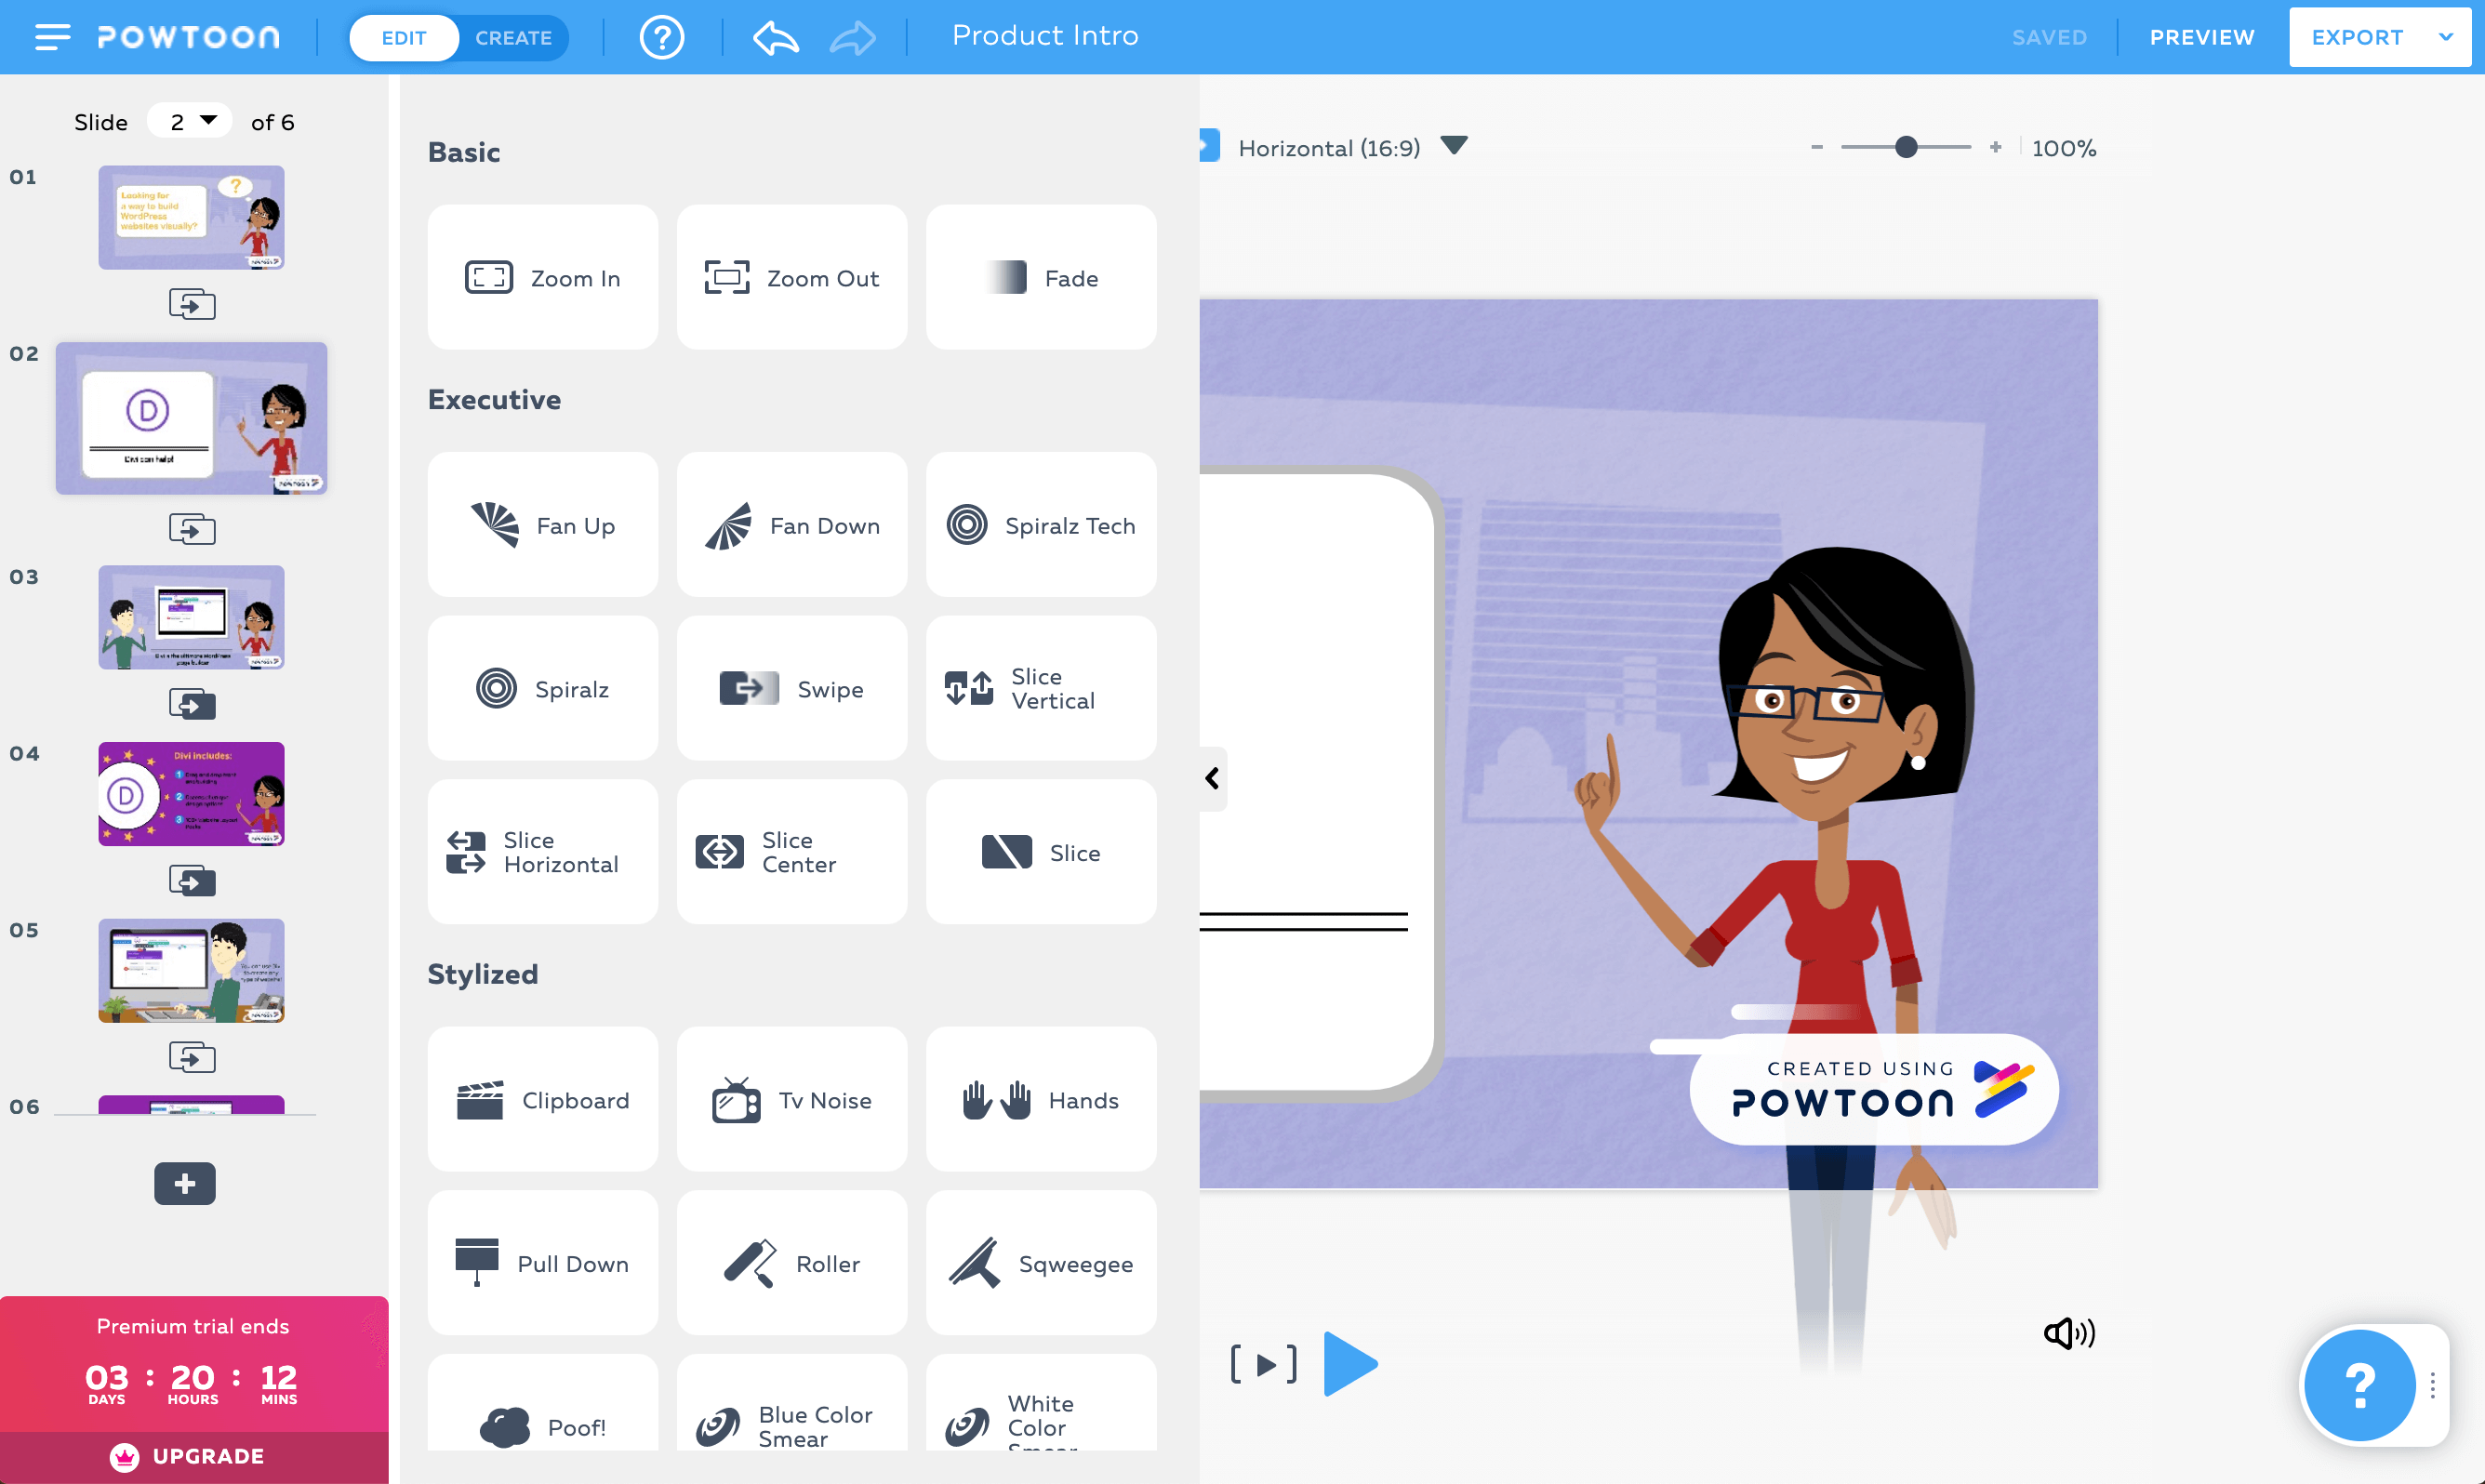
This will open Powtoon’s transition library. You can select whichever effect suits your video’s style and content, and Powtoon will apply it for you:
To add effects to specific elements, select the relevant object and click on the gear icon in its toolbar. Then select Effects:
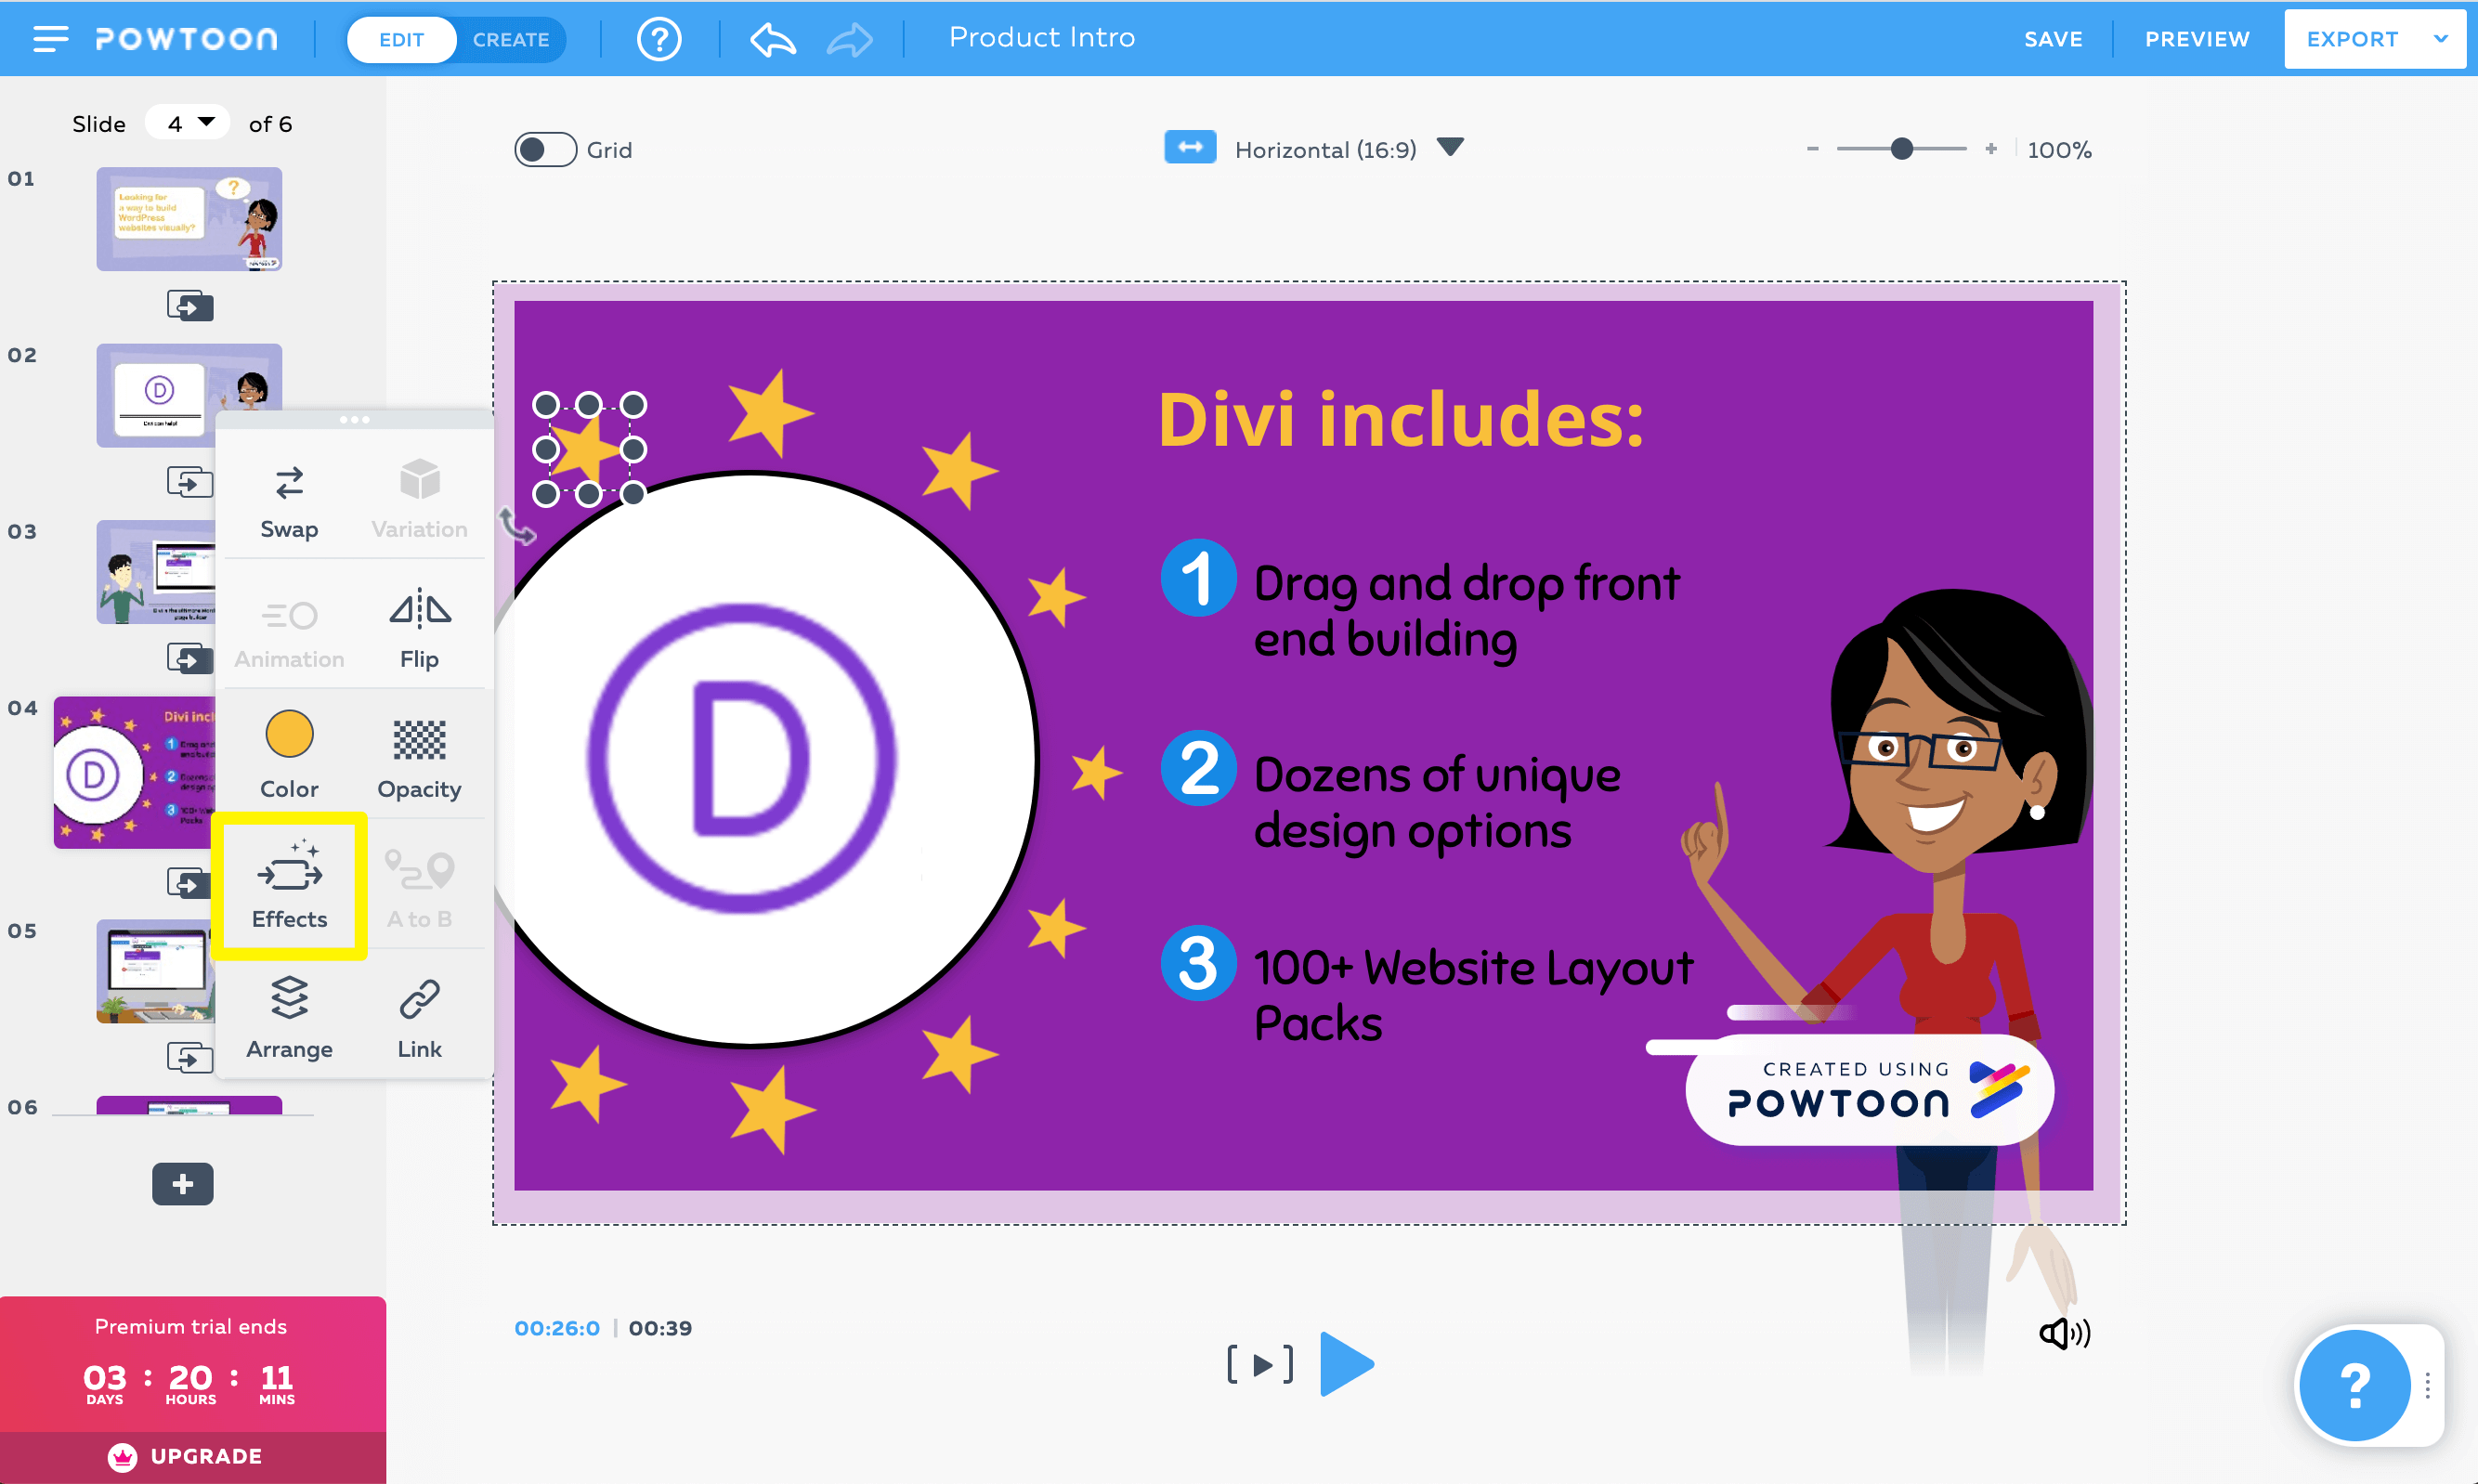
This will open the list of available effects. Click on one to apply it to your element:
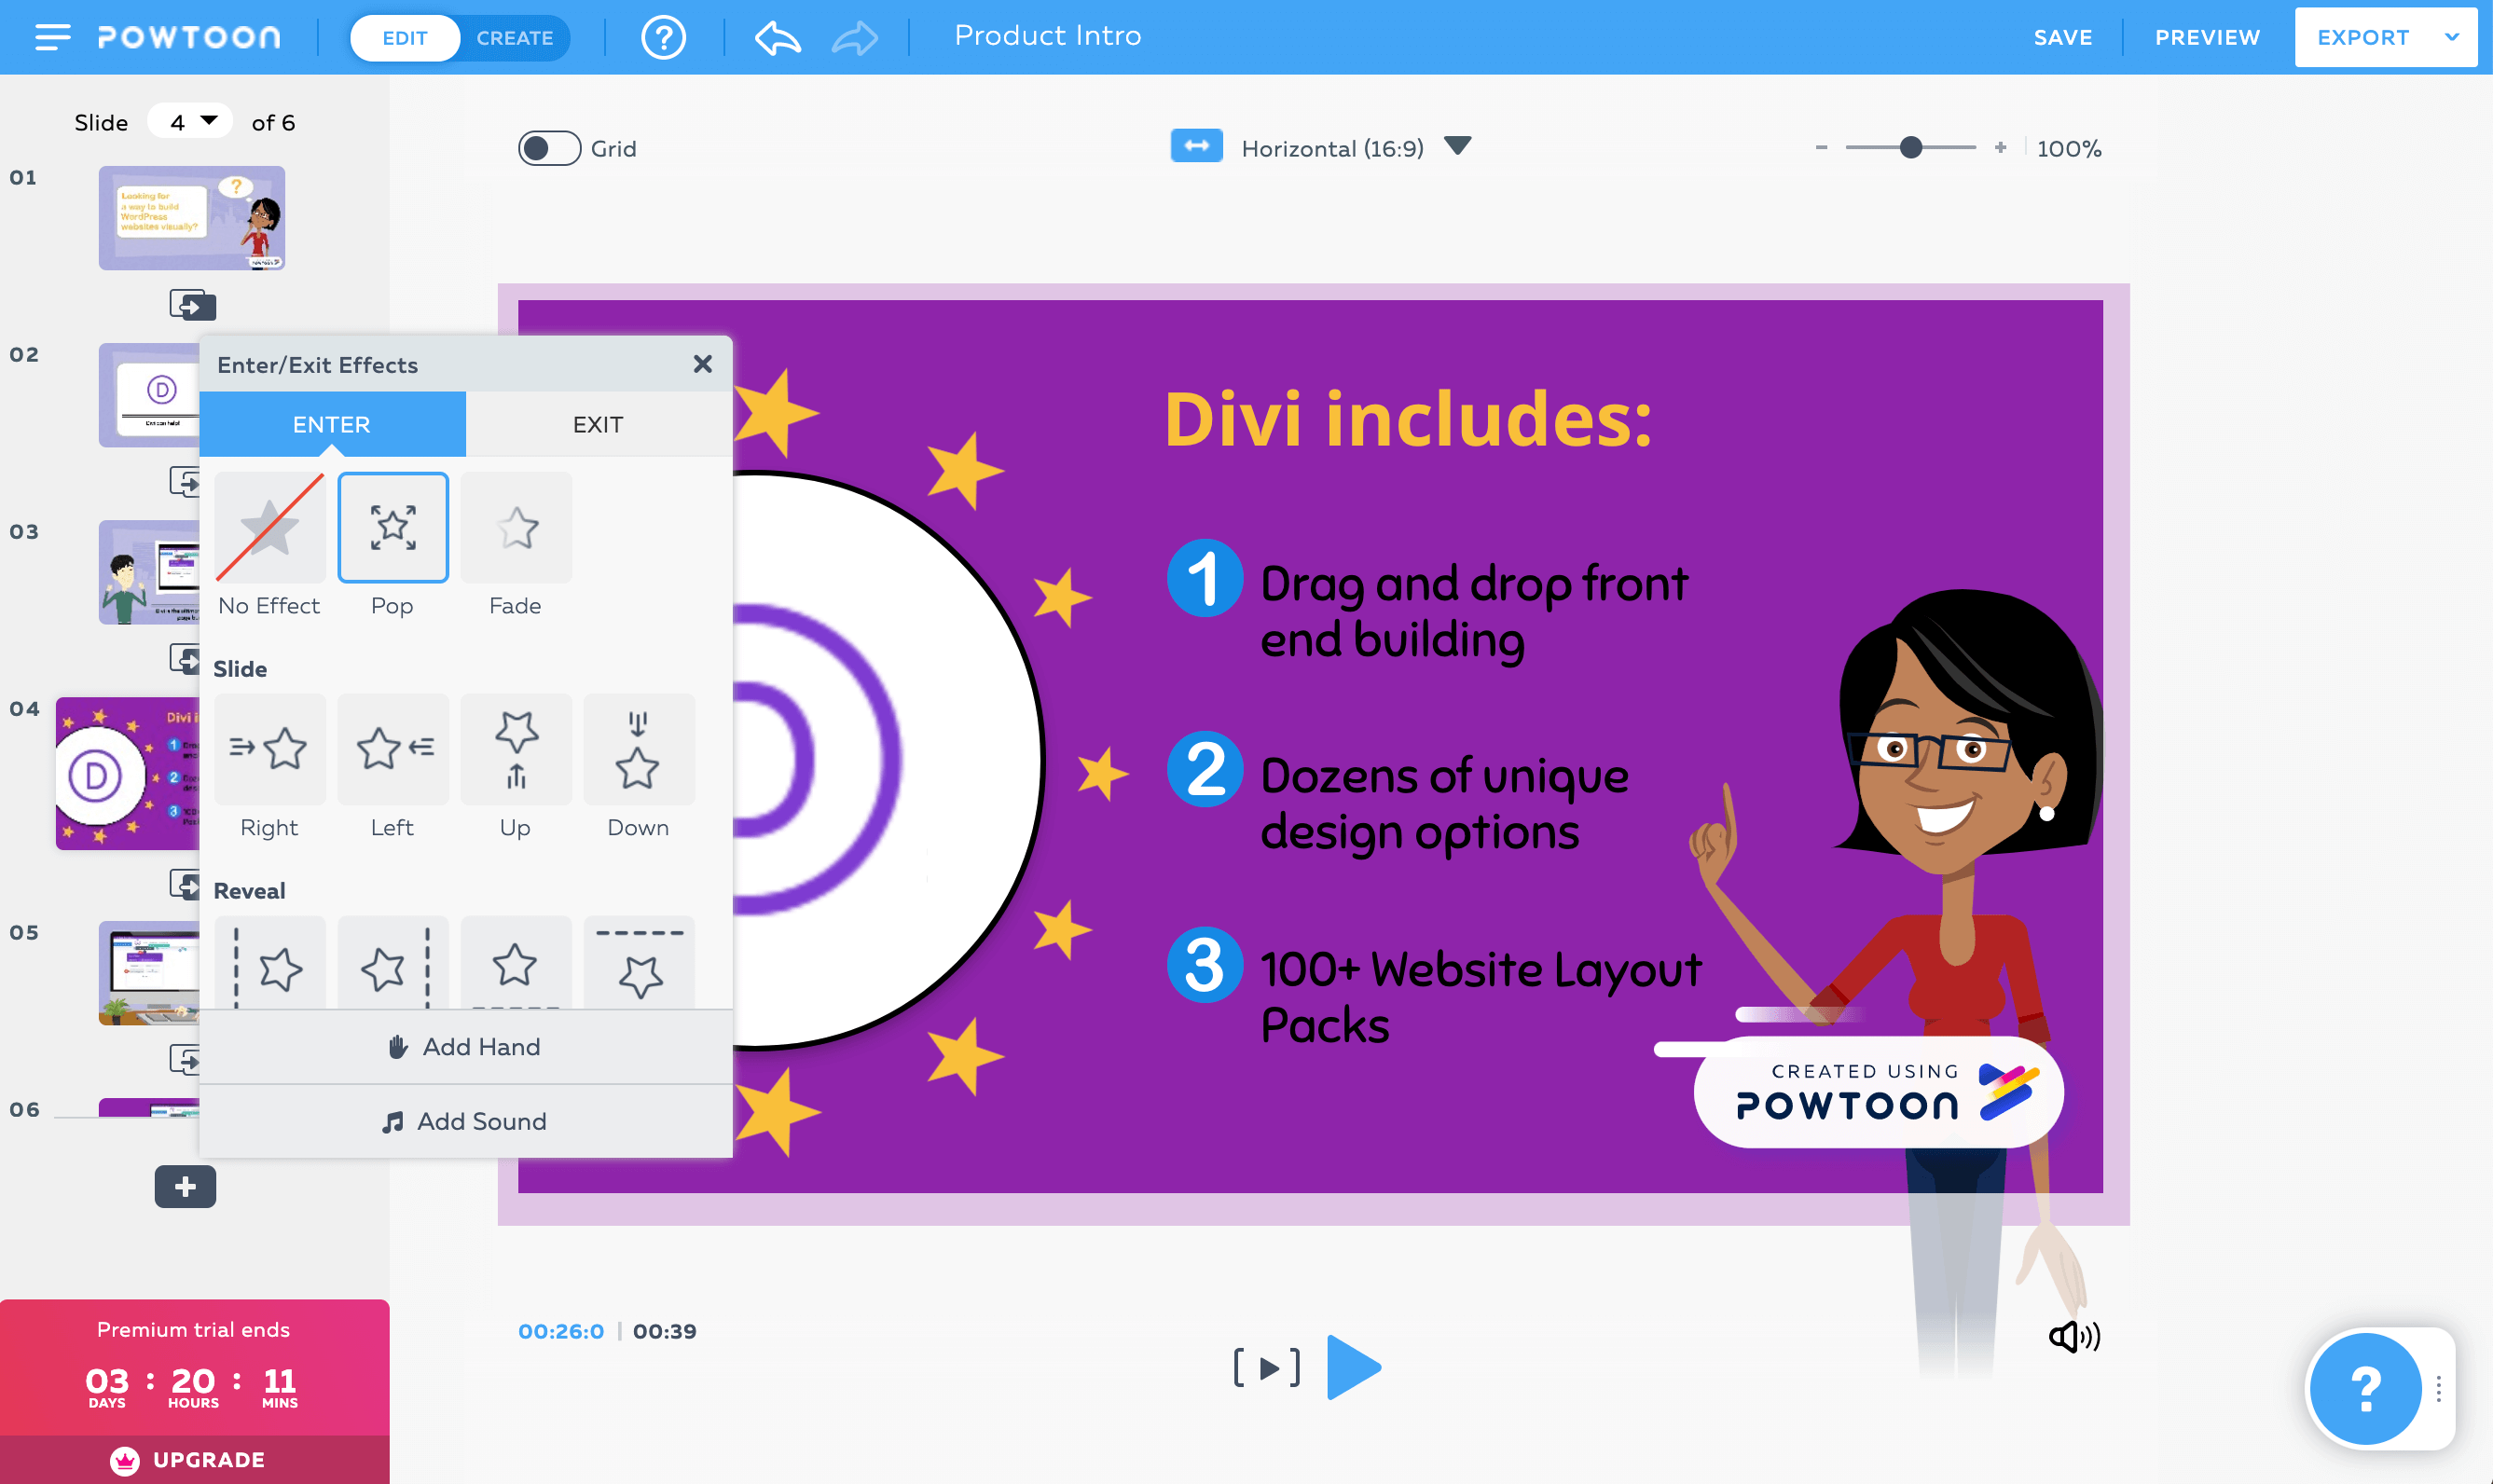
You can also adjust the timing of your effects using the method described in the previous step.
Step 7: Choose Your Video’s Background Music
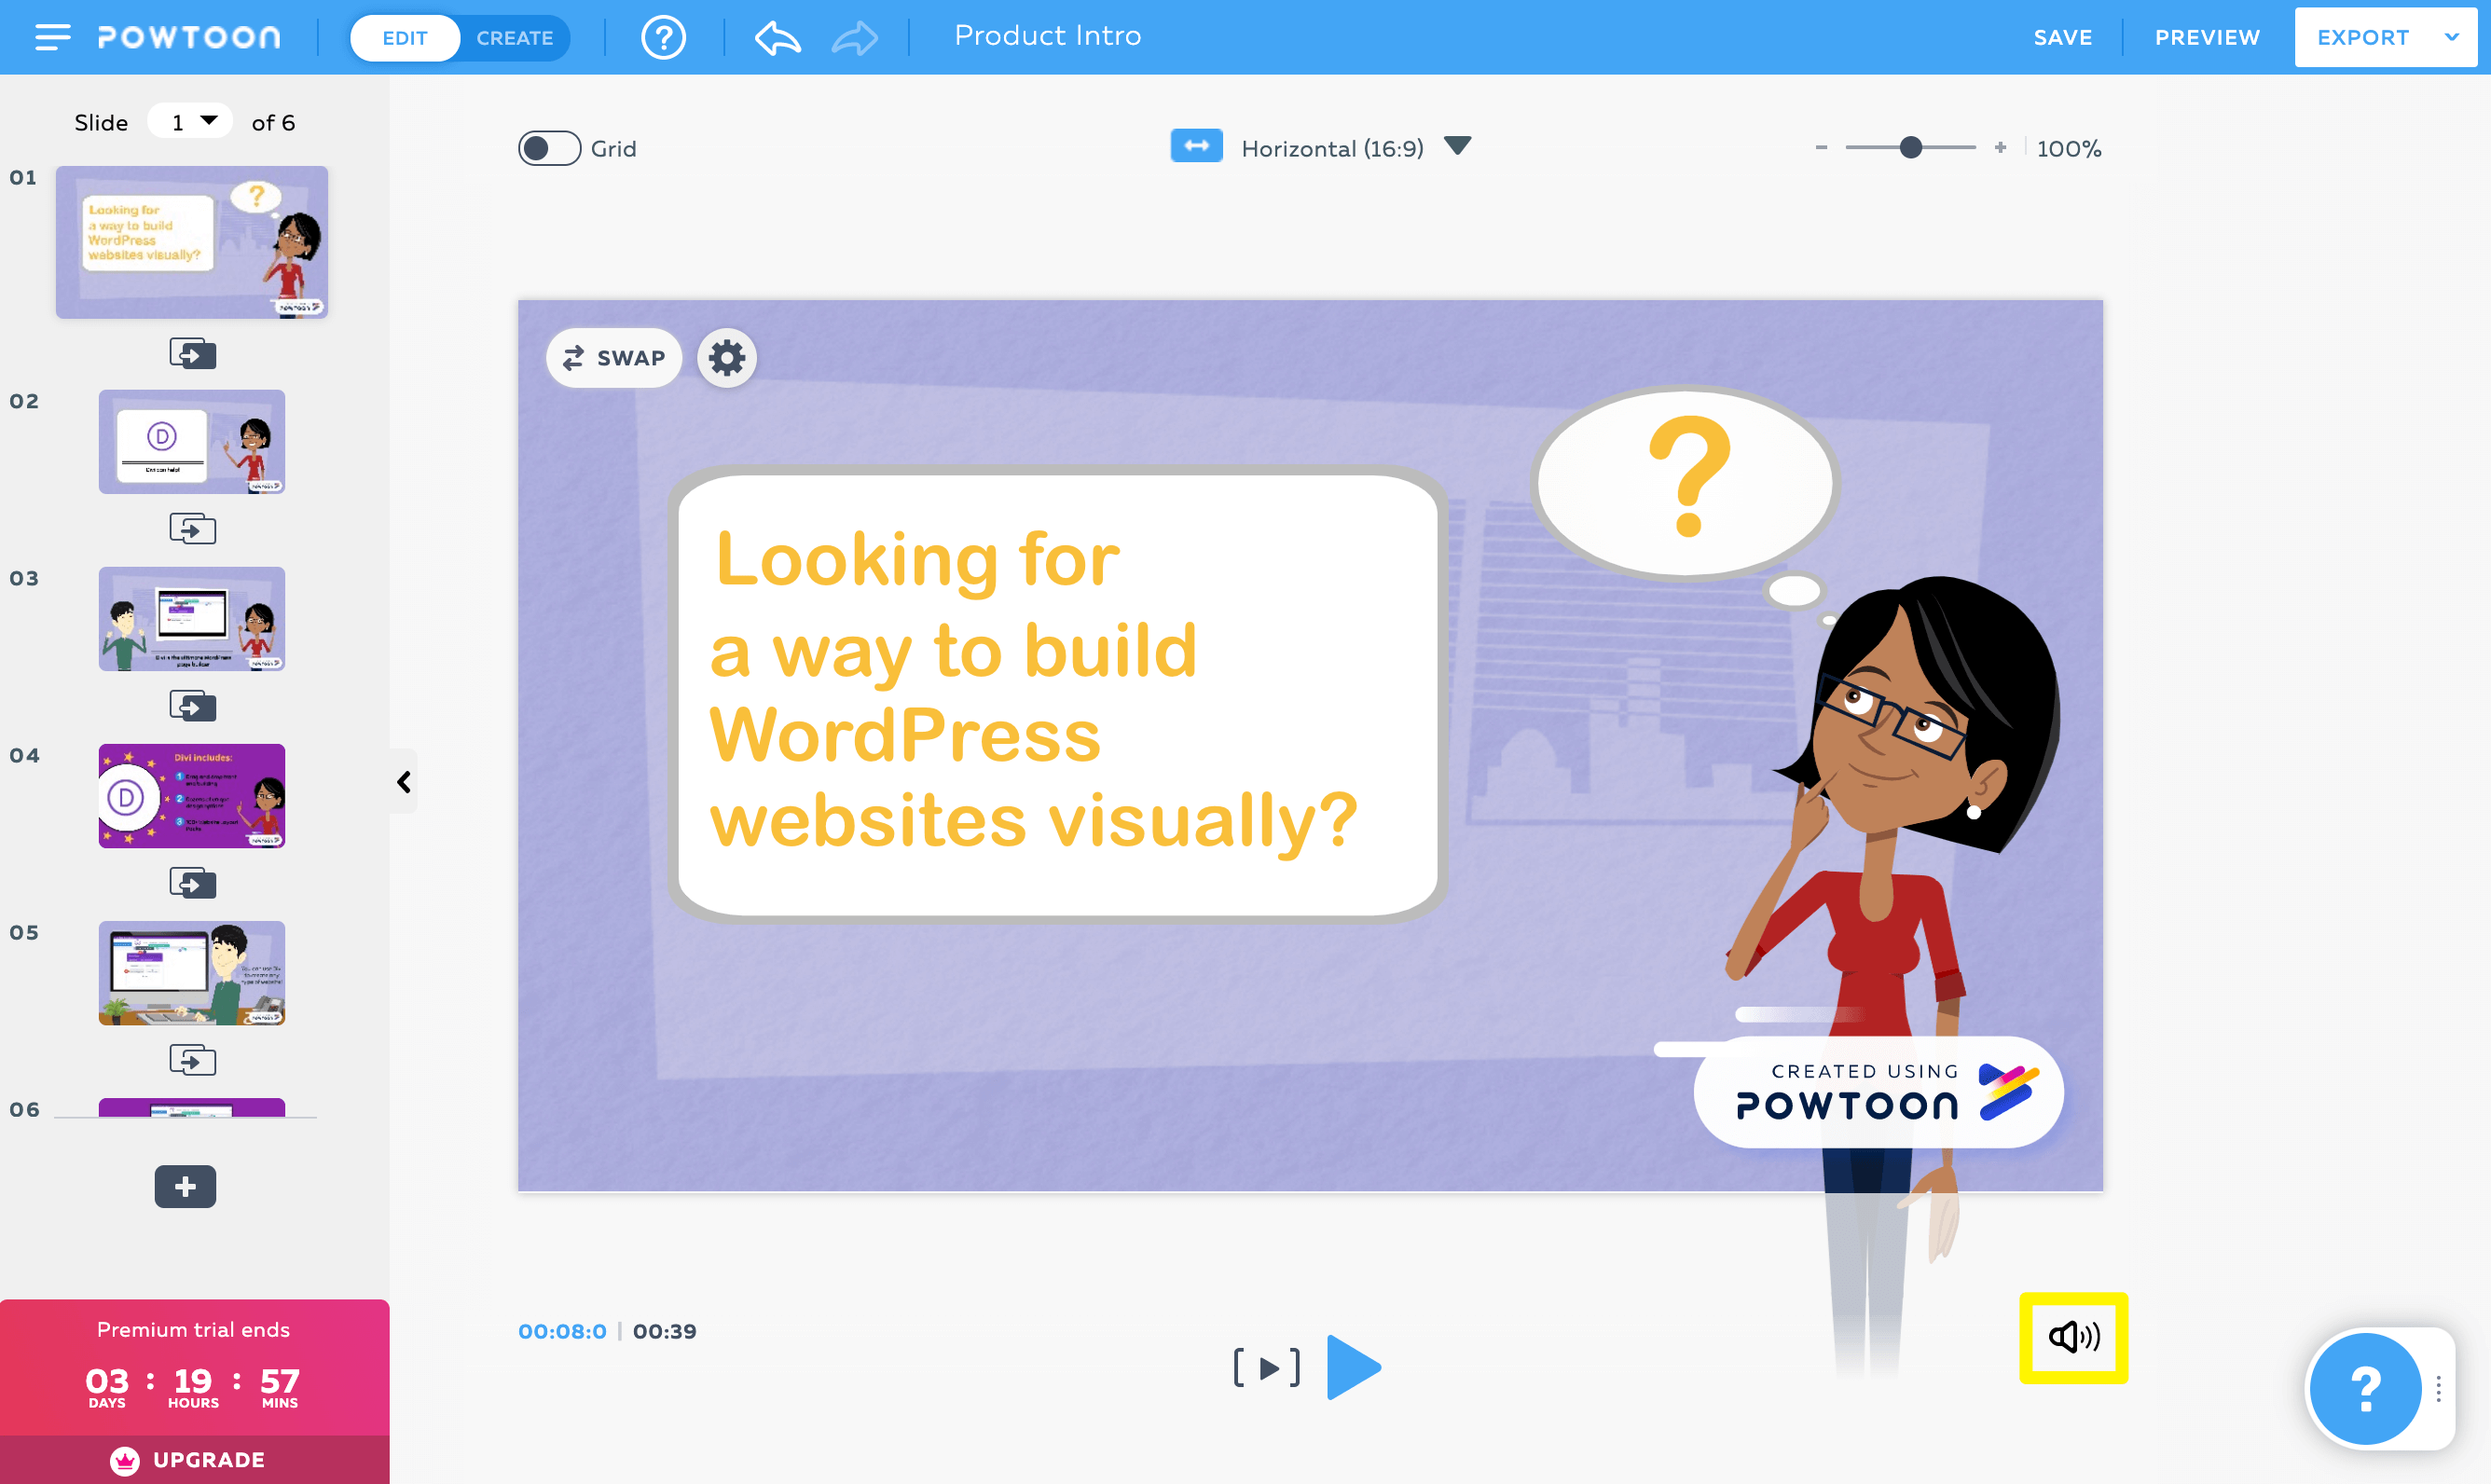
At this point, you know how to create animated videos from a visual standpoint. The finishing touch is your video’s audio. Your template should include a default royalty-free music track. You can swap it out for a different one by clicking on the speaker icon below the main editing area:
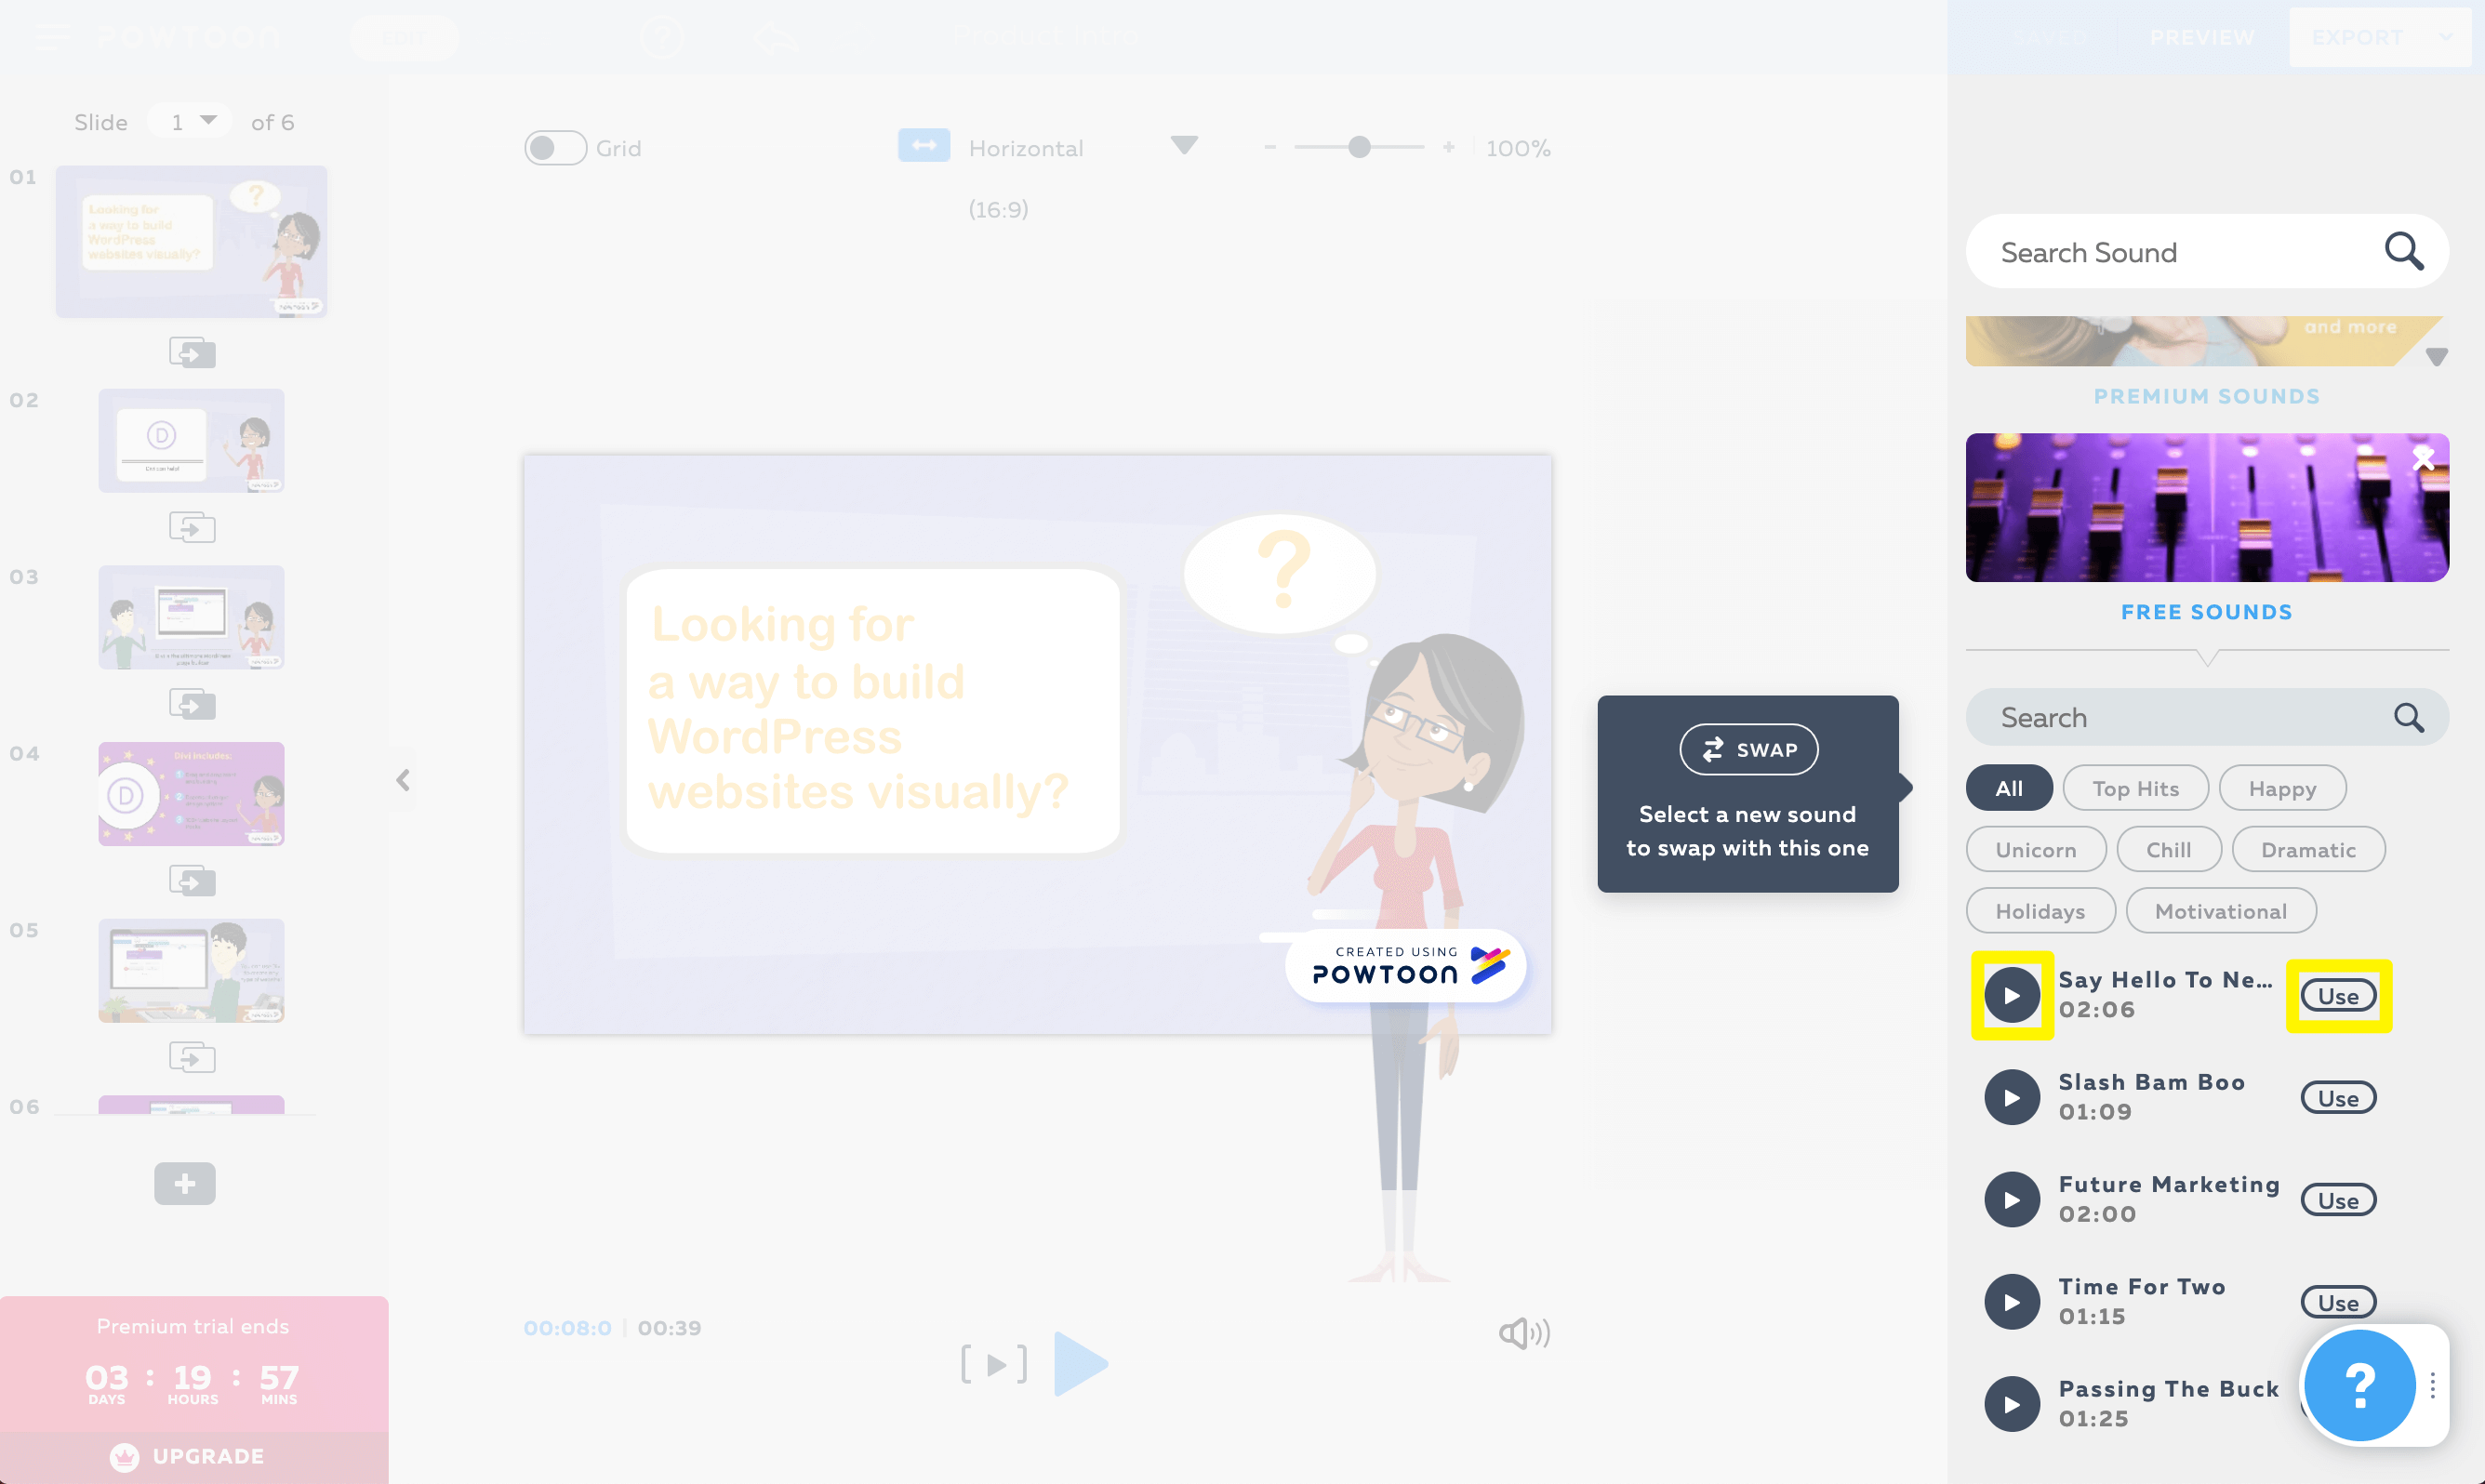
Click on the Swap icon to open the audio library:
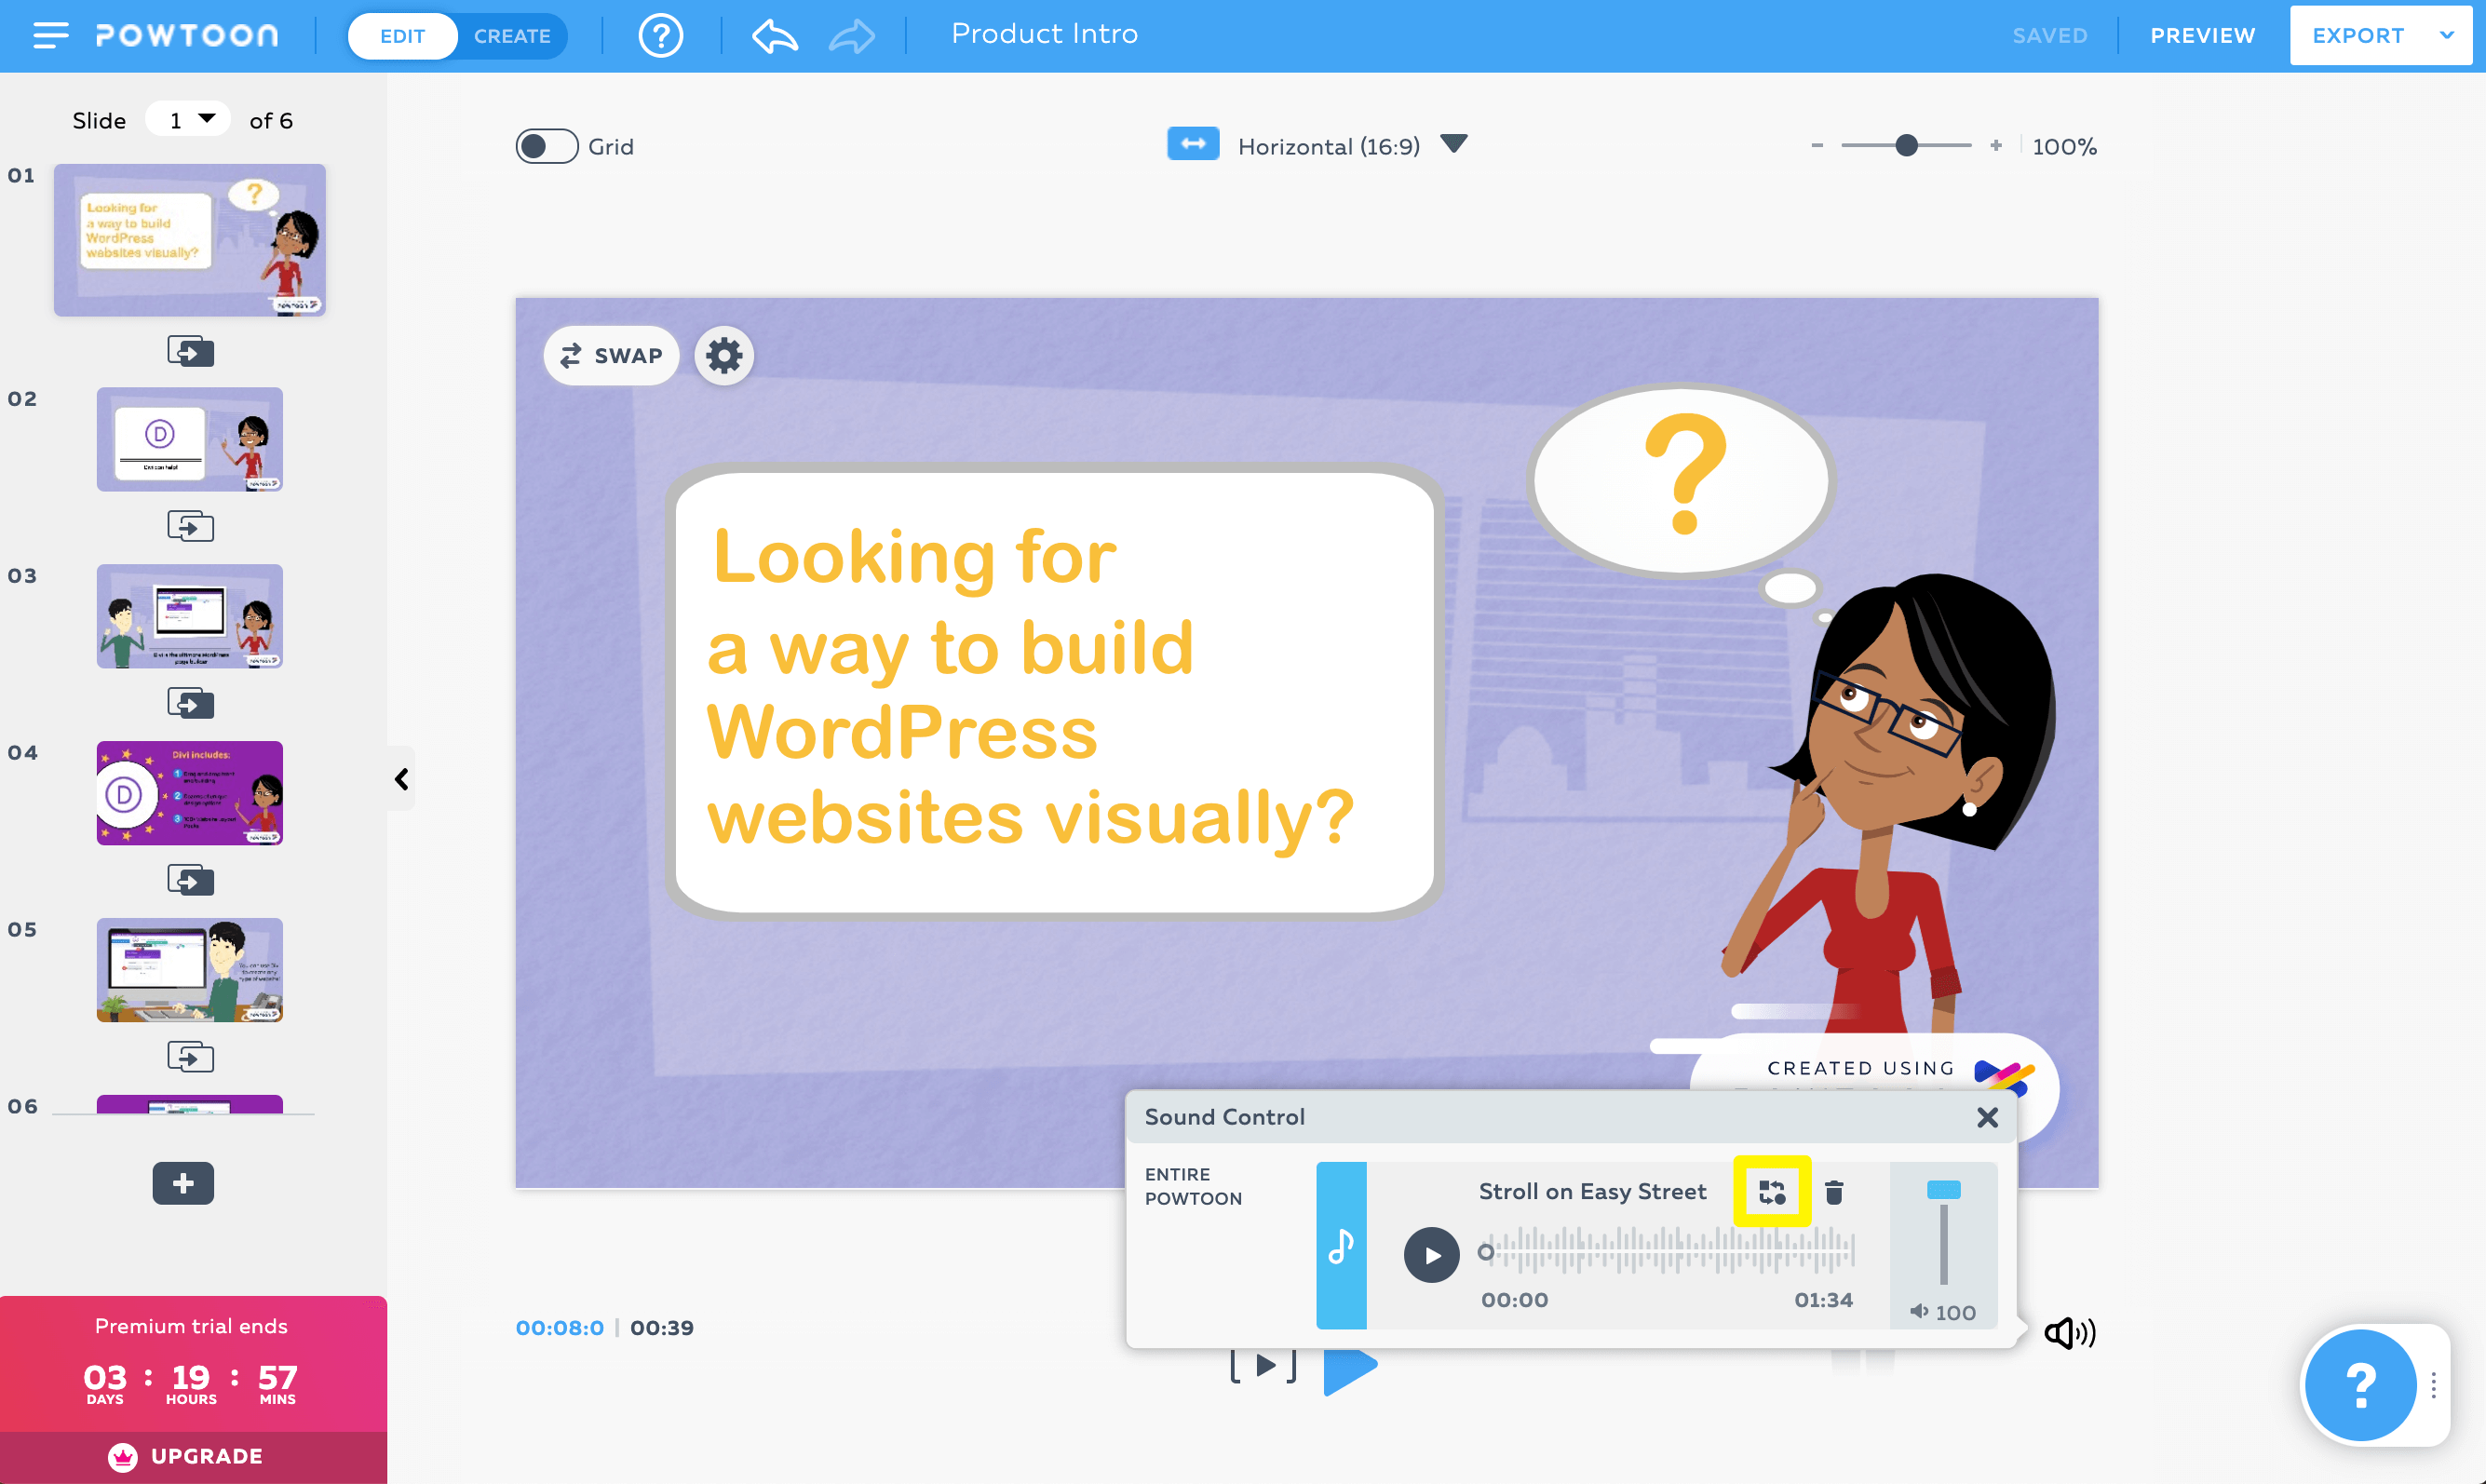
You can preview sounds by clicking on the Play button next to them. When you find on that suits you, select the Use button:
In Create mode, you can also add voice-overs to specific slides. Click on the Add Voiceover button in the sound control panel, then upload a pre-recorded audio file, or record your voice-over right in Powtoon:
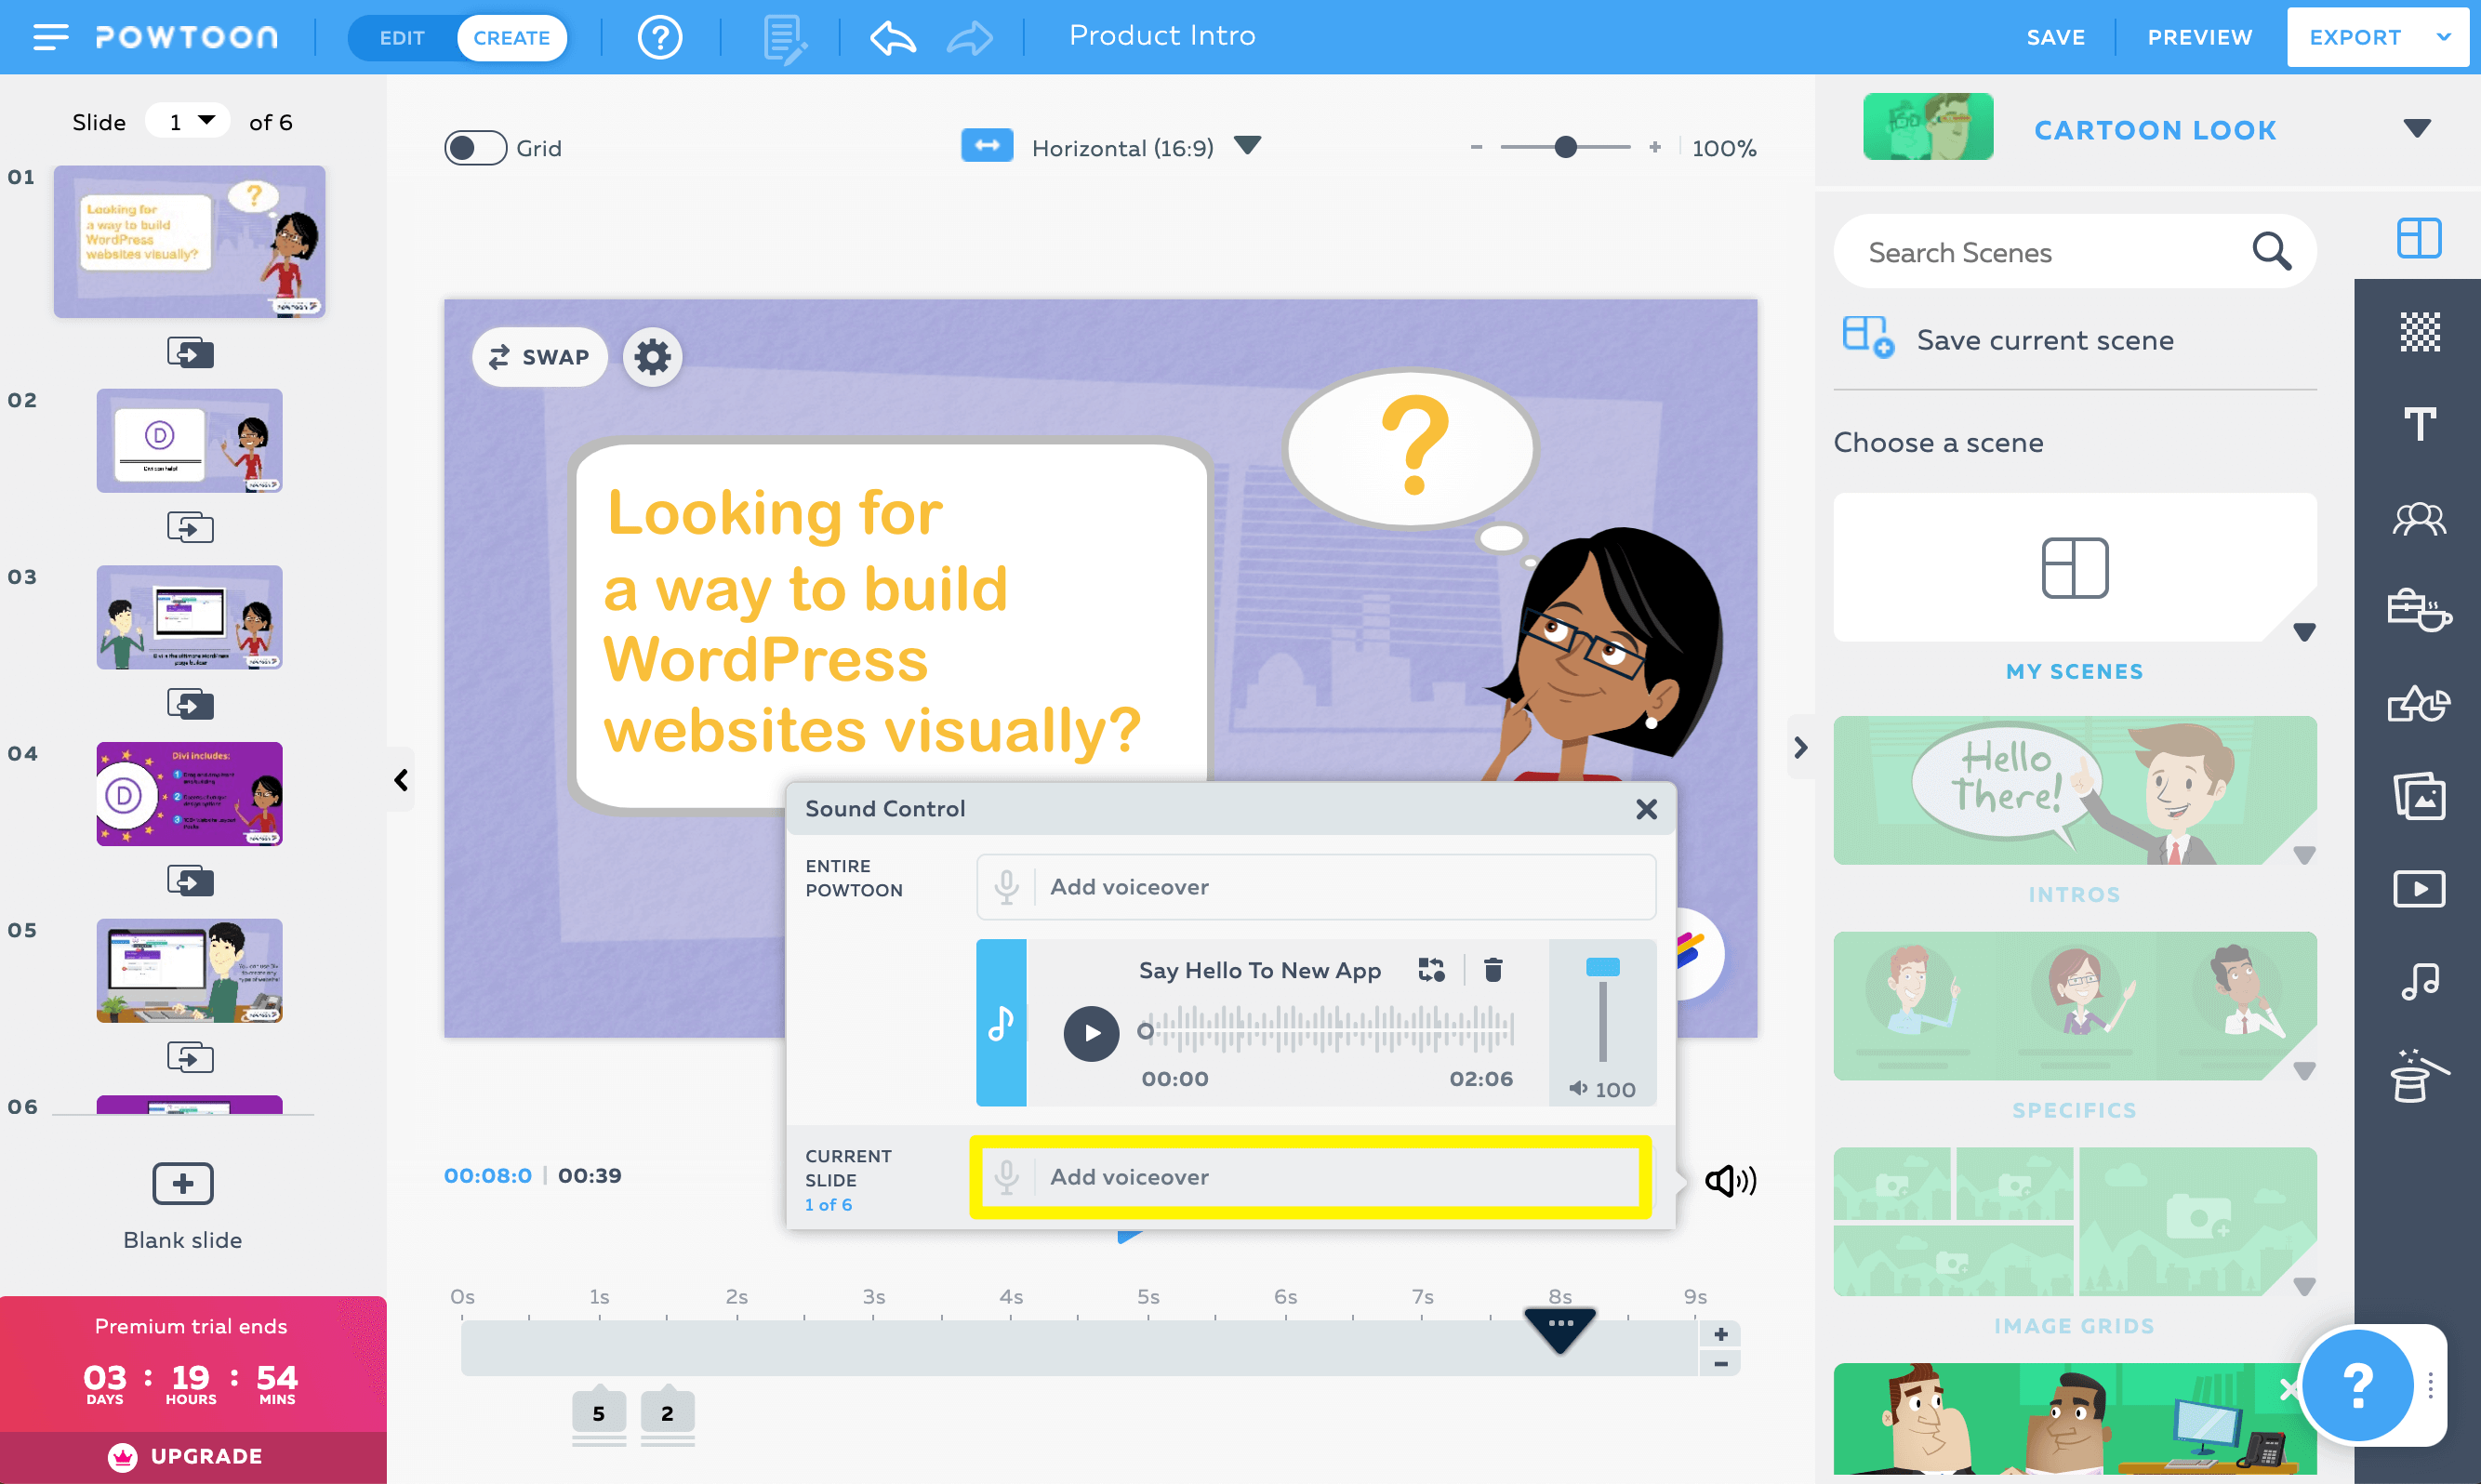
If you’ve added multiple audio files throughout your scenes, you can use the sound control panel to adjust the volume so that it’s consistent throughout your video.
Step 8: Preview and Export Your Video
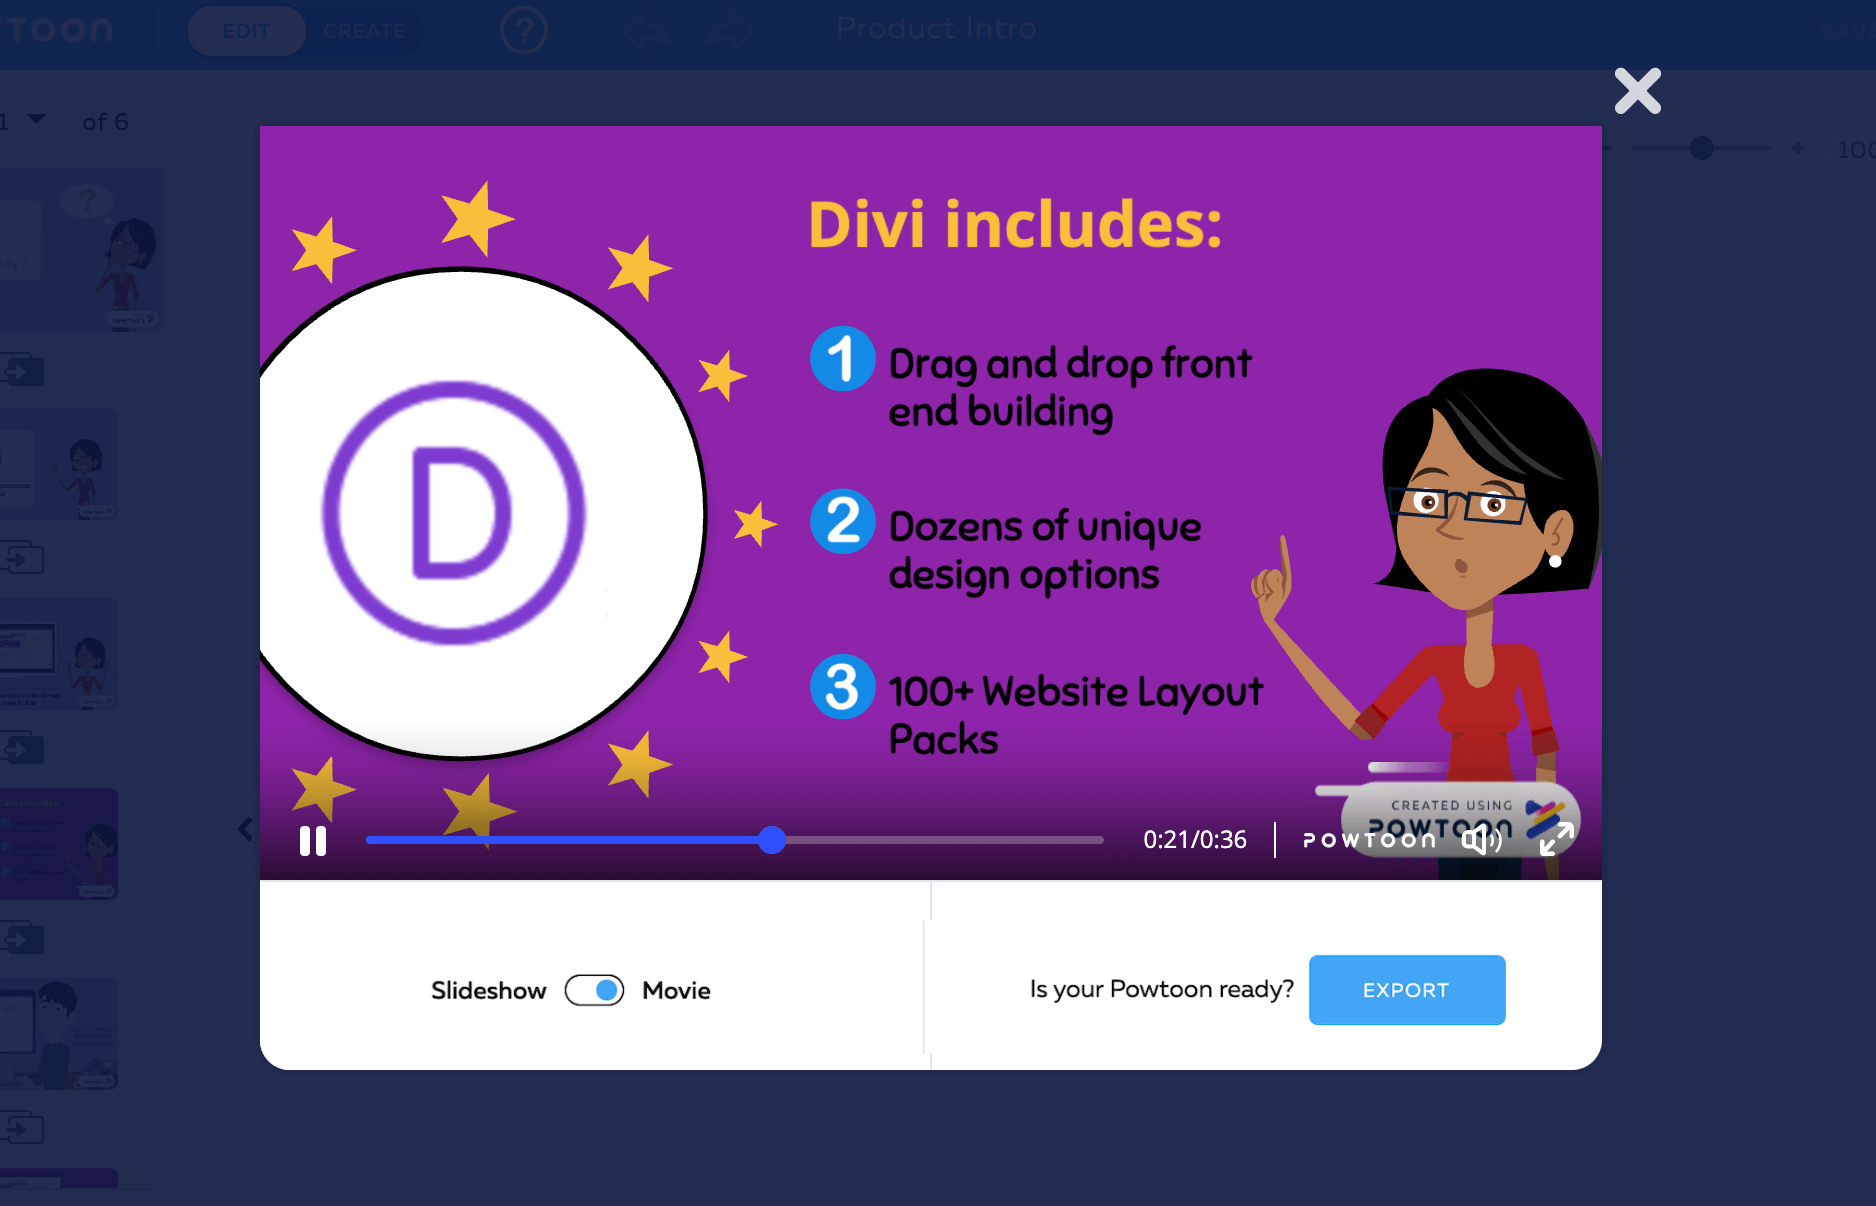
Once you’ve made all the necessary tweaks to your Powtoon video, you can click on the Preview button in the top right corner of the editor to watch it all the way through. It will open in a separate media player, so you can view it without distractions:
If you’re happy with the final product, you can click on the Export button:
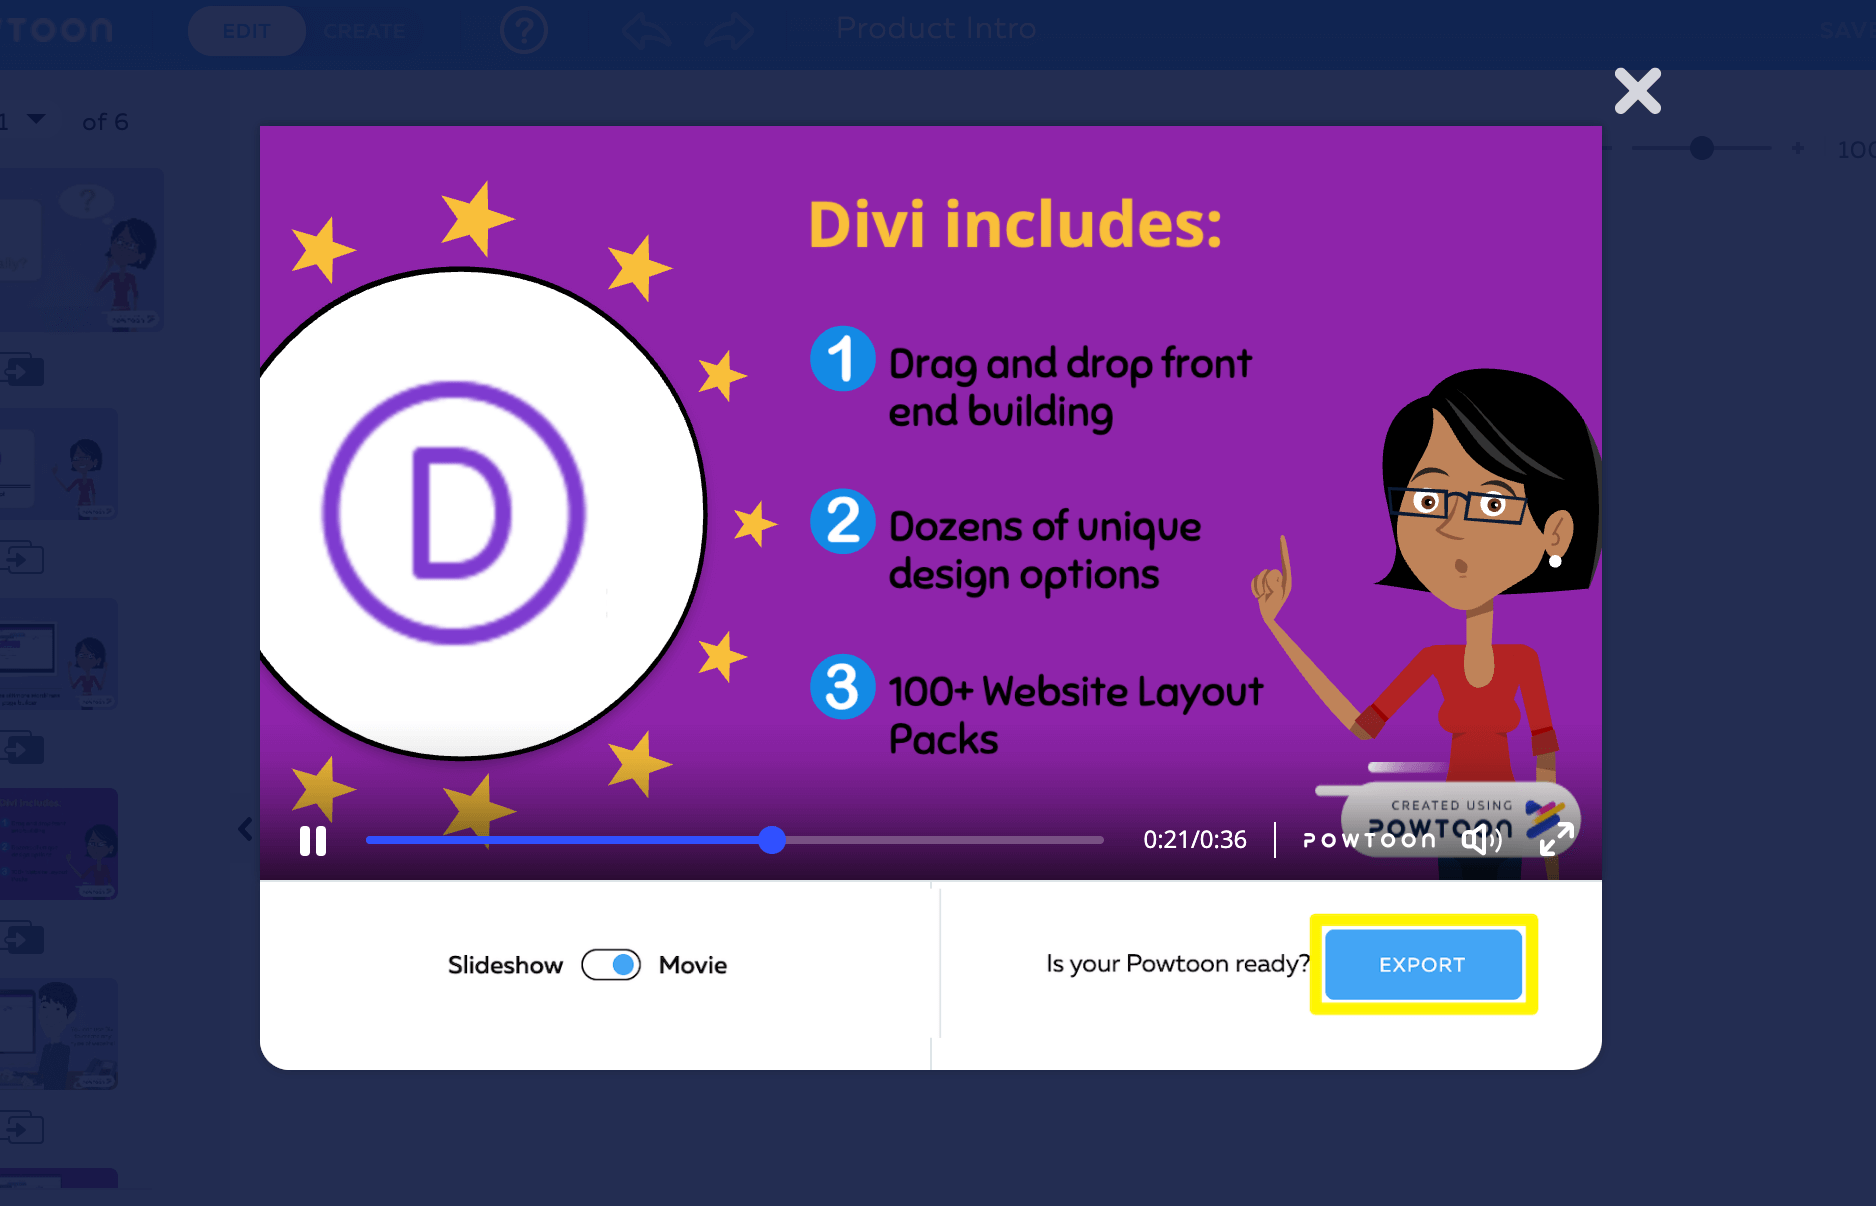
You’ll then be able to choose your export method. Note that MP4 downloads are only available to users with paid Powtoon accounts:
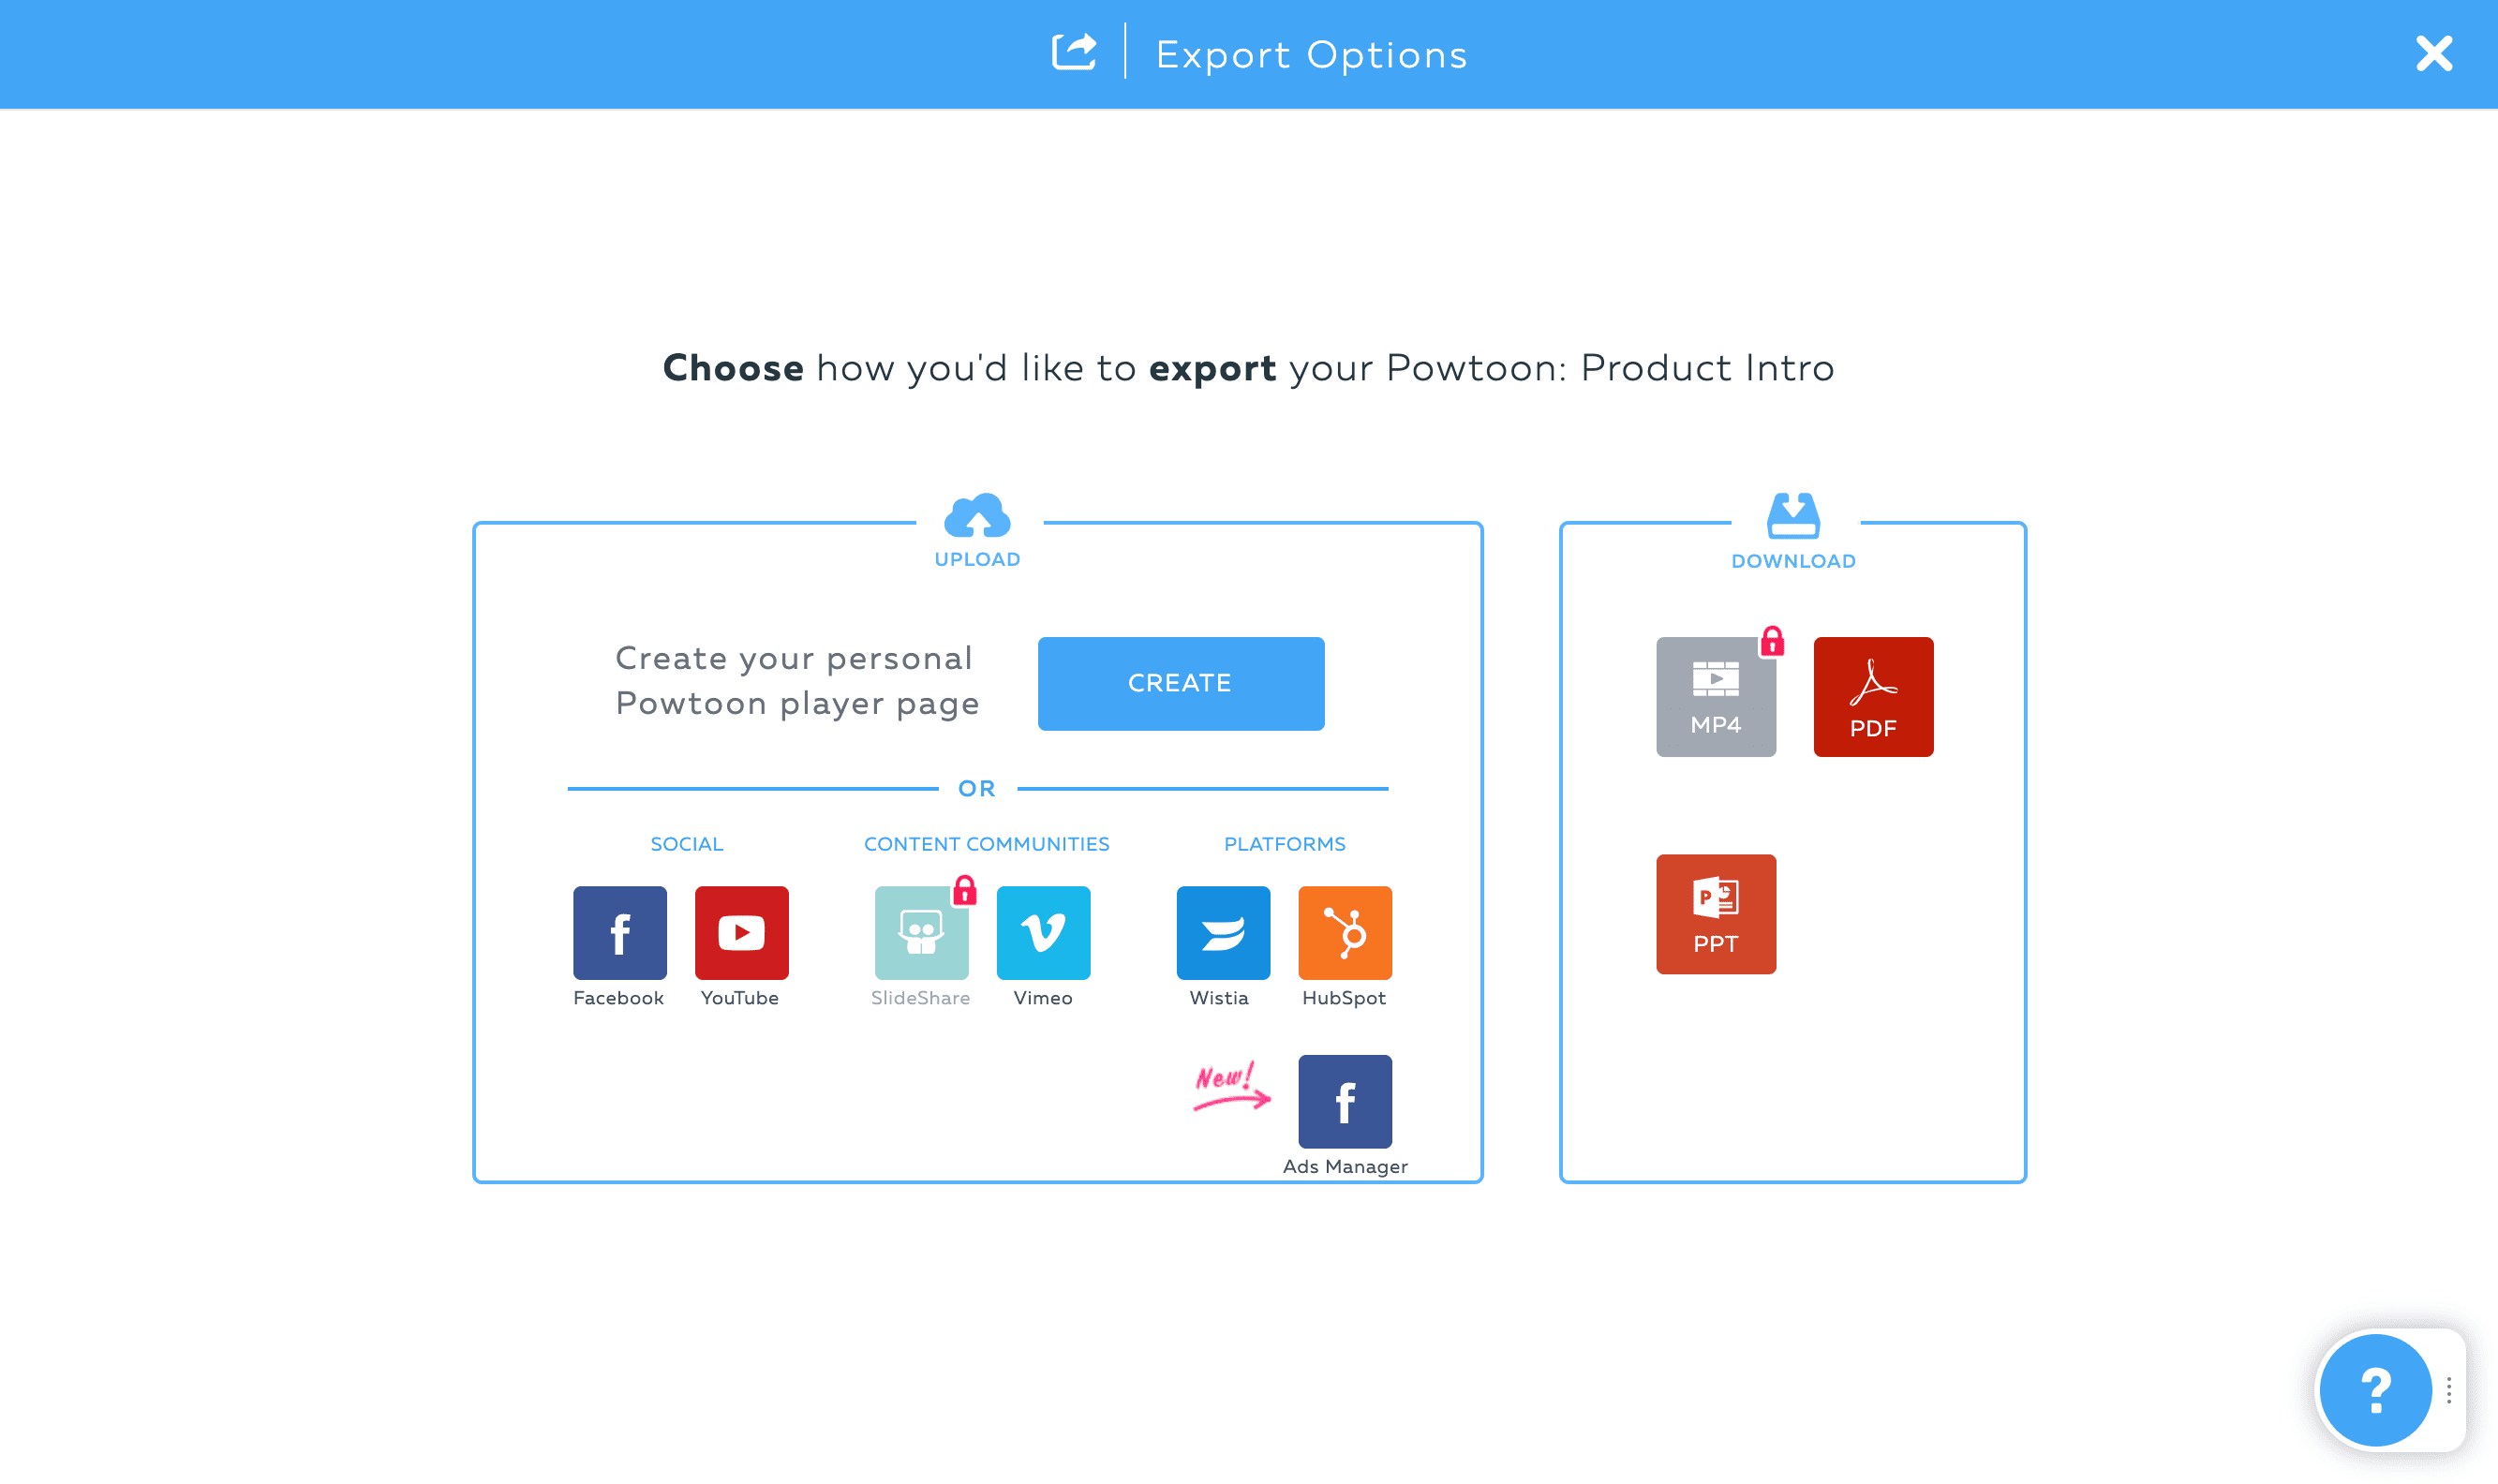
After you’ve published your animated video, you can also access an embed code to add it to your website, as well as additional social media sharing options. Here’s the finished example video we created throughout this tutorial:
Conclusion
Knowing how to create animated videos for your brand opens up a world of possibilities for your social media strategy, marketing campaigns, client and team member training, and more. Fortunately, there are plenty of platforms such as Powtoon that enable you to get started for free.
In this post, we walked you through eight steps to create and publish an animated video. Although there are many factors you’ll have to consider during this process, Powtoon makes each step as simple as possible with its user-friendly editor and huge libraries of graphics, characters, and music.
Do you have any questions about how to create animated videos for your content? Leave them for us in the comments section below!
Image by Arkadiy Chumakov / shutterstock.com


Well, 27 $ – 97 $ per month is a lot for creating cartoons. I personally prefer one time payments. Found a plattform for professionell video creation and they charge 4,99 – 19,99 per video.
But overall a very well description of a nice video plattform. Thanks for sharing.